Quick Links
It's easier than ever to edit and share videos directly from your iPhone or iPad. In iOS 13, Apple added a range of new video-editing tools. You can now crop, rotate, and perform other video-editing actions without a third-party app.
How to Trim Videos on an iPhone or iPad
Trimming a video is one of the most basic edits you can perform. While you can trim before you share in some apps, like Instagram, you can also easily do this in the Photos app.
Follow these steps to trim your video:
- Select the video you want to trim.
- Tap "Edit" in the bottom-right corner.
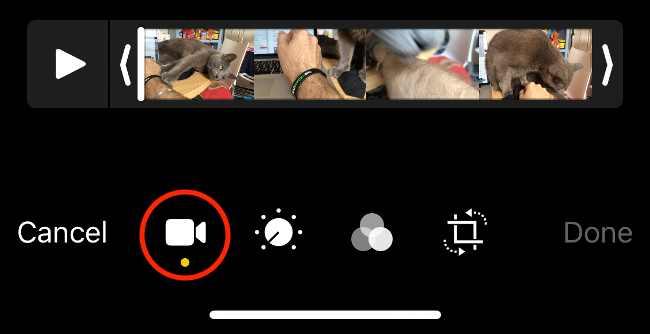
- You should now see a Play button and the video's timeline. Use the arrow on the left to change the video's start point, or the arrow on the right to change the video's endpoint.
- Tap the Play button to preview your edits.
- When you're happy with your edits, tap "Done," and then choose "Save Video" or "Save Video as New Clip" to duplicate.
Video editing in iOS is nondestructive, meaning if you choose "Save Video," you won't permanently lose any footage. At any time, you can re-edit the video to include the footage you trimmed.
How to Crop and Rotate Videos on an iPhone or iPad
Previously, you had to use a third-party app to correct video orientation. Now, in iOS 13, you can crop and rotate your videos.
Follow these steps to rotate a video:
- Select the video you want to rotate or crop.
- Tap "Edit" in the bottom-right corner.
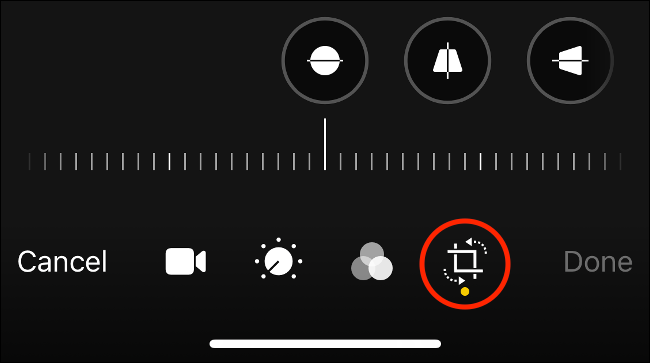
- At the bottom of the screen, tap the Rotate/Crop icon (see image below).
- In the top-left corner, tap the Rotate 90 degrees icon (the box with an arrow above it). Tap the button as many times as necessary until you find the right aspect ratio.
- Tap "Done" in the bottom-right corner to finalize your edit.
How to Merge Videos on an iPhone or iPad
You'll need a third-party app to merge videos on your iPhone or iPad. Fortunately, Apple offers iMovie for free, which makes it easy to merge two or more videos into a finished production.
Follow these steps to merge two or more videos:
- Download iMovie for free on your iPhone or iPad.
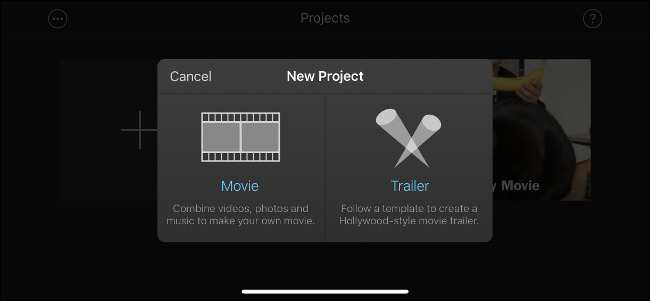
- Launch iMovie, and you'll see the "Projects" screen. Tap the plus sign (+) to start a new project, and then tap "Movie" when prompted.
- Select the videos you want to merge (you can add more later). Grab the edges of each video to trim clips directly in this screen.
- With your clips selected, tap "Create Movie" at the bottom.
Your selected clips are placed on a video timeline one after the other. To trim them, tap your videos to select them, grab the edges of each frame, and then drag them down to size.
If you want to reorder your videos, tap and hold one until it floats. Then, drag it left or right to move it backward or forward on the timeline. Release it in front of another clip to place it after that clip.
You can also change the video transition between each clip. To do so, just tap the transition icon between videos on the timeline.
When you're finished, follow these steps to export your movie:
- Tap "Done" in the top-left corner.
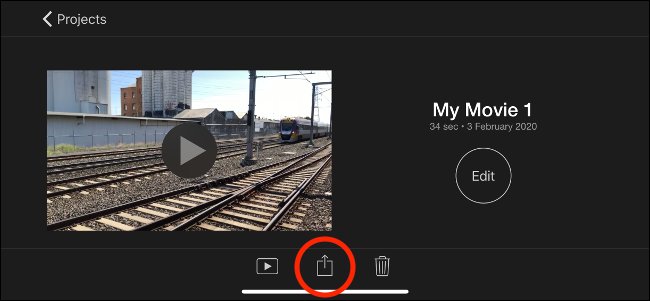
- Press the Play button to preview your project, and then tap the Share button to export it.
- Use the app icons to choose where you want to share your video, or tap "Save Video" to export it directly to Photos.
How to Apply and Remove Video Filters
Just as you can with photos, you can shoot videos with filters in the native iOS app. Also the same as photos, videos you shoot with a filter are nondestructive, which means you can change or remove the filter at any point.
Follow these steps to add, change, or remove a filter:
- Select the video to which you want to apply a filter.
- Tap "Edit" in the bottom-right corner.
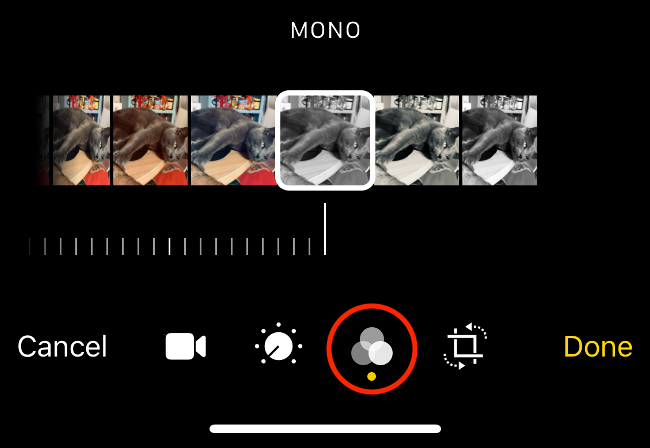
- At the bottom of the screen, tap the Filters icon (see the image below).
- Scroll to preview the filters, and then select one or choose "Original" to remove all filters.
- Tap "Done" at the bottom right and wait for your filter to apply.
The size of the video, the quality at which it was shot, and the age of your device determine how long you'll have to wait for the filter to apply.
How to Adjust Video Exposure, Contrast and More
You can also now adjust various image parameters on videos in iOS 13 just as you can with photos. iPhone and iPad owners now have access to a full gamut of editing tools, including automatic enhancement. These changes are also nondestructive, so you can undo them in the future.
Follow these steps to adjust a video's exposure, contrast, and more:
- Select the video you want to edit.
- Tap "Edit" in the bottom-right corner.
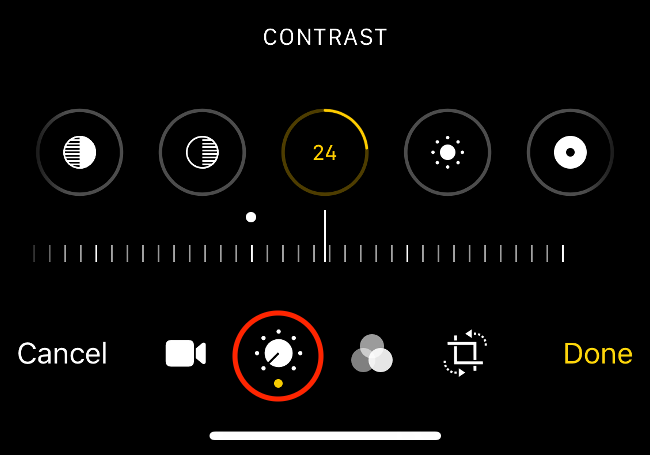
- At the bottom, tap the Adjustments icon (see image below).
- Scroll through the various image attributes, and move the slider to adjust the image.
- When you're happy with your edits, tap "Done."
You can adjust all the following parameters:
- Exposure
- Highlights
- Shadows
- Contrast
- Brightness
- Black Point
- Saturation
- Vibrancy
- Warmth
- Tint
- Sharpness
- Definition
- Noise Reduction
- Vignette
The best way to learn what each of these settings do is to play around and experiment with them.
How to Revert a Video to Its Original State
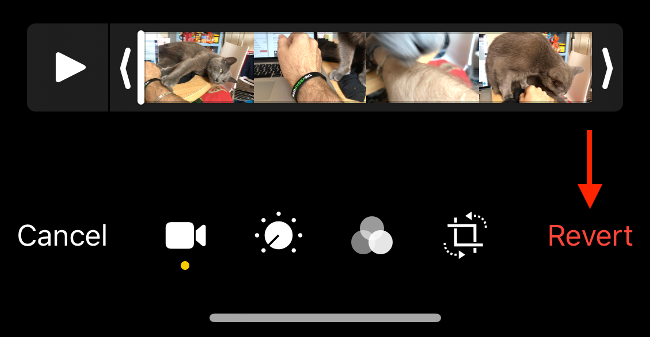
You can revert any video or photo to its original state with a tap in the Photos app. To do so, just find the edited video, tap "Edit" in the bottom-right corner, and then tap "Revert."
This works for both photos and videos. It reverts any trimming, filters, image adjustments, rotation, or cropping you applied.
Create Trailers and Richer Productions with iMovie
iMovie is Apple's free consumer-grade video editing app. It allows you to "linear edit," which means editing video in a single track (rather than multitrack editing, which allows for more complex operations).
iMovie is an easy-to-use video editor that allows you to place videos, photos, and audio on a timeline. You can also record a voiceover, shoot video directly to the timeline, or import other files from your file system or iCloud.
When you first start an iMovie project, tap "Movie" for regular projects, or "Trailer" to make an automated video in the style of a movie trailer.
In Movie mode, tap the plus sign (+) to add media to the timeline. Tap a clip to edit it, add text, change the playback speed, or add filters.
If you want to make fine adjustments to a video (exposure, contrast, and so on), you have to do so in the Photos app before you add it to your timeline.
Take Editing to the Next Level with Lumafusion
iMovie is useful but limited. Since Apple hasn't released a version of its professional video editing app, Final Cut, for iOS, it's up to third-party developers to fill in the gap.
Lumafusion is currently the best professional video-editing app for iPhone and iPad. It provides you with six tracks for audio and video, and six more for other audio, including music, voiceovers, or sound effects.
This app contains the following features that are normally only available in professional editors:
- Markers
- The ability to link or unlink clips
- Keyframes for audio levels and panning
- Audio filters and equalization
- Effect layering
- The ability to copy and paste clip attributes
- Custom aspect ratios
- A wide range of supported frame rates
You can get Lumafusion for $29.99 in the App Store, which might seem expensive for an iOS app. However, it's a bargain compared to professional video-editing software, like Final Cut Pro X on a Mac ($299.99) or an Adobe Premiere Pro subscription (around $240 annually).
If you want to make the most of your device's video-shooting abilities, check out FiLMiC Pro.
Shoot, Edit, Share
It's becoming increasingly common for video professionals, journalists, and hobby filmmakers to shoot, edit, and share their projects from a single device. If you go this route, your biggest hurdles are likely to be battery life and disk space.
Make sure you plug into an outlet if you're going to be editing video. To solve space issues, you might want to upgrade your iCloud storage plan, so you can enable the iCloud Photo Library. This offloads your entire media library to the cloud, but you'll need a reliable internet connection if you want to use the videos stored online in your projects.
Looking for a new video project? Learn how to use green screen with your iPhone!


