Quick Links
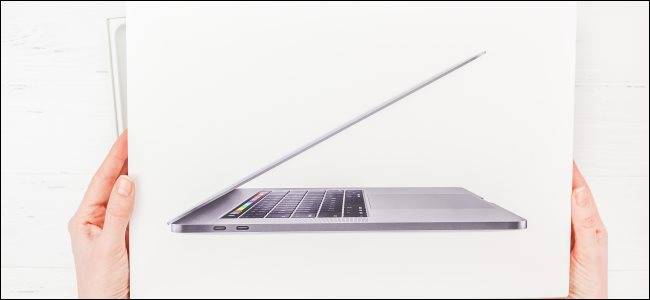
Macs have a pretty simple setup process, and Apple's macOS will walk you through what you need to do. But that's just one part of the setup process. Here's a checklist of things you should do to set up your Mac after clicking through the basics.
The Initial Setup
Apple's initial setup process is virtually foolproof, so we won't spend too long walking you through it. The first thing you'll need to do is unbox your machine and connect it to a power outlet. If you have an iMac, then you'll also need to connect a Magic Keyboard and Magic Mouse or Magic Trackpad.
With everything connected and plugged in, it's time to hit the power button on your Mac. On most machines, this is located in the top-right corner of the keyboard. If your Mac has a Touch ID sensor, press that instead.
First of all, you'll need to select a country, language, and wireless network. If you would rather use an Ethernet connection, you can connect your Mac to a wired network instead. Finally, choose whether or not you want to move data to your new Mac using Migration Assistant.

Assuming you're setting your Mac up as a new computer, you'll next be asked to enable Location Services (GPS) and log in with your Apple ID. If you don't yet have an Apple ID, you'll be invited to create one. Once you're signed in, there's one last Terms and Conditions document to accept.
Next, macOS will prompt you to set up iCloud, FaceTime, and iMessage. Add any additional email addresses you would like to use with FaceTime and iMessage, then move on to the next stage of the setup and enable Find My Mac as a security provision. This feature lets you find and remotely wipe your Mac in case it goes missing.
Next, you'll be asked to set up your user account, but only if you're setting up a new Mac rather than restoring from an old one. Add your name, password, and select an image that you would like to see next to your login icon. You can change this later. Enable "Allow My Apple ID to Reset This User's Password" to allow for password resets over the internet in case you forget your login details.
Finally, you can set a Time Zone (your Mac will automatically detect it if you enable Location Services) and choose to register your Mac with Apple. Then you can click Continue and start using your new Mac.
Install the Latest Updates to macOS
There are likely updates or even a major operating system upgrades available to install on your new machine. First, check to see which version of macOS you are running by clicking on the Apple logo in the top-left corner, then choosing About This Mac. You can check the latest version on Apple's website.
If your Mac isn't running the latest and greatest version of macOS, you will likely want to upgrade it before you take the process any further. To do this, head to System Preferences > Software Update and wait for the tool to refresh.
Your Mac will check with Apple whether or not any updates are available, and you'll be invited to install them. Click the "Advanced" button to reveal options for automatically keeping your Mac and its apps up to date.

If a new release of macOS is available, it will be listed at the top of this window. Click "Upgrade Now" and wait for the download to complete. Once it has finished, the installation process will begin, or you can launch the "Install macOS <name>" app in your Applications folder (replacing <name> with the current iteration's title).
Installing a new version of macOS can take a little while, so make sure you set aside 30-60 minutes for the process to complete. Your Mac will restart several times during this process.
Finalize Your Setup
Now that you're running the most up-to-date version of macOS, it's time to finish setting up your Mac.
Set Up Time Machine Backups

To use Time Machine, you'll need a drive with at least as much free space as the total size of your Mac. Having a larger drive will allow you to store older versions of files, but isn't necessary if all you want is a working backup. The easiest way to set up Time Machine is with an inexpensive external hard drive.
Connect the drive you want to use to your Mac and navigate to System Preferences > Time Machine. Click on Select Disk to nominate the drive you just added and confirm your selection. Time Machine will now begin its initial backup, and will automatically back up your Mac whenever that drive is connected.
You don't have to use an external drive for this purpose. You can use another Mac for Time Machine backups, or even a networked Raspberry Pi. It's also possible to partition your Time Machine drive and use it to store files too.
Enable FileVault Encryption

FileVault is the disk encryption software that Apple bundles with macOS. It's free and offers the bare minimum of security, so if you're concerned about your data, you may want to enable it. Enabling FileVault will mean that you always need to login to your Mac with a password. While it's generally enabled by default, it's a good idea to double-check.
Head to System Preferences > Security & Privacy > FileVault and click "Turn On FileVault..." to enable the feature (click on the padlock and enter your admin password first). You'll be invited to create and store a recovery key in iCloud behind three recovery questions, or to create a local recovery key consisting of random letters and numbers which you store by yourself.
You'll need a recovery key in case you ever forget your FileVault password. Make sure you are comfortable with the recovery key method you are choosing, and if you opt to make a local recovery key, then make sure you keep it somewhere you can access it (not on your main startup disk, which is what you are encrypting).
Connect Email, Calendar, and Other Services

If you want to set up Mail for use with your email accounts or integrate your Google or Outlook calendars into Apple's Calendar app, you'll need to set up your various accounts. Head to System Preferences > Internet Accounts and click on the account type you would like to add.
While adding an account, you'll be asked to enable features like mail, calendar, contacts, and notes. If you have a CalDAV, CardDAV, LDAP, or regular old POP3 or IMAP email address, click "Add Other Account" and choose the appropriate option.
Set Up Other Accounts & Parental Controls

Are there any other members of your family, household, or office that will be using this Mac? Head to System Preferences > Users & Groups to add new accounts. You'll need to click on the padlock icon and enter your admin password to make changes. You can then click on the plus "+" icon to create new accounts.
Add details like full name, account name, password, and the account type then click on "Create User" to finalize. If you want to impose parental controls on the account, visit System Preferences > Screen Time to apply app limits and content or privacy restrictions on the type of content the account can access.
Tweak macOS to Your Liking
Now that you've set up all of the important stuff, it's time to tweak macOS until you're happy with the way that it looks and feels.
Set Up Pointing Devices

If you have a laptop or a Mac with a Magic Trackpad, you'll likely want to customize the way your pointing device behaves. Head to System Preferences > Trackpad to see the various gestures available to you. You can customize these gestures or simply hover over them to see a video example.
This is your opportunity to change the way macOS scrolls. If you aren't fond of the touchscreen-inspired "Natural" scrolling, then click on "Scroll & Zoom" and disable "Scroll direction: Natural" to reverse it. If you have a Magic Mouse instead, head to System Preferences > Mouse to set double click and tracking speed.
Customize the Dock

Click and drag on an icon out of the dock then release it to remove it entirely. You won't be deleting the app or folder, just the shortcut. Drag an app from your Applications folder to the dock to pin it, or launch the app then right-click (two-finger click with a trackpad) on the icon and select Options > Keep in Dock.
Head to System Preferences > Dock to see even more options. You can choose to position it on the left, right, and bottom edges of your screen, enable auto-hide, tweak the dock size, enable the magnification animation, and more.
Enable Dark Mode

macOS now has Dark Mode, and it looks great whether or not you primarily use your Mac in dim conditions. Head to System Preferences > General and toggle Appearance between Light, Dark, and Auto. If you choose, Auto macOS will automatically enable dark mode based on the time of day.
Disable Autocorrect

For some reason, macOS still enables autocorrect by default on every new Mac. While autocorrect is a lifesaver when typing with a touch-based keyboard, it's mostly unnecessary on a full-size hardware keyboard. It's easy to feel like autocorrect is "fighting" what you're trying to type.
If you don't like this, you can disable the feature under System Preferences > Keyboard > Text. Disable "Correct spelling automatically" and "Capitalize words automatically" to disable autocorrect entirely. You can also turn off "Add period with double-space" if you don't use the feature.
Adjust Resolution Scaling

You can scale the display resolution of your Mac to fit more or less on-screen at once. If you choose to have more on-screen, things will appear smaller. The text will be harder to read, and everything will feel somewhat "zoomed out" compared to the default setting. Or, if you want elements on the screen to be larger, you can go the other way and "zoom in."
Head to System Preferences > Displays, and select "Scaled" then choose a new resolution. You can always drop back to "Default" if you don't like what you see.
Configure Secondary Displays
If you intend to connect a secondary or tertiary display for use with your Mac, now's the time. Plug the monitor in and power it up, then launch System Preferences > Displays. You'll need to configure your display according to where it is positioned on your desk, and pick a resolution and refresh rate you're happy with.
Tweak the Keyboard

Head to System Preferences > Keyboard to view keyboard preferences. Most of these options will be best left at their default settings unless you feel the need to change them based on usage.
You can add text expansion shortcuts under the Text tab, for example, you might want to replace ":shrug:" with "¯\_(ツ)_/¯" or ":myaddress:" with your home address for quicker typing.
Under "Input Sources," you can install different keyboard layouts if you want. For example, if you use the "British" layout, you can type the "£" symbol by holding Shift + 3.
Are you using a third party hardware keyboard intended for Windows? A free app called Karabiner-Elements will allow you to reconfigure each key, including the Windows keys and unsupported media keys, for a much better macOS experience.
Tweak the Touch Bar

If you have a MacBook Pro with Touch Bar, you can configure what is displayed by launching an app then selecting View > Customize Touch Bar. You can drag and drop controls into the Touch Bar panel based on what you most commonly use.
You can also head to System Preferences > Keyboard to see other Touch Bar options. Click on Customize Control Strip to change which system-wide control buttons are displayed (including volume and media controls).
Customize Siri

You can change everything about Siri, including the keyboard shortcut, language, voice profile, and whether or not to receive voice feedback under System Preferences > Siri.
If you disable "Enable Ask Siri," then you will turn the feature off entirely. Siri can be used to do some useful things on macOS, like finding files for you and pinning dynamic data to your Today screen.
Set Up Touch ID
If your Mac has a fingerprint reader, you may have already set up Touch ID. If not, you can do so now under System Preferences > Touch ID. You can enable Touch ID for the following:
- Unlocking your Mac
- Paying for items with Apple Pay
- Paying for and downloading items from the App Store, iTunes, Apple Books
- Filling in Passwords and other Saved Credentials
All of these are useful and worth enabling. You can also add a secondary fingerprint here if you want.
Enable Battery Percentage View

If your new Mac is a laptop, there's a good chance you'll appreciate a battery percentage counter in the top-right corner, rather than the vague battery symbol that's displayed by default.
To do this, click on the battery indicator in the top-right and select Show Percentage. Don't forget; you can also click on the battery indicator at any point to see any apps that are using a significant amount of energy, which is useful when trying to conserve battery power.
Enable Night Shift

Night Shift is a feature that emulates the setting sun's orange glow to promote better sleep. It does this by removing as much blue light as possible. You can enable the feature under System Preferences > Displays > Night Shift.
You can set a "Sunset to Sunrise" schedule, which will use weather data to decide when to enable or disable the feature, or set your own custom schedule. Drag the "Color Temperature" slider to your desired level of blue light reduction.
You can instantly disable or enable Night Shift by bringing up the Today screen (click on the icon in the top-right corner of your screen), then scrolling up to reveal the Night Shift option.
Customize Your Wallpaper

Apple includes some amazing desktop wallpapers with macOS. Head to System Preferences > Desktop & Screen Saver to browse what's already available. Choose "Dynamic" wallpapers to see your wallpaper change depending on the time of day.
Install the Essential Apps
The last stage of setting up your Mac is to install any additional apps you want to use. We recommend using Safari as your primary browser since it's well-optimized for both performance and energy efficiency in macOS. A second browser is handy to have around, so we'd recommend grabbing Chrome or Firefox too.

Next, grab any big software suites that you regularly use like Microsoft Office or Adobe Creative Cloud. Alternatives you might want to look at include LibreOffice or Apple's own iWork suite.
You should be using a password manager, so download LastPass, 1Password, Dashlane, or whatever it is you are using. If you're already using Apple's iCloud keychain, then you only need to make sure you're signed in to your Apple ID under System Preferences.

You may need a media player too for the many unsupported filetypes that QuickTime Player doesn't support. Download VLC or MPV and install them. If you're a keen user of cloud storage, then you'll want to grab Google Drive, Dropbox, OneDrive, or whichever solution you prefer.
It's also worth checking your Mac App Store purchase history for any apps you may have forgotten. Launch the Mac App Store then click on your name in the bottom-left corner to see a list of past purchases. Click the cloud icon next to each one to download them.

After all that, you might want to download Vanilla to cut down on menu bar icons and keep everything nicely organized. For even more suggestions, check these must-have apps for new Mac owners.
Finishing Touches
You're now ready to use your Mac. There are a few other tasks that you might want to perform in the background while you kick the tires on your new machine:
- Launch Mail (if you're using it, or another email app) and let it download your mail history. Depending on the size of your inbox, this can take a long time.
- Open Photos and set up iCloud Photo Library if you're using it. Give it a bit of time to download your library. You can choose between "optimized" copies and full-sized originals.
- Launch the Music, Podcasts, and TV apps and sign in to each, then let iCloud sync your library so that your entertainment is ready-to-go when you want it.
But what if you're not setting up your new Mac from scratch? Learn how to back up and move to a new Mac without setting everything up again.