Quick Links
AirDrop lets you send files, photos, and other data between iPhones, iPads, and Macs. Like all wireless tech, though, AirDrop can be temperamental. And getting devices to "see" each other can sometimes be a challenge. Here's how to troubleshoot common AirDrop problems.
What Is AirDrop?
AirDrop is Apple's proprietary method of sending files or data locally between two devices. The devices initially connect over Bluetooth, with Wi-Fi doing much of the heavy lifting when it comes to file transfers.
The feature was first introduced on Macs in 2008. It expanded to iOS devices with the rollout of iOS 7 in 2013. AirDrop is excellent when it works, but if you have older hardware, you're more likely to experience issues. Visibility issues are the most common problem people have with AirDrop---sometimes, the recipient doesn't show up, no matter how hard you try.
This is one of the reasons Apple introduced the new U1 chip with ultra-wideband technology for the iPhone 11. The U1 is designed to improve device discoverability and eliminate the issues that have plagued AirDrop for years. It will be a while before the majority of people have such a chip in their device, though. For now, we're stuck trying to get AirDrop to work the old-fashioned way.
We've split these tips between Mac and iOS devices, as you can use different methods on each platform. If you want to use AirDrop between an iPhone or iPad, and a Mac, be sure to check out both sections for relevant tips.
Can My Mac or iOS Device Use AirDrop?
AirDrop is compatible with the following Mac computers:
- MacBook Pro (late 2008 or newer)
- MacBook Air (late 2010 or newer)
- MacBook (late 2008 or newer)
- iMac (early 2009 or newer)
- Mac mini (mid-2010 or newer)
- Mac Pro (early 2009 with AirPort Extreme or newer)
AirDrop is compatible with iOS devices that:
- Run iOS 7 or later
- Have a Lightning port
Despite this extensive compatibility, the older your device, the more likely you are to have issues with AirDrop.
Troubleshooting AirDrop on a Mac
There are more tricks to getting AirDrop working on a Mac than there are for an iOS device. This is because, on a Mac, you have access to the Terminal, more settings you can adjust, and the ability to delete files from system folders.
Let's get started!
Update macOS

You've heard it before, but we'll say it again: you should keep your device up to date if you want to minimize software issues. AirDrop is temperamental at the best of times, so if your Mac is running an outdated version of macOS, and you're trying to send files to your brand-new iPhone 11, that might be the problem.
First, back up your Mac with Time Machine, and then head to System Preferences > Software Update and install all available updates. If you're not running the latest version of macOS, open the App Store, search for "macOS," and then download it for free.
Open AirDrop in Finder

According to Apple, if your Mac runs OS X Mavericks or earlier, you have to open Finder and click on AirDrop in the sidebar to transfer files. Apple doesn't stipulate this requirement for later versions of macOS, but we've had better results when we open the AirDrop window before starting a transfer.
Set Your Mac's Visibility to "Everyone"

If you have trouble sending files to a Mac, adjust the visibility under Finder > AirDrop. At the bottom of the screen, click the arrow next to "Allow Me to Be Discovered By:" and select "Everyone" from the drop-down menu.
If you select "Contacts Only," make sure the other party's contact details appear in your Contacts app. Apple doesn't specify which particular piece of information it uses to identify a contact, but an email address linked to an Apple ID is a solid choice.
Sometimes, the "Contacts Only" option doesn't work properly---even when email addresses and phone numbers are present. For best results, make sure both parties appear in each other's Contacts apps.
Disable Do Not Disturb

Do Not Disturb mode interferes with AirDrop because it makes your Mac invisible to other devices. To disable it, open "Notification Center" (the icon in the top-right corner of your screen), click the "Today" tab, scroll up, and then toggle-Off "Do Not Disturb."
Search for an Older Mac

Older Macs use a legacy implementation of AirDrop that isn't compatible with the latest iOS devices. You can use a modern Mac to send files to an older Mac, but you first have to tell AirDrop to search for the older Mac. If your Mac was manufactured pre-2012, this method might work for you.
First, make sure the older Mac is visible, and the AirDrop window is open and ready to receive. On your newer Mac, head to Finder and click "AirDrop" in the sidebar. Click "Don't See Who You're Looking for?" at the bottom of the window, and then click "Search for an Older Mac."
Connect to the Same Wi-Fi Network
Apple explicitly states that both devices do not have to share the same Wi-Fi network for AirDrop to work. However, our own experience suggests that when devices share a network, the results are much better. If possible, connect both devices to the same network, and then try again.
Disable "Block All Incoming Connections"

If you use the firewall that comes with macOS, it might be blocking incoming connections, too. To prevent AirDrop transfers from failing, you should disable this setting. You don't have to stop using the firewall to do this.
Head to System Preferences > Security & Privacy, and then click the "Firewall" tab. If the Firewall is set to "Off," you can move on to the next tip.
If the Firewall is on, click the lock in the bottom-left corner of the window, and then type your admin password (or use Touch ID, or your Apple Watch, if possible).
Next, click "Firewall Options." In the window that opens, make sure the checkbox next to "Block All Incoming Connections" is unchecked. Click "OK" to save your changes, and then try again.
Disable Wi-Fi and Bluetooth Manually

Sometimes, you just have to turn it off and on again. To do this with both Bluetooth and Wi-Fi, click the relevant icon in the menu bar at the top-right of the screen. After you turn off both Wi-Fi and Bluetooth, turn them back on, and then try again.
Kill Bluetooth with a Terminal Command
If that doesn't work, you can try to kill your Mac's Bluetooth service, instead. This essentially forces the service to restart, and can potentially solve visibility and transfer issues, too.
To do this, open a new Terminal window, and then type (or paste):
sudo pkill blued
Press Enter, type your admin password (or authorize via Touch ID or Apple Watch,) and then press Enter again. The service restarts immediately and kills any other Bluetooth connections you have open. You can now try to use AirDrop again.
Reset All Bluetooth Connections

This is the nuclear option, but many people have had success with it so it might be worth a shot. Your Mac stores known Bluetooth connections in a single file. If you delete that file, you force your Mac to make new connections, and it will potentially clear up any issues. It might also fix problems with any Bluetooth devices that don't pair or act erratically.
First, click the Bluetooth icon in the menu bar, and then select "Turn Bluetooth Off." Open a Finder window, and then select Go > Go to Folder in the menu bar.
Type (or paste) the following, and then hit Enter:
/Library/Preferences/
Find the file "com.apple.Bluetooth.plist" and delete it. You can use the search bar, just make sure you click "Preferences" at the top of the Finder window. Now, turn on Bluetooth again and see if AirDrop works.
Remember to re-pair your Bluetooth devices after you try this tip.
Restart Your Mac

As always, the most effective way to solve AirDrop issues is to restart your Mac and try again. It's not convenient, though---especially if you're in the middle of something. We recommend you experiment with the previous tips first to see if any of them work with your particular hardware; it might prevent you from having the same issue in the future.
Other Mac AirDrop Troubleshooting Tips
Still having AirDrop problems? There are a few other things you might want to try:
- Restart your network equipment.
- Reset your Mac's PRAM and SMC.
- Sign out of your Apple ID under System Preferences, and then sign in again.
- Reinstall macOS to restore your device to an "as new" state.
Solving AirDrop Problems on an iOS Device
Due to the closed nature of the operating system, iOS devices don't have quite as many troubleshooting avenues open to them. Fortunately, there are a few tips that have worked for us.
Update iOS

Just like macOS, iOS receives regular updates. To give yourself the best chance at AirDrop success, make sure you're using the latest version of iOS. Head to Settings > General > Software Update and install any available updates.
Make Sure Your iOS Device Is Visible

You can change your iOS device visibility in Control Center. To access Control Center on an iPhone 8 or earlier, swipe up from the bottom of the screen. If you have an iPhone X or later, swipe down from the top-right corner of the screen.
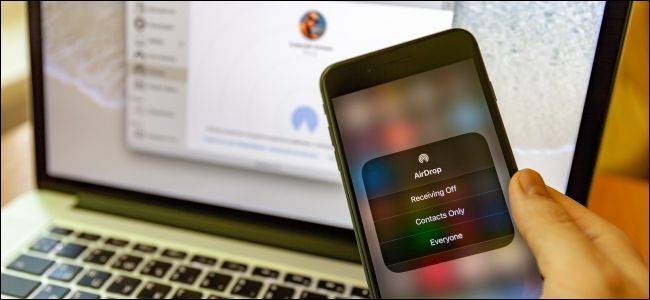
Press and hold the panel that contains the Airplane Mode and Wi-Fi symbols until a new panel appears. Tap "AirDrop" to set the visibility. For best results, tap "Everyone."
If you select the "Contacts Only" option, the person you share with also has to be in your Contacts app (or the Phone app under the Contacts tab). For best results with this method, make sure the other party's linked Apple ID appears in the relevant contact.
Since "Contacts Only" is temperamental, we recommend you switch this option to "Everyone" for transfers, and then change to "Receiving Off" if you don't want to be bombarded by strangers.
Make Sure Your iPhone Is Awake and Unlocked
Your iPhone needs to be awake to be visible to other AirDrop devices. AirDrop requests will appear as notifications on your lock screen when your device is locked. For best results, make sure your device is awake, unlocked, and ready to receive.
Disable Do Not Disturb
If Do Not Disturb mode is enabled on your iOS device, you won't be able to receive AirDrop requests. To disable Do Not Disturb mode, go to Settings > Do Not Disturb. You can also toggle the Do Not Disturb icon (it looks like a moon) in Control Center.
Disable Personal Hotspot

You cannot use AirDrop if you have a Personal Hotspot connected. To quickly disable Personal Hotspot, open Control Center, tap and hold the panel with the Wi-Fi symbol in it, and then toggle-Off "Personal Hotspot."
Receive Different File Types Separately
When you receive a file via AirDrop, it opens immediately in the relevant app. This sometimes causes issues if you try to send multiple filetypes in one transfer.
Split up your transfers by filetype before you send them via AirDrop to an iOS device and see if this solves the issue.
Kill Bluetooth and Wi-Fi with Airplane Mode

A favorite tip is to kill all your device's radios with Airplane Mode. Toggling Wi-Fi and Bluetooth isn't enough because, when you disable Wi-Fi in Control Center, it only disconnects you from the current network. To reset all services, open Control Center, enable Airplane Mode, and then wait about 10 seconds. Disable Airplane Mode and try again.
Note that Airplane Mode saves your last-known configuration. If you turn on Airplane Mode, and then manually re-enable Wi-Fi or Bluetooth, Airplane Mode will remember this next time. Make sure you disable both Bluetooth and Wi-Fi before you try this tip.
Restart Your iOS Device
When in doubt, turn it off and back on. This will likely resolve your AirDrop issues (at least temporarily), although it's not always the most convenient option.
Reset Network Settings

We haven't tried this, so we can't attest to its success rate, but if you have chronic AirDrop issues, you might want to give it a try. This resets all known Wi-Fi networks, and VPN, APN, and Cellular settings to their default values. You'll have to reconnect to all of your Wi-Fi networks afterward.
If it's worth it to you, head to Settings > General > Reset > Reset Network Settings.
Use iCloud Instead of AirDrop
iCloud Drive is Apple's cloud storage medium. It's hardly the most robust cloud storage service out there, but it's integrated into every iOS and macOS device, so it's a good alternative to AirDrop.
There are limitations, though. Whereas AirDrop is designed for local file transfers, iCloud is an online storage medium. You have to connect to the internet, and if you need to upload or download large files, it might be inconvenient (or impossible).
If you want to give iCloud a shot, read on, and we'll walk you through it.
Send Files or Images on iOS
To upload files to iCloud Drive:
- Select the files or images you want to send, and then tap the Share button.
- Scroll down to "Save to Files."
- Select a destination (or create a new folder), and then tap "Save."
Your files will be sent to iCloud immediately over the internet. If your connection is slow, you might have to wait a while before they show up on other devices.
Receive Files or Images on iOS
To retrieve files you uploaded to iCloud Drive on iOS:
- Launch the Files app.
- Navigate to the folder in which you saved your files or images.
- Access your files.
Send Files or Images on a Mac
On a Mac, the process uses Finder, as it does for all iCloud Drive interactions. To send files or images:
- Launch Finder and click "iCloud Drive" in the sidebar.
- Select (or create) a folder to upload your files to.
- Drag and drop (or copy and paste) your files into the folder, and then wait for them to upload.
You should see the status of the upload beneath the file you're uploading.
Receive Files or Images on a Mac
To retrieve files from iCloud Drive on a Mac:
- Launch Finder and click "iCloud Drive" in the sidebar.
- Navigate to the folder in which you saved your files or images.
- Access your files.
If the files haven't finished downloading, double-click them. When they open, you can prioritize the download.
AirDrop Improvements
With the addition of the U1 chip to the latest iPhones, it's clear Apple is aware of the issues that plague device discoverability. While the applications of the U1 chip go far beyond local file transfers, it's a notable step forward for local wireless device-to-device file transfers.
We expect to see the U1 and similar chips in future Apple hardware.