Quick Links
With Google Drive, you can share any Google file (from Docs, Sheets, or Slides) online as a web page for anyone to see. You can even share simple HTML files to act as your site's landing page. Here's how to do it.
Sharing a Google file as a web page is a great way to publish information to the Internet for a large audience. Anything you share is entirely public, and---if you use the right search string---it can be found via any search engine as a lightweight page on the web.
When you share a file to the web, Drive creates a copy of it with a unique URL. This allows you to make edits and publish changes when you want to, and it also prevents viewers from seeing any source material.
Remember: anything you publish to the web is available for anyone to see, so you should never include sensitive or private information in your files.
How to Share a Google Docs File
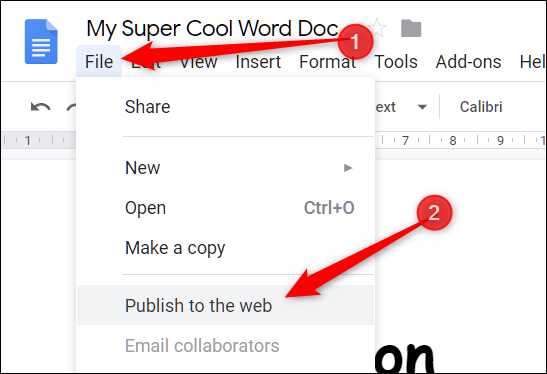
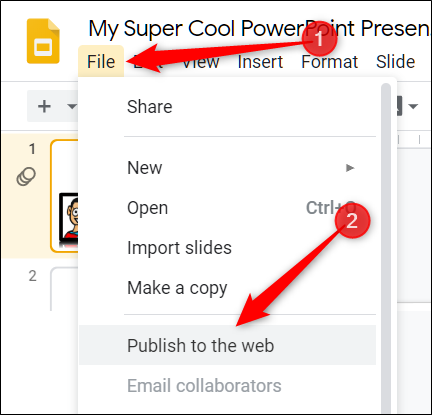
Fire up your browser, head to Google Docs, and then open the file you want to share. Click File > Publish to the Web.
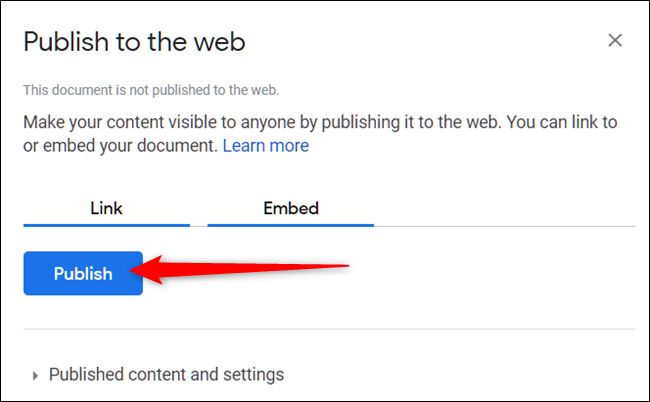
Next, click "Publish" to make your file visible on the Internet.
Click "OK" to confirm you want to publish the file to the web.
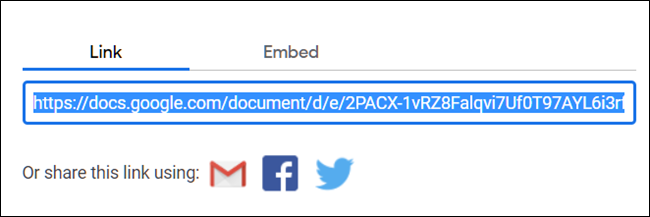
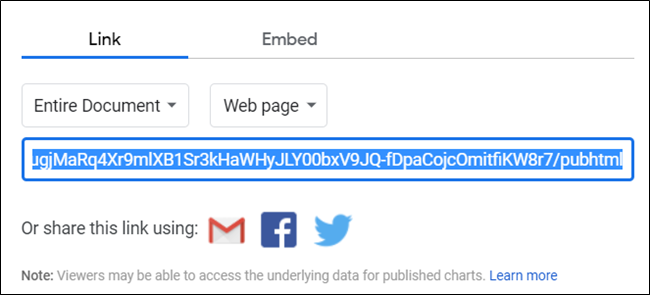
You can now copy the link (Ctrl+C on Windows/Chrome OS or Cmd+C on macOS), embed it on your website, or share it via Gmail, Facebook, or Twitter.
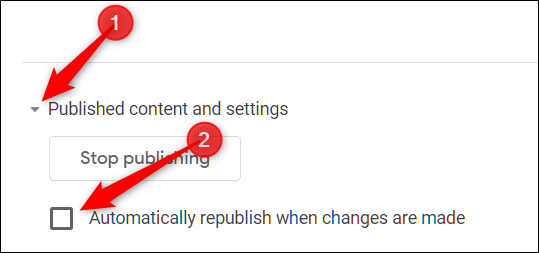
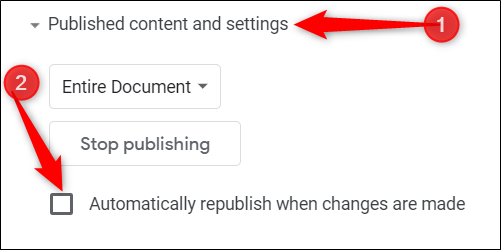
If you don't want the page to update automatically whenever you make changes to it, click the arrow next to "Published Content and Settings." Then, click the box next to "Automatically Republish When Changes Are Made" to uncheck it.
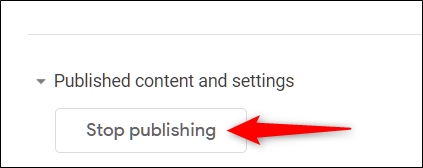
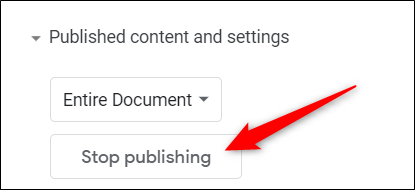
When you want to remove the file from the web, head back to File > Publish to the Web. Expand "Published Content and Settings," and then click "Stop Publishing."
How to Share a Google Sheets File
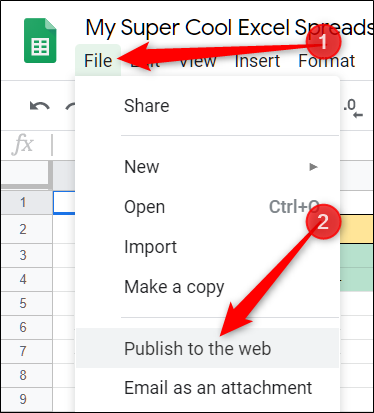
Head to the Google Sheets website, open the file you want to share, and then click File > Publish to the Web.
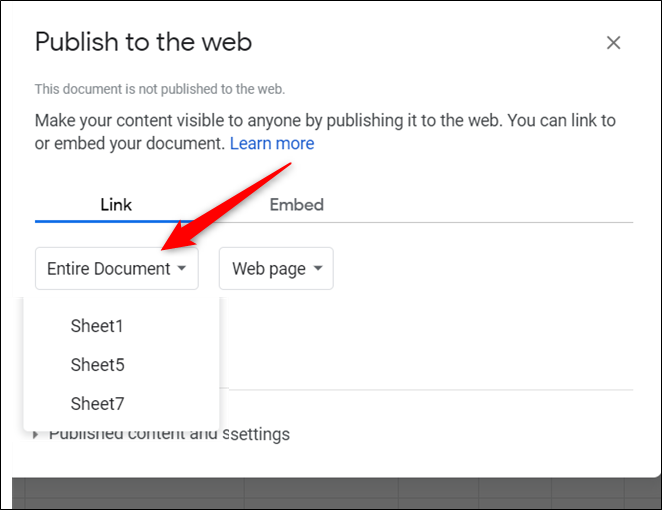
If you don't want to share the entire document, you can choose a single sheet to publish online. To do this, click "Entire Document," and then select the sheet from the drop-down menu.
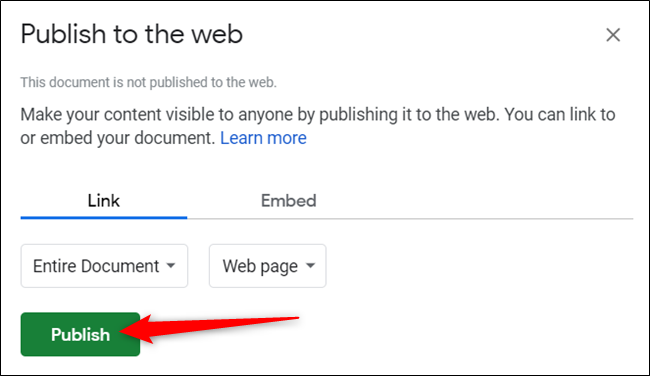
Click "Publish."
Click "OK" to confirm you want to publish the file to the web.
Again, you can copy the link (Ctrl+C on Windows/Chrome OS or Cmd+C on macOS), embed it on your website, or share it via Gmail, Facebook, or Twitter.
If you don't want the page to update automatically whenever you make changes to it, click "Published Content and Settings," and then uncheck the box next to "Automatically Republish When Changes Are Made."
To stop publishing the page altogether, head back to File > Publish to the Web, and then click "Stop Publishing."
How to Share a Google Slides File
When you share a Slides file to the web, Google Drive acts as a player and allows visitors to view your presentation on your page. You can set slides to auto-advance at 1, 2, 3, 5, 10, 15, 30, or 60 seconds.
To share your Slides file on the web, head to your Google Slides homepage, open a presentation, and then click File > Publish to the Web.
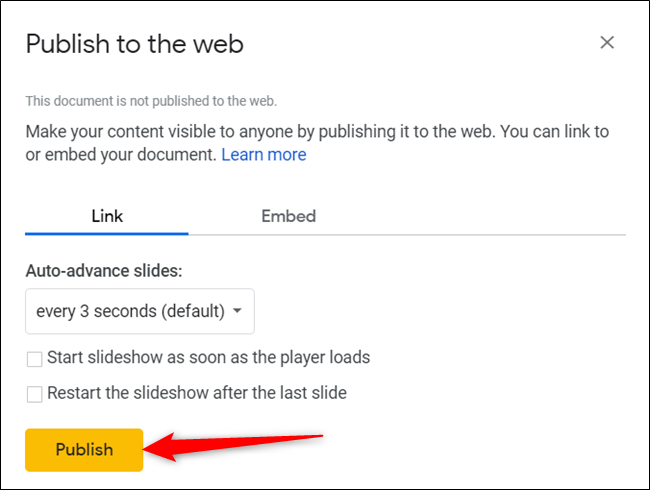
Click the drop-down menu in the "Auto-Advance Slides:" section and select the interval at which you want the slides to advance. Click the checkboxes if you want your presentation to start as soon as the player loads and if you want it to restart after the last slide. Click "Publish" after you make your selections.
Click "OK" to confirm you want to publish the file to the web.
You can then copy the link (Ctrl+C on Windows/Chrome OS or Cmd+C on macOS), embed it on your website, or share it via Gmail, Facebook, or Twitter.
When you want to remove the file from the web, head back to File > Publish to the Web, expand the "Published Content and Settings" menu, and then click "Stop Publishing."
How to Share an HTML File
This section is similar to the Google Docs method. You share from a Docs file, but you can use HTML and some basic CSS to style everything. This enables you to create a pseudo-website without having to buy a domain or hosting.
First, create an HTML file with the code for your website's homepage and save it to your computer.
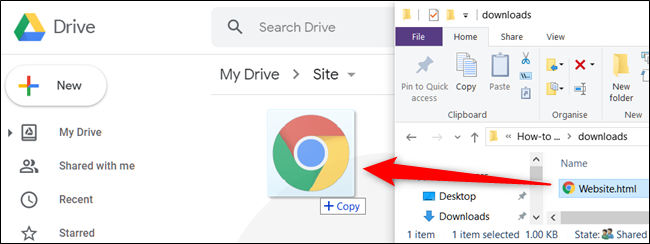
Next, head to your Google Drive, and then upload the HTML file. You can also drag and drop it directly from your computer into Drive's webpage to upload.
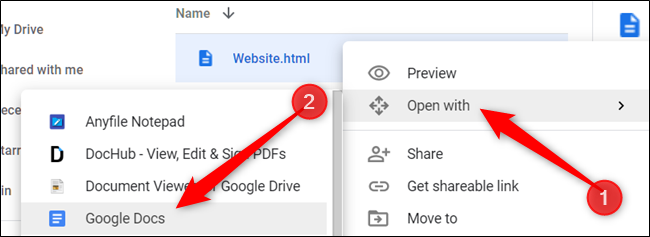
Right-click the file, and then click Open with > Google Docs.
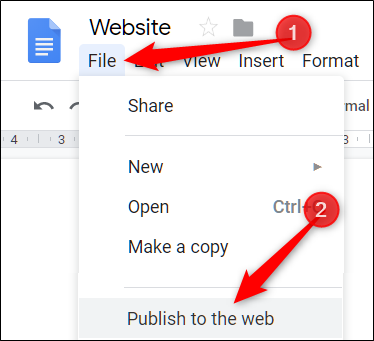
Google Docs opens the file and formats your HTML inside the Docs file. Click File > Publish to the Web, just as you did before.
Next, click "Publish" to make your file visible on the Internet.
When you're asked if you're sure you want to publish the file to the web, click "OK."
Once again, you can copy the link (Ctrl+C on Windows/Chrome OS or Cmd+C on macOS), embed it on your website, or share it via Gmail, Facebook, or Twitter.
Note that any changes you make to the Docs file appear immediately on the web page. However, if you want to add more HTML code, you have to edit the original file, and then redo the upload and sharing process.
Additionally, Docs sees any tags as literal text and won't format them correctly.
If you don't want the page to update automatically whenever you make changes, click "Published Content and Settings," and then uncheck the "Automatically Republish When Changes Are Made" box.
When you want to remove the file from the web, head back to File > Publish to the Web. Expand "Published Content and Settings," and then click "Stop Publishing."
While sharing documents, spreadsheets, and presentations from Google Drive works wonderfully, there are a few hang-ups when it comes to publishing HTML files as a web page.
If you use Google Drive to host your website, the amount of functionality and formatting features available are drastically limited when compared to conventional web hosting. It's probably better to use Google Drive only as a basic landing page for personal use.

