Despite the rise of tools like Slack, email isn't going away, and it can sometimes feel overwhelming. One way to get your email under control is to have Outlook automatically sort incoming messages to specific folders.
To do this, we're going to use Outlook rules. These operate automatically when you send or receive email and perform tasks you've chosen ahead of time.
There are two ways you can create a rule to do this. The first method is easier and works best with a single email address you want to move automatically. This is ideal for emails that always come from a single address, like a ticketing or alert system.
The second method is a bit more involved but still pretty simple. It works best for an entire domain---such as all emails from people at the same business---or if you want to set up a bunch of rules one after the other.
Creating Simple Rules
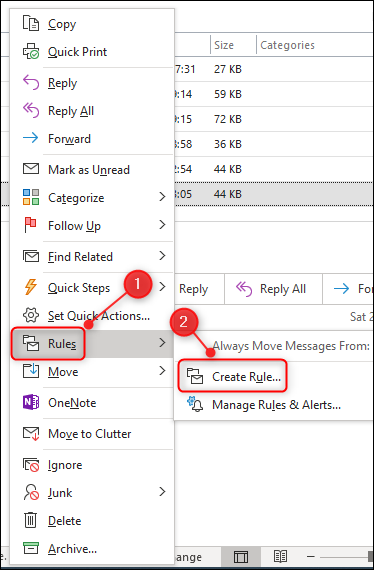
To create a rule the simple way, open your Outlook inbox, right-click an email you want to sort automatically, and then click Rules > Create Rule.
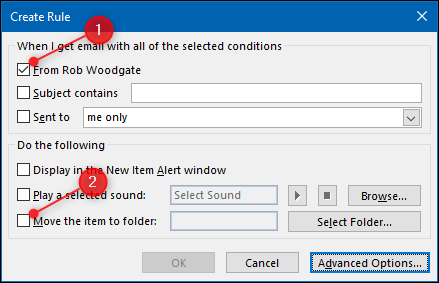
The Create Rule window opens. Click the checkbox next to the name of the person. This tells Outlook to apply the rule to any emails from that address. Next, click the "Move the Item to Folder:" checkbox.
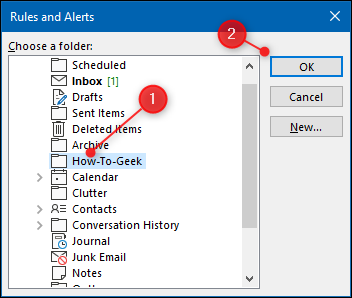
In the window that opens, select the folder you want to move the emails to (or click "New" to create a new folder), and then click "OK."
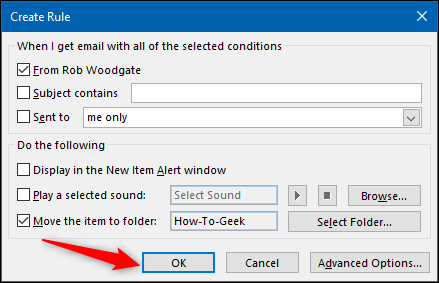
Your rule is now ready to go, so click "OK."
A confirmation dialogue appears. Click the "Run this rule now on messages already in the current folder" checkbox, and then click "OK."
From now on, any emails from that address will go to the folder you chose.
Creating More Complicated Rules
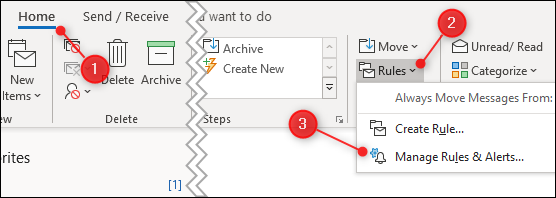
To set a rule from scratch, click Home > Rules > Manage Rules & Alerts.
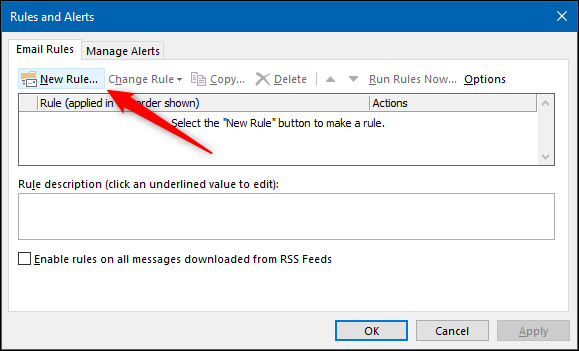
The "Rules and Alerts" window opens. Click "New Rule."
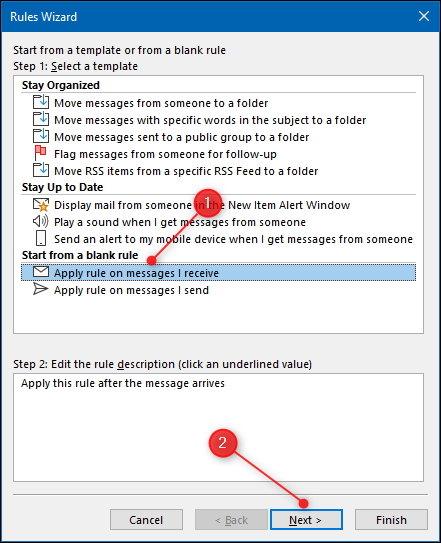
This opens the "Rules Wizard" window. In the "Start from a Blank Rule" section, click "Apply Rule on Messages I Receive," and then click "Next."
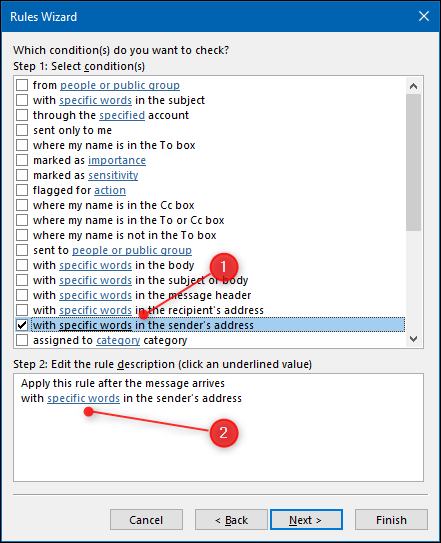
Here, you select the conditions an email must meet to apply the rule. We're going to set the conditions to apply to every email that comes from the @howtogeek.com domain.
Select the "With Specific Words in the Sender's Address" checkbox, and then, in the text box at the bottom, click "Specific words."
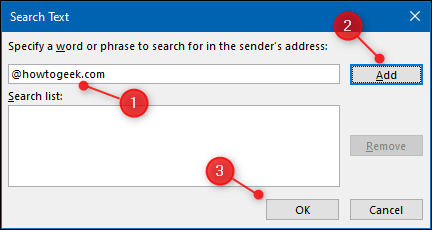
In the window that opens, type the domain to which you want the rule to apply. If the emails come from people with addresses that end with "@acmeanvils.com," type that, and then click "Add."
You can type more than one item here, so if you've got a couple of important clients, you can add them all here. When you're finished, click "OK."
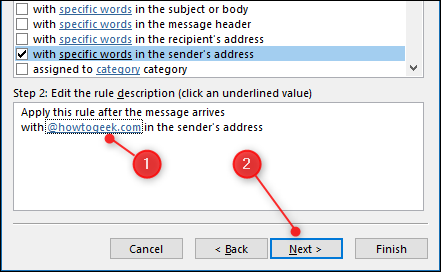
The rules wizard displays your chosen email domains. You can click the terms to edit them if they change. Once everything is set, click "Next."
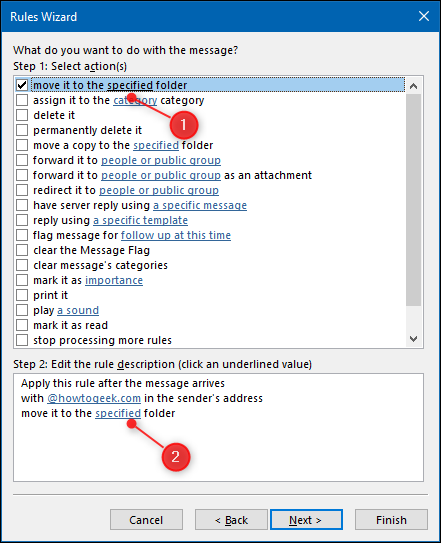
We're going to select this folder on the next page of the wizard to move these emails to. Check the "Move it to the Specified Folder" box, and then click "Specified" in the text box at the bottom.
In the window that opens, select the folder you want to move the emails to (or click "New" to create one), and then click "OK."
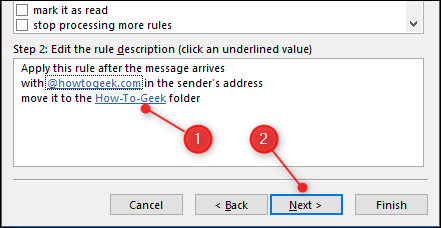
The rules wizard shows the folder you selected. If it's not the right folder, click it to change it, and then click "Next."
Now you can specify any exceptions; click "Next" if you don't want to add any.
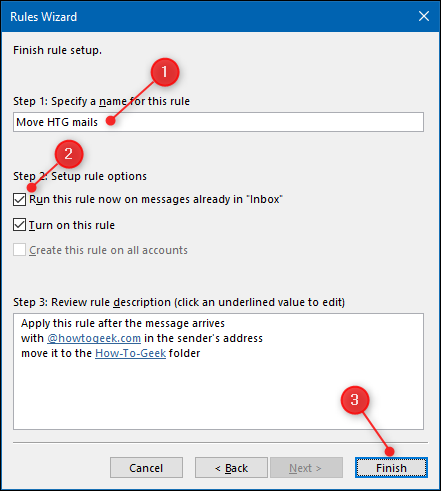
Type a name for the rule, select the "Run This Rule Now on Messages Already in 'Inbox'" checkbox, and then click "Finish."
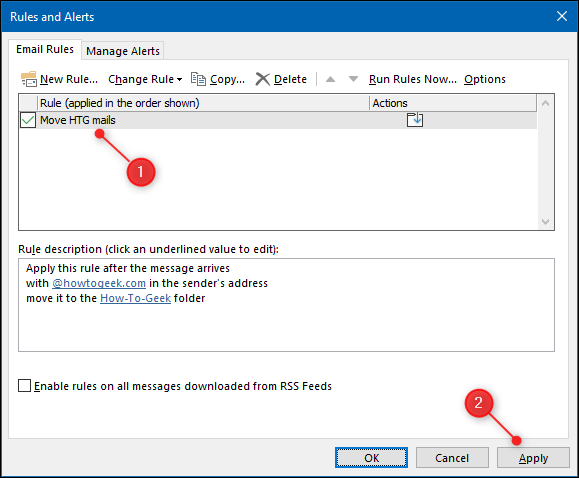
Your rule is now complete and appears in the "Rules and Alerts" window. Click "Apply" to complete the process.
Your rule is now live. Any emails that meet the conditions you chose will go to the selected folder. Also, any rules you create in the Outlook client are mirrored in the Outlook web app.

