Quick Links
Thanks to iOS 13 and iPadOS 13, it's finally easy to deal with external storage on the iPhone and iPad. You can connect USB flash drives and SD cards to copy and back up your data. Here's how you do it.
How to Connect External Storage to iPhone or iPad
If you use a 2018 iPad Pro with a USB-C port and have a USB-C flash drive, all you have to do is plug in the flash drive.
If you have any other iPad or iPhone, though, you'll need an adapter. You can use a Lightning to USB adapter to connect any USB flash drive, and this also works for a USB SD card reader.
Alternatively, you can purchase Apple's standalone Lightning to SD Card Camera Reader.

Support for external hard or solid-state drives is iffy, at best. However, you can connect USB-C-based external drives directly to your iPad Pro via the USB-C port. Drives that require more power---especially those with spinning hard drives---require an external power source.
If you connect a drive and see a message that says, "This accessory requires too much power," you'll have to use a connector with a power pass-through. You can get these to work with iPhones and older iPads with a Lightning to USB 3 Camera Adapter, which lets you power your device (and the drive) via a Lightning port.
How to Copy Files From External Storage
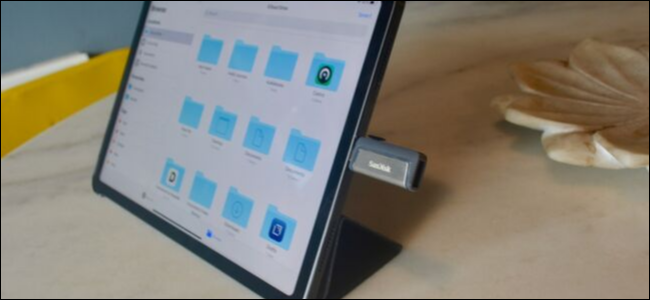
We use the Files app to copy data to and from external storage. First, connect your USB flash drive or SD Card using one of the methods outlined above, and then open the Files app.
Go to the "Browse" tab. When you see your drive in the "Locations" section, tap it to see all the files and folders on your drive.

Tap a file to preview it. The Files app has a robust media viewer. You can open text and audio files, or even watch video from your drive without exporting it to an app.
Let's move some data from your external drive to your iPhone or iPad's local storage. First, in "Locations," tap the "On My iPhone" or "On My iPad" section.

Here, tap and hold the empty space, and then select "New Folder."

Name it, and then tap "Done" to create a new folder for the files you want to transfer.

Now, from the "Locations" section, select your USB flash drive.
Here, tap "Select" in the top toolbar, and then choose the files you want to move.

In the bottom toolbar, tap "Move."

This opens a menu with all the available locations in the Files app. Tap "On my iPhone" or "On my iPad" to expand the local storage option. Select the folder you just created, and then tap "Copy." The files are transferred to the folder.

How to Copy Files to External Storage
After you connect your external drive, you can copy data from any location in the Files app to it just like you did above. This means you can copy files from your iCloud Drive, Dropbox, a connected SMB server, or any app you add to the "Locations" section in the Files app.
Using Save to Files Extension
As an example, let's say you want to export photos to a USB drive. First, go to the Photos app, select the images, and then tap the Share button.

Select "Save to Files."

This brings up the versatile Files extension, so you can save files to any location, including attached external drives.
Tap your external drive, and then select a folder. You can also tap the New Folder button at the top to create one. Select the folder from the external drive, and then tap "Save."

In a second, your photos export at their full resolution to the folder you selected on the external storage device. To confirm this, go to the Files app, and then navigate to the folder.

The Photos app is just one example. You can use this method to move PDFs, videos, images, and more from any app to external storage.
Using the Files App
What if the file is already saved in the Files app? You can use the drag and drop feature to quickly move the files.
Open the Files app, and then navigate to the folder in which you saved the files. Next, tap and hold one file, and then drag your finger away from the icon. You should now be in the file selection mode.

If you want to select multiple files, tap them with your other finger.

Then, use your other hand to switch to the external drive from the "Locations" menu. While still holding the files with one finger, navigate to the folder in which you want to save them.
Once you reach the destination folder, you can release the files and they will be copied over to the external storage.

That's it! You can now remove your USB drive from your iPhone or iPad. There's no need to safely eject it.
Becoming a Files Power User
As you might have guessed, the Files app is quite complex, and there are more than a few ways to perform a single action. The best way to become a Files power user is to explore it because the version in iPadOS 13 helps turn your iPad into a real computer.
After you upgrade, the first thing that you should do is enable the dark mode.