The iPhone's Do Not Disturb feature is a great way to make sure your handset doesn't disturb you when you're sleeping or busy. But if you want a certain contact to still be able to get ahold of you, you can whitelist them. Here's how.
How the iOS Do Not Disturb Feature Works
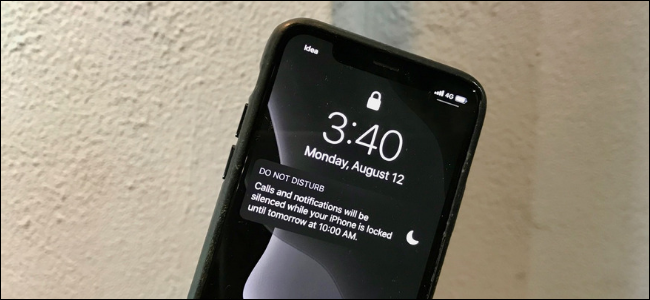
Do Not Disturb automatically mutes all calls, notifications, and alerts you get when your iPhone is locked. The feature can be enabled by tapping on the "Crescent moon" icon from the Control Center.
If you 3D Touch/Haptic Touch the Do Not Disturb icon, you can enable it from one hour or until you leave the current location. You can also set up Do Not Disturb on a schedule by going to Settings > Do Not Disturb > Scheduled.

By default, Do Not Disturb works as an all-or-nothing switch. However, you can add exceptions to the Do Not Disturb filter in a couple of ways.
How to Whitelist Favorites in Do Not Disturb
The Favorites tab in the Phone app is a modern take on the speed-dial. Add a couple of numbers that you frequently contact for a one-tap connection. The Favorites feature also has a couple of other benefits such as the option to add the Favorites widget to your Lock screen.
The Favorites list also integrates directly with the Do Not Disturb feature. To set things up, open the Settings app, go to "Do Not Disturb," select "Phone," and then tap on "Allow Calls From."

Next, switch the setting to "Favorites." With this set, anyone who calls you from your Favorites list will be let in.

iOS also has an option in the Do Not Disturb section called "Repeated Calls." When you enable this feature, a second call from the same caller within three minutes will be let through.
How to Add Contacts to Favorites
If you haven't set up the Favorites list, you can do so by going to the Phone app and tapping on the "Favorites" tab. Add your family members and close friends to this list by tapping on the "Plus" button in the top-left corner.

Now search for a contact from your contact book.

Tap on the contact and you'll see a popup with all their available contact information (including alternative numbers and FaceTime options).
Choose the "Call' option and then select their number.

They'll be added to your Favorites list. Repeat the process for all the contacts you want to whitelist from Do Not Disturb.
Let Contacts Through Using Emergency Bypass
The Favorites method for letting calls through will not work for everyone. I, for instance, use Favorites as a shortcut for accessing my frequently used contacts, which includes all my family members and friends.
In case of emergency, I want only a handful of contacts to get through the Do Not Disturb filter. If you're in the same boat, you can use the Emergency Bypass feature added in iOS 10.
The Emergency Bypass feature works on a per-contact basis and includes controls for both calls and texting. Once you enable Emergency Bypass for a contact, their call or text can come through even if you have Do Not Disturb enabled and if your phone is on silent mode.
To enable Emergency Bypass feature for a contact, open the Phone app and search for the contact.
Tap on the contact to open their contact card. Then tap on the "Edit" button in the top-right corner.

Swipe down until you find the "Ringtone" option and tap on it.

From the top of this screen, tap on the toggle next to "Emergency Bypass" to enable the feature. Tap on "Done" to save the setting and go back to the previous screen.

You can do the same thing for text messages by tapping on "Text Tone" and enabling the "Emergency Bypass" feature from the next screen.
You can repeat this process for all the contacts you want to let through the Do Not Disturb filter. Once it's set up, any time they give you a call or send you a message, your iPhone will ring.