Quick Links
If you use Google Sheets to collaborate with others, you can prevent people from typing the wrong data in your spreadsheet's cells. Data validation stops users from inserting anything other than properly-formatted data within specific ranges. Here's how to use it.
How to Use Data Validation in Google Sheets
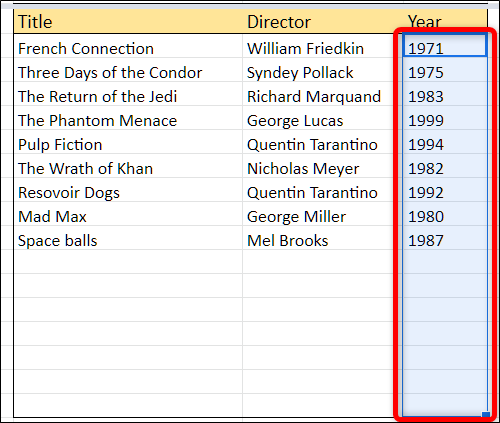
Fire up your browser, head to the Google Sheets homepage, open a spreadsheet, and highlight the range you want to restrict.
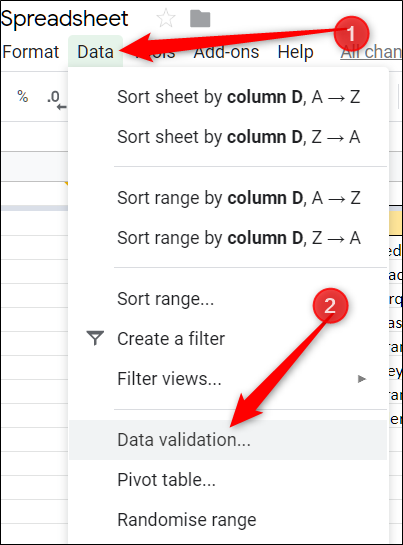
Click "Data," and then click "Data Validation."
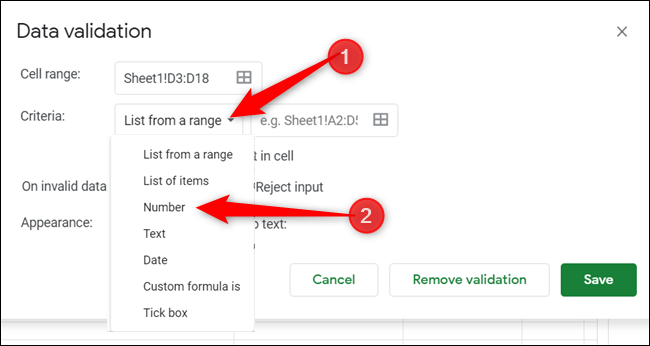
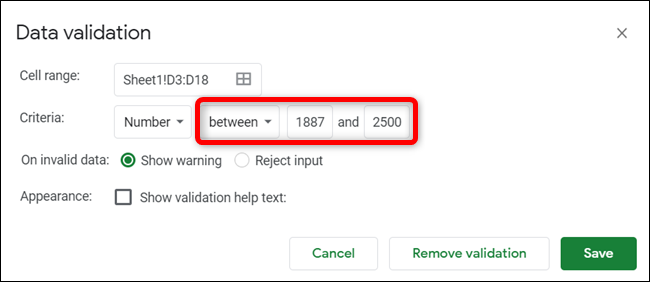
In the data validation window that opens, click the drop-down menu beside "Criteria." Here, you can set a specific type of input to allow for the selected cells. For the row we've selected, we're going to make sure people put in a four-digit number for the year a movie was released, so select the "Number" option. You can also select other criteria, such as text only, dates, a pre-defined list of options, items from the specified range, or your custom validation formula.
Each option has its own values you need to specify for this feature accurately to validate the data typed into each cell. Since we only want the year a movie was released, we're going to use the "Between" validation. Then, we're configuring a minimum value of 1887---the first motion picture created---and a maximum of 2500, which should be sufficient for the needs of this spreadsheet.
Next, choose whether Sheets should show a warning message or completely reject anything typed and display an error message when the data is invalid.
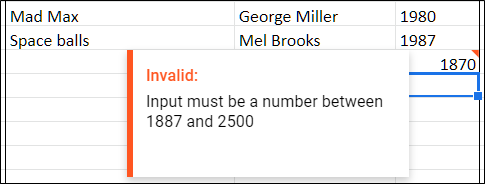
The warning message notifies the user the number must be between a specific range and keeps the invalid data in the cell with a red notification.
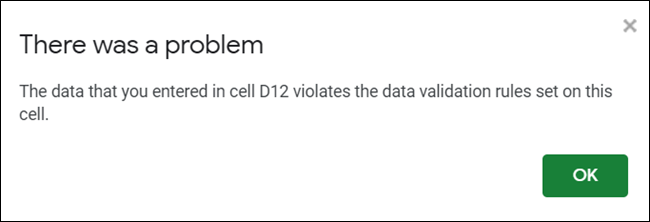
If you select "Reject Input," the user sees a pop-up window with a nondescript error message after he submits the invalid data and whatever he typed is also deleted.
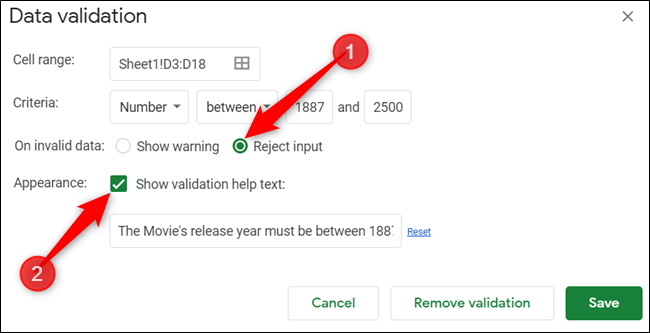
You can also reject any invalid input, but provide people with some feedback on the type of data required. Click "Reject Input," click the checkbox for "Show Validation Help Text," and then type a helpful warning message. Click "Save" to close the validation tool.
Now, when someone attempts to enter invalid data, she's given a helpful message so that she can fix the error in the data.
Data validation is essential when you're collecting information from people and want to ensure they type the proper info into your spreadsheet cells. It prevents anyone from submitting malformed data and can be used as a catchall if you've set up formulas or automation tasks that rely on that data.

