Quick Links
PowerPoint features a large library of shapes used for things like creating flowcharts. That’s not all, though—PowerPoint also lets you combine and merge these shapes to create a unique object. Here’s how.
Merging Shapes in PowerPoint
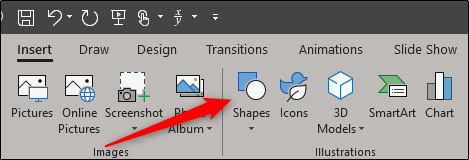
To merge shapes in PowerPoint, you’ll first need to insert the shapes you wish to merge. To do so, head over to the “Insert” tab and select “Shapes” found in the “Illustrations” group.
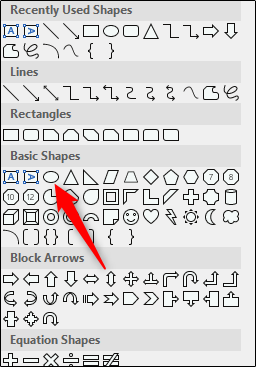
On the drop-down menu that appears, browse through the large library of shapes and select the one you want to use. We’ll use the oval shape in this example.
Next, draw your shape. You can do so by clicking and dragging your cursor.
Repeat the steps above to insert your next shape. Once ready, make sure the shapes are overlapping.
To merge the shapes, you’ll need first to select both of the shapes that you want to merge. To do this, hold the Ctrl key while clicking each shape in turn.
Once you select the shapes, you’ll notice a new tab appear—the “Shape Format” tab. Go ahead and select that tab.
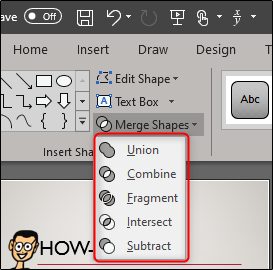
Over in the “Insert Shapes” group, click the “Merge Shapes” button.
From the drop-down menu that appears, select your desired merge type. You can also hover over each option to get a live preview.
That’s it. Your shapes will now be merged.


