Quick Links
If you want to share your presentation with someone that doesn’t have Microsoft PowerPoint, you can save and share the file as a PDF. You can also adjust the way the slides appear on the PDF. Here's how.
Save PowerPoint Files as PDFs
When you save a PowerPoint presentation as a PDF file, the layout, format, fonts, and images of the presentation will remain the same. This lets users without access to PowerPoint view the presentation (though they are unable to edit it).
First, open the PowerPoint presentation to be saved as a PDF. Select the “File” tab and then click the “Export” option in the left-hand pane.
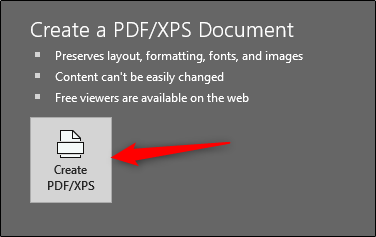
You’ll then be at the “Create PDF/XPS Document” tab. Here, select “Create PDF/XPS.”
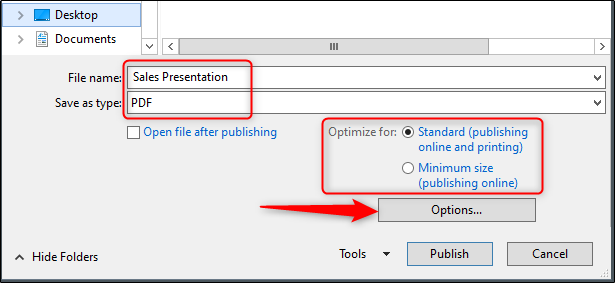
Window’s File Explorer will appear. Select the location in which you would like to save your new file. You can see that the “Save as type” is now PDF. You can also rename the file as you like.
You may also notice the “Optimize for” options at the bottom-right of the window:
- Standard: This is a high-quality version of the document, ideal for when you only plan to publish it online or print it out.
- Minimum Size: This is a lower-quality version of the document. It’s also suitable for publishing online, but ideal for when you need to send the document as an email attachment, as it reduces the size of the file.
You can also set specific options to adjust how the file appears. To do this, click the “Options” button underneath.
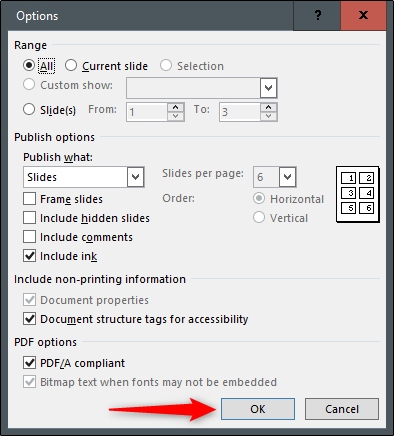
The “Options” window will appear, and you have several options to choose from. Here’s a brief overview of what’s available:
- Range: Export all slides, the current slide, or a selection of slides from your presentation.
- Publish Options: You can choose to export only comments, handouts, or outline view here by selecting the “Publish What” option. You’re also able to dictate how many slides appear on each page, flip the slides horizontally or vertically, or give the slides a frame.
- Include Non-printing Information: Include document properties or structure tags.
- PDF Options: Make the document PDF/_A compliant.
Once you’ve adjusted the options, click “OK.”
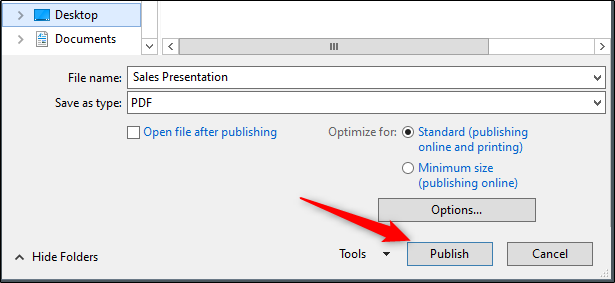
Finally, back at Windows File Explorer, click “Publish.”
Your PDF is now ready to share.


