Quick Links
Key Takeaways
- Open the System Backup Image Tool. In Windows 10, head to Control Panel > Backup and Restore (Windows 7) > Create a System Image.
- Choose where you want to save the backup image.
- Select the drives to back up.
- Start the backup.
- Optionally, create a system repair disc that you can use to start your computer and restore a backup image.
The built-in backup utilities in Windows are pretty solid. You can even create a full backup image of your PC without a third-party utility. This tool is still included on Windows 10 and Windows 11.
The System Image Backup functionality is deprecated. It is still present in both Windows 10 and Windows 11, but Microsoft recommends you use a third-party utility to create a complete drive image instead.
What Is a System Image Backup?
A system image backup is essentially a complete snapshot of an entire hard drive. The advantage of a system image is that if a hard drive crashes, you can replace it, restore the image, and have your system right back to where it was when the image was captured. No need to reinstall Windows or your apps. On the other hand, normal backup tools, including online backup services like Backblaze or Windows' built-in File History feature, essentially copy your files to another location.
The biggest disadvantage with system image backups---other than taking a bit longer---is that you can't restore the backup to a different PC. You're creating an image of your full Windows installation and, since Windows is set up specifically for your hardware, it just won't work as-is in another PC. It would be like trying to plug your hard drive into another PC and expecting everything to load well. With that in mind, however, image backups can still be really handy.
Third-party apps like Macrium Reflect or Acronis True Image---at least, the paid versions---do offer some advanced features you won't find in the Windows system image backup tool. For example, both support incremental backups, password-protected images, and the ability to browse backups for individual files. But free is free, and if you don't need the extra features, the Windows tool offers a solid way to perform a full backup of your system.
Step One: Open System Image Backup
The System Image Backup tool is located in the Windows Control Panel, but it's in a different place on different versions of Windows.
Open System Image Backup in Windows 10 and Windows 11
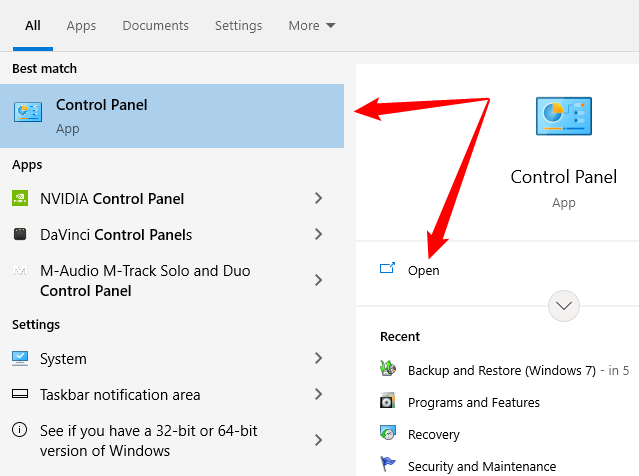
In Windows 10 and Windows 11, click the Start button, type "Control Panel" into the search bar, then press enter or click "Open."
Make sure that your Control Panel view is set to "Large Icons" or "Small Icons," and then click "Backup and Restore (Windows 7)."
You can also just search "Backup" in the search box at the top-right corner of the Control Panel window to find this shortcut.
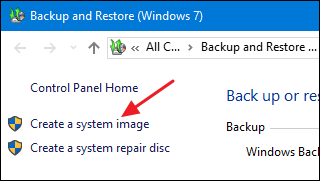
In the "Backup and Restore (Windows 7)" window, click the "Create a system image" link.
Step Two: Create a System Image Backup
Once you've opened the system image tool, the steps for creating a system image are the same in Windows 7 all the way up to Windows 11.
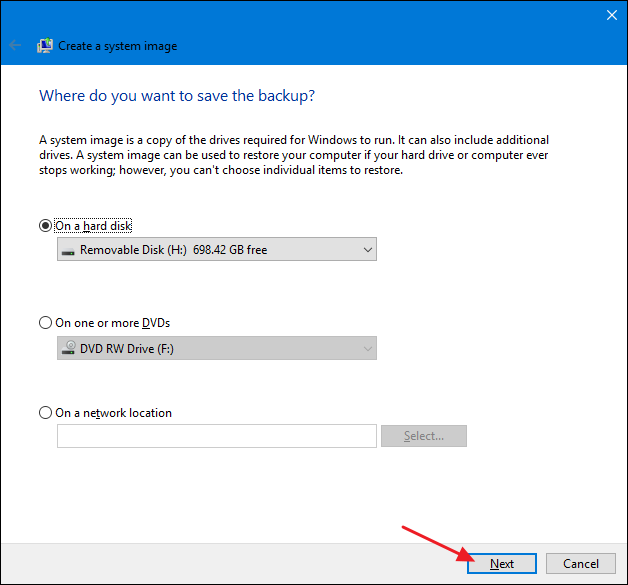
When you first open the tool, it will scan your system for external drives. You can then decide where you want to save the image. It can be to an external drive, multiple DVD's, or on a network location. Select where you want to save your backup and then click "Next."
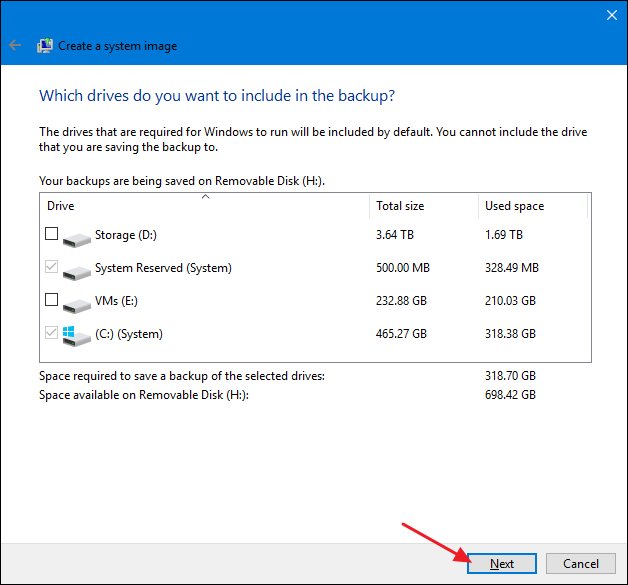
By default, the tool only backs up your system drive. You can include other drives if you want, but remember that this will add to the size of the final image. Typically, we like to create separate image backups for each drive.
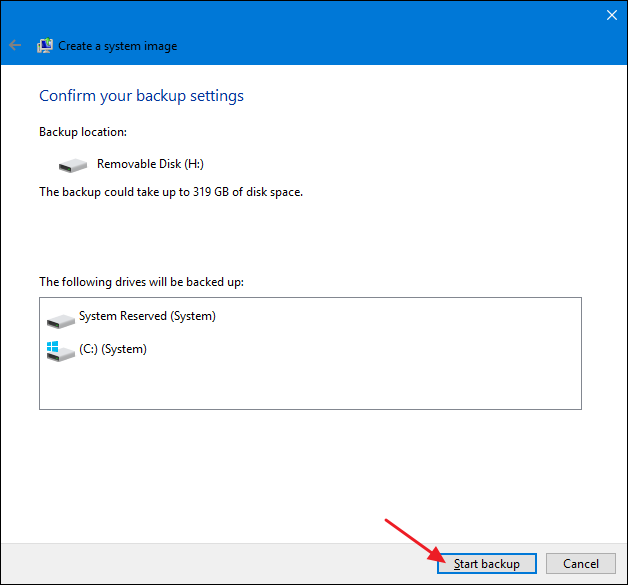
At the confirmation screen, notice the amount of space the image may take. If anything doesn't look right, you can still go back and make adjustments. If everything looks okay, click the "Start Backup" button.
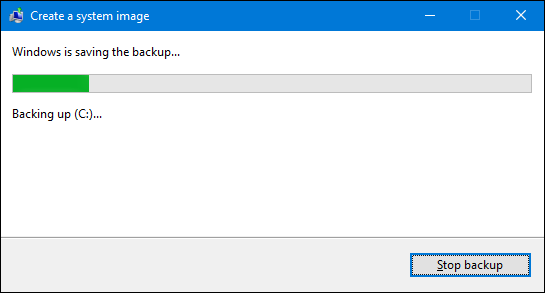
You'll see a progress meter as the tool creates the image.
It can take a while. In this example, we're backing up a drive with about 319 GB of data. It took about 2.5 hours when backed up to an external hard disk connected to our PC via USB. Your time will vary depending on your PC and the type of storage to which you're backing up. Solid-state drives will naturally be much faster.
Step Three: Create a System Repair Disc
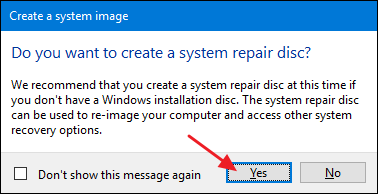
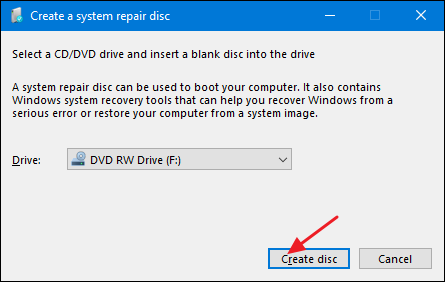
When the backup is complete, Windows gives you the option to create a system repair disc. You can use this disc to start your PC and restore from your image backup in the event you ever need to replace your hard drive and can't start Windows. We highly recommend you go ahead and create the disc, then label and store it in a secure location.
Select the drive you want to use to create the disc and then click the "Create Disc" button.
When it comes time to restore the image, you can start your PC from the recovery disc to get access to a number of recovery tools---including "System Image Recovery."
Creating an image backup can take some time, so it's best to do it when you won't need your computer for a few hours---or even overnight. And should the need ever arise when you need to put that backup to use, restoring image backups in Windows isn't very difficult.

