
Worried about archiving your tweets? Want a more powerful search? Want to see your tweet statistics? You can do all of that and more by installing ThinkUp on your home server. ThinkUp is a brilliant application (currently in beta) that will archive all of your tweets, your replies, responses, etc. so that you can search through them and find out some helpful usage statistics. It has quite a few plugins, including one that adds full Facebook support, too. It’s designed to be installed on a LAMP server; that is, Linux, Apache, MySQL, and PHP is what will provide the backbone for it. While it’s possible to install it on a Windows- or Mac-based machine, it’s most easily handled in Linux, so we’ll be using Ubuntu to show you how to get it up and running. It’s in very active development by the founder, Gina Trapani, and by many users in the community.
Prerequisites
ThinkUp is currently in beta, so there will be some bugs and things may not go perfectly, so unless you’re interested in tinkering (and maybe helping out by submitting bug reports), this may not be for you. Firstly, you’ll need to have a LAMP server up and running, and we’re going to assume you’ve got that set up already. You’ll need a personal MySQL user account already set up, too. Finally, the mail function in PHP should be working, which means you’ll need an program or script that can send mail, but if not, we’ve got you covered. Okay, to begin, we’ll need to install some extra stuff that may not already be installed, such as cURL and GD. To do that, just enter the following command:
sudo apt-get install curl libcurl3 libcurl3-dev php5-curl php5-gd

Enter your password, and let it install. To finish this off, you’ll have to restart the Apache server:
sudo /etc/init.d/apache2 restart
Alternatively, you can use:
sudo service apache2 restart

Keep your terminal window open, because you may need to switch back to it often to change some things.
SendMail
As noted above, you will need something that can send mail on your server itself. If you don’t, there’s a really easy fix for it. Just install sendmail with the following command:
sudo apt-get install sendmail
Then, we need to edit the php.ini file to point to the newly installed program.
sudo nano /etc/php5/apache2/php.ini
Hit the page down key until you find something that looks like this:
;sendmail_path =
You need to delete the initial semicolon, and append the path at the end. Change that line so it looks like this:
sendmail_path = /usr/sbin/sendmail -t –i
To save, hit CTRL+O, and enter. If prompted to overwrite, hit Y. Then exit with CTRL+X. Lastly, restart Apache, like we did in the last section. This will provide your server with the ability to send mail, which we’ll need in a little while to activate our ThinkUp account.
Installing ThinkUp
Head on over to the ThinkUp GitHub page to download ThinkUp (currently beta version 0.8). Once you’ve got it downloaded, pop this command in the terminal to extract it to your default web directory:
sudo unzip path/to/thinkup-0.8.zip –d /var/www

This will automatically create a directory called “thinkup” in /var/www. To access ThinkUp, open up a web browser and navigate to either one of the following:
http://localhost/thinkup http://your.internalip.address/thinkup
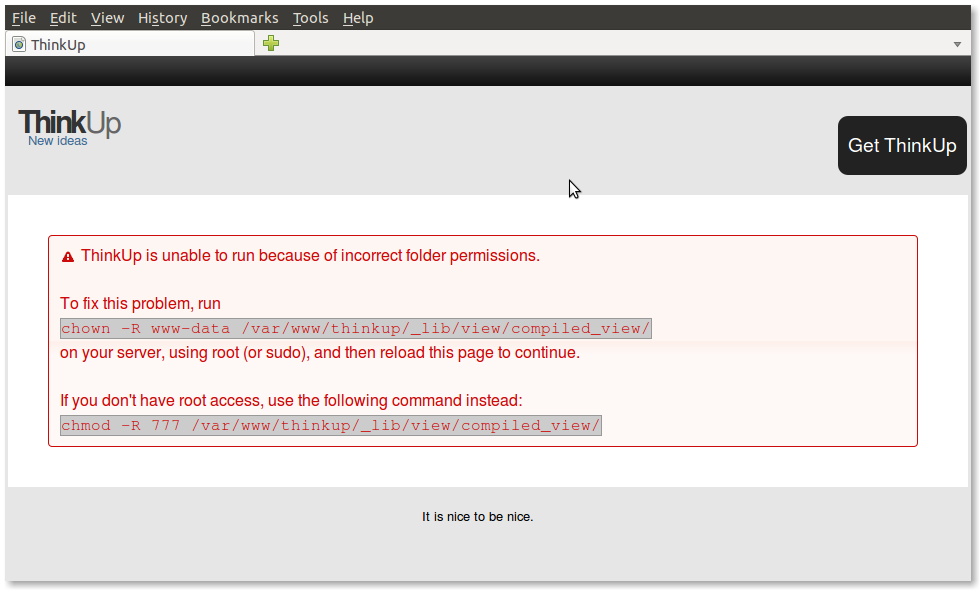

Odds are that you’ll get that error message due to incorrect permissions. You can just enter that command in a terminal to fix the issue.

Then, refresh your browser page.

Click the “installing ThinkUp” link to begin the initial configuration. You’ll see the requirements screen.

You should be good to go. Scroll down and click the button to continue.

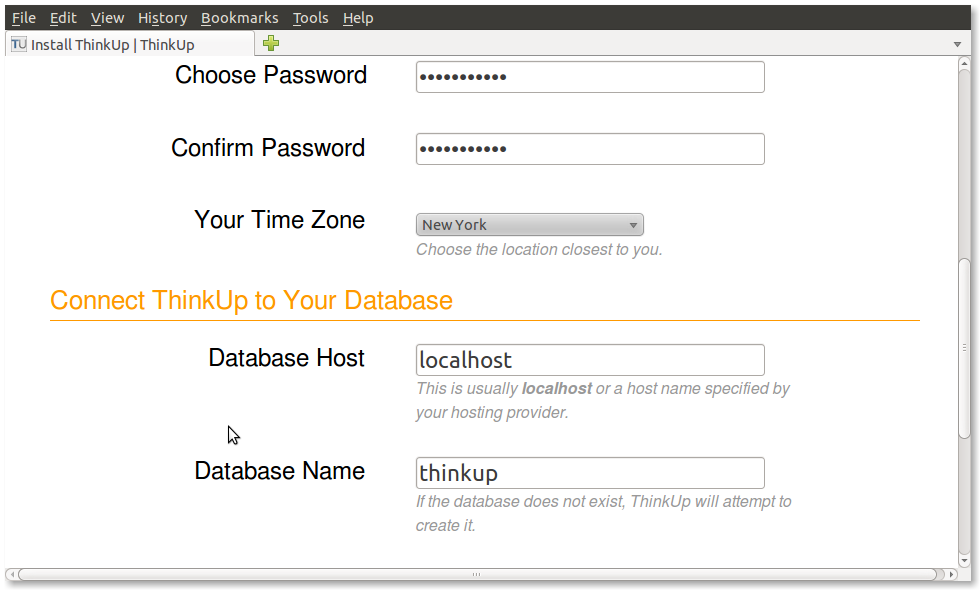
You’ll have to enter a valid email address, create a password, and set a time zone. Those are the easy options. The tougher ones come next.
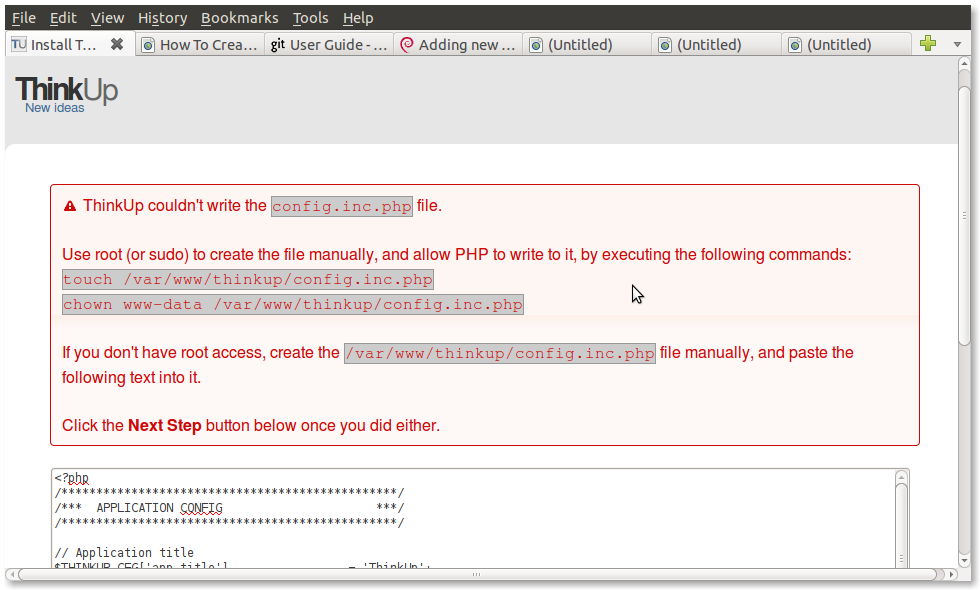
Then click the button to continue. You may see a message like this:

Just enter the two commands in a terminal to create the config file and change ownership of it.

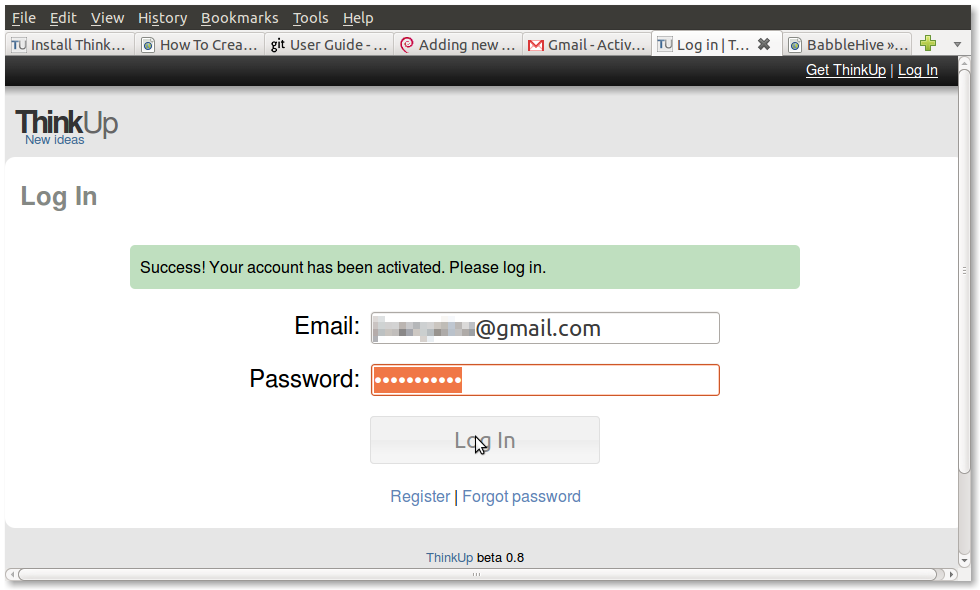
After clicking the button, you’ll see a message with a green background saying that installation was successful and that an email was sent to activate your account. Log in to your email, click the link (being sure that the IP/domain name is correct), and you’ll see a nice green “activated” message.

Enter your credentials and log in!
Configuring ThinkUp
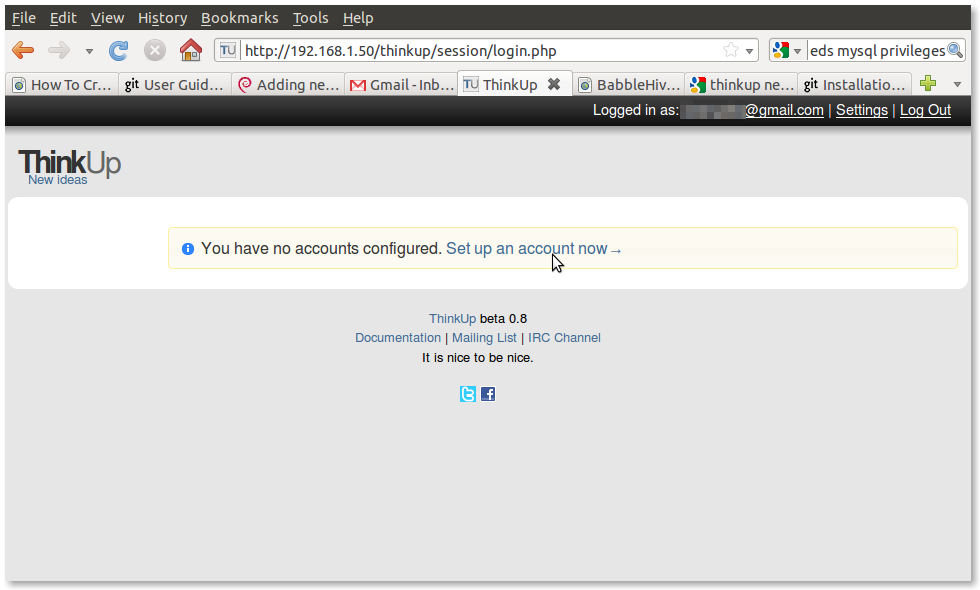
Once you’re in, you’ll see that you don’t have any accounts set up yet. Click the link to change that.

By default, it’ll ask you to add a Twitter account. Scroll down to where it says “Configure the Twitter Plugin” and follow the steps to register ThinkUp on Twitter. Be aware that you may have to change your callback URL to point to your external IP or a DNS alias. Twitter should give you some extra information: consumer and secret keys.

Be careful with these, as they are unique to this application’s interaction with your specific Twitter account! Enter these keys in your ThinkUp configuration. Next, click on “Show Advanced Options” towards the bottom to reveal this:

You can up the values like I did. Once configuration is complete, ThinkUp will use a crawler to get your info from Twitter. By increasing these error toleration and other values, we’ll be able to get more and more data each crawl. When you’re done, click the “Save” button, and scroll up. You’ll see another button that says “Authorize ThinkUp on Twitter”. Click it.

It will redirect you to Twitter, where you just need to click the “Allow” button, and then it should send you back to ThinkUp.

When you scroll up, you’ll see your account listed under “Twitter Plugin” and if you can make your stats public by click the “Set to public” button. This will make it so that you don’t have to log in to see all of your stats when you go to http://localhost/thinkup in the future.
Crawling for Data via Cron
We need to get some data into ThinkUp. Click the ThinkUp logo, or just go to your ThinkUp main page. Click on any of the stats listed in the menu on the left.

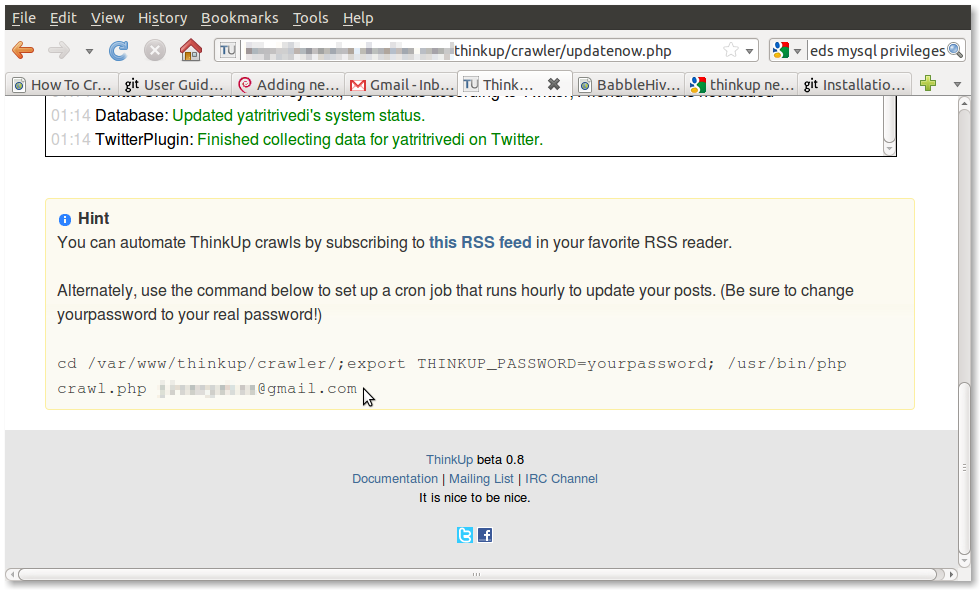
You’ll see that there’s nothing available, but you will see a link that says “Update your data now.” Clicking it will take you to another page where you can see the attempts made my ThinkUp to grab data off of Twitter for you. This is the previously mentioned crawler. If you scroll down, you’ll see a handy suggestion.

That command at the bottom? We can automate that in Linux via something called cron. Switch back to your terminal and enter the following command:
crontab –e

It’ll ask you to choose a text editor. Nano is great for beginners, and it’s what we used earlier on, so hit 2 to make that the default.

Each of the five columns up top represents time periods to repeat on: minutes, hours, day of the month, month, and day of the week. Entering a number will set those values, while entering an asterisk will ignore that criterion. Above, you see I have entered: 34 * * * * That means that every hour at the 34 minute mark, it will execute a command. Which command? Why, the one ThinkUp suggested, of course!
cd /var/www/thinkup/crawler/;export THINKUP_PASSWORD=yourpassword; /usr/bin/phpcrawl.php your@email.com
Be sure to make sure you enter your password and check the email address in this command! This will make sure that every hour ThinkUp refreshes itself to get new data. If you want to use more elaborate criteria for your crawler, I suggest starting with the Cron How-To from the Ubuntu Community Documentation. Hit CTRL+O to save, and then CTRL+X to exit.
Twitter Statistics
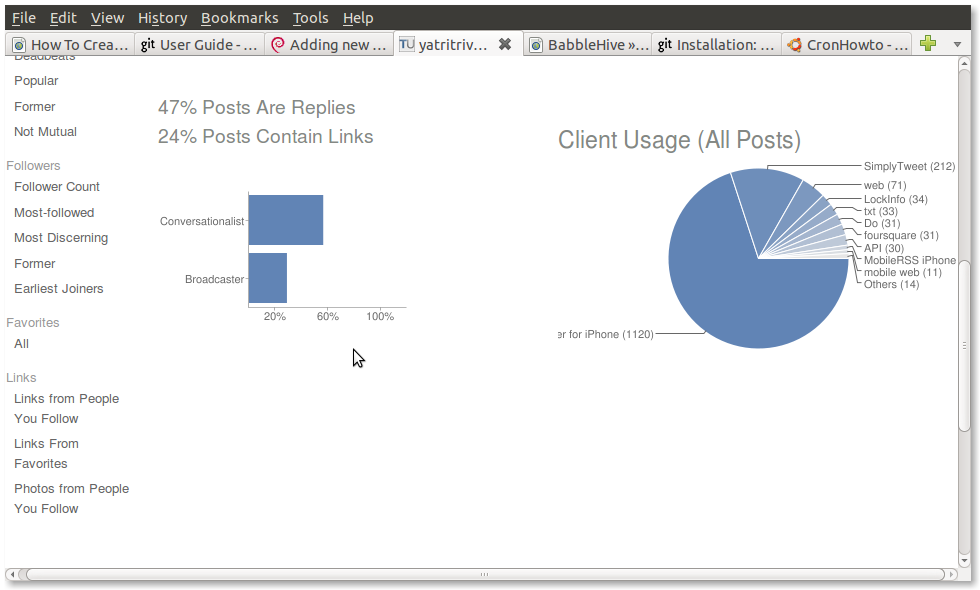
In addition to just archiving all of your tweets, replies, and other information into a MySQL database, you get to see a lot of interesting statistics. You can see your usage of specific clients, how much you reply compared to how much you tweet, how many followers you have, which of those are most followed, and much more.

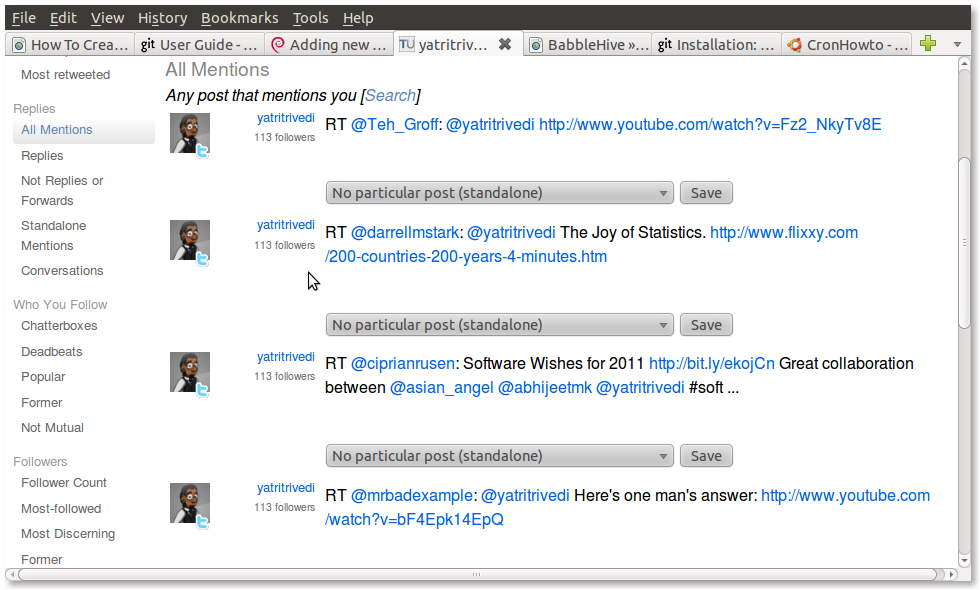
ThinkUp also pulls out some useful information for you, such as all posts that mention you, mentions that are not replies or forwards, and full conversations.

At the bottom, you can also see how ThinkUp pulls out lists of links that appear in your tweets, pictures that appear in your tweets, and more.

And, of course, you can search through any of these categories by clicking the search link.

You’ll get a great search window that’s pared down to text.

ThinkUp provides a lot of functionality with Twitter, but its Facebook plug-in is just as powerful. Once you configure ThinkUp, you can even let your friends create accounts so they can use it, too! In addition to preservation, you can also use ThinkUp to track answers to questions you post and filter out useful information from your entire timeline. It helps a lot when you’re Twitter feed is ridiculously busy or there’s a lot of following going on.