Quick Links
Photoshop and Illustrator both have a dark point many users choose to avoid---the notorious Pen Tool. It may be intimidating, but it can be mastered, and surely is not impossible to use. Keep reading for tips and videos to help.
The Pen Tool and vectors are important parts of Photoshop, and pretty much run the show within the confines of Illustrator. Scared off yet? If not, carry on, and see both how easy (and how complex) the Pen Tool really is.
Vectors Versus Pixels, Once Again

One of the most helpful things before diving into the Pen Tool in either Photoshop or Illustrator is a basic understanding of how vectors work, what they are, and how they differ from pixels. As you may remember, How-To Geek has already covered the differences between Pixels and Vectors in an older article from last year. It can be helpful to refresh your memory on the difference; simply because you may be working in Photoshop does not mean that its Pen Tool is not exclusively a vector drawing tool. Once you're satisfied in your knowledge about vectors, you can confidently dive into using Photoshop's Pen Tool.
Straight Lines Versus Curved Lines
The first thing to know about the Pen Tool is that it creates two basic types of lines, Straight Lines, and Curved Lines. These lines are created by the kinds of points you draw when you select the Pen Tool and click around in your canvas.
Creating straight lines between points is as simple as clicking single points with your mouse or stylus. When using the Pen Tool, any single click without dragging will create a point or connect to your last active point with a straight line.
In the sample video, you can see the active line creating points, then connecting back to the original point, creating a complete, contiguous shape.
Curved lines are a little more complex, and the main reason behind most users frustration. They are created by clicking and dragging to create an anchor point that affects the next curve that is drawn. Every new point that is added affects the curve before and the curve after it, which can frustrate users new to the Pen Tool. However, there are a myriad of tools to add, edit, and re-edit these points, curves, and anchor points, again and again.
The Pen Tool and Friends

As one of the most complicated tools in the Photoshop and Illustrator toolbox, the Pen Tool has a lot of accompanying tools in order to be a little more user friendly. Let's take a look at some the ones in Photoshop, and see what can help you save some frustration.

Pen Tool: The be all and end all, the Pen Tool is why you're here in the first place. Click and hold on the Pen Tool in the toolbox to bring up these other options in the contextual menu.
Freeform Pen Tool: Photoshop only. The Freeform Pen Tool allows you to draw with your mouse or stylus. When you release your drawn line, Photoshop will create a path based on your drawn line.
Add Anchor Point Tool: A tool useful for adding points of articulation to a line you've already drawn. Simply select this tool and click or click and drag to add new points to it.
Delete Anchor Point Tool: A long name to say it removes points of articulation from a line you've already drawn. Select this tool and click any point you've drawn on any line to delete it.
Convert Point Tool: With the Pen Tool active, shortcut key

. More useful that it sounds, the convert point tool allows you to change single click "angular" style points to click and drag "curved" points. It will also allow you more precise control over your points, as you can use it to move your anchor points.

Path Selection Tool: Selects and moves the entire connected path without changing its shape, moving points or anchors, or changing what you've drawn other than simply moving it around. Click and hold down the Path Selection tool in your toolbox to select the buried "Direct Selection Tool."
Direct Selection Tool: Can select individual points, lines and anchors, moving them around and warping lines and paths. Useful for re-editing your lines and anchor points once you've drawn them.

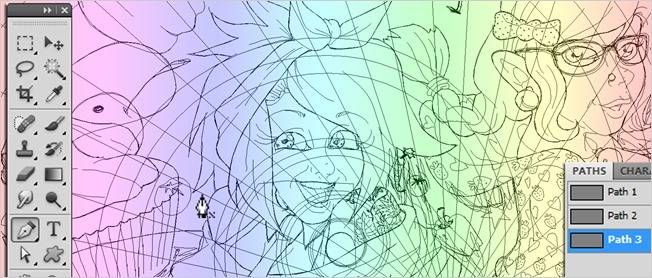
The Paths Panel: If you can't see this, you can go to Window > Paths to open this panel. Similar to the layers panel, Photoshop works with various paths in these different containers within this panel. Switching from Path 1 to Path 2 will make any lines drawn for Path 1 disappear from the screen. Photoshop will only show one of these active paths at a time. Keep in mind that each of these containers can hold dozens if not hundreds of actual lines and points that don't connect and Photoshop will still consider them "Path 1" or "Path 2." Think of it as a "layer" of paths, only you can't have more than a single layer turned on at a time.

Rectangle Tool, et al: A set of tools that draws regular vector shapes. If you are uncertain of how vectors work, you might want to experiment here to get your sea legs with Photoshop's vector abilities. Otherwise, these tools will have little effect on your use of the Pen Tool, and can safely be ignored when drawing with it.
Comparing, Manipulating Your Two Types of Points
The two types of points, as we've shown before, are "made" of the same types of information. Clicking and dragging in combination will create various types of points, allowing you to create and manipulate complex drawings.
With the Pen Tool selected, use the shortcut key

to pick the Direct Selection arrow. This will allow you to move points and anchors around, changing your curves and location of your lines.
Again, with the Pen Tool selected,

plus clicking on a line will allow you to add points to it.

plus clicking and dragging will allow you to add curving points to a line.

also allows you to move the curve anchor points independantly of each other, as shown in the video above. Watch and rewatch it, as all of these techniques are very useful in drawing accurate lines.
Drawing Complex Curves and Mastering the Pen Tool
Combinations of these techniques will allow readers to draw lines to follow elegant curves with surprising precision. It does not come immediately and is frustrating at times. While explaining the usage of the tool and the various helper tools will only get readers so far in learning the Pen Tool.
The fact of the matter is that it is somewhat difficult to understand and requires a lot of practice to become accurate at drawing curves. It can be helpful to see how certain complex curved shapes are drawn, as in the video above. While practice makes perfect, this how-to should give you a good start on figuring out some of the more complicated and confusing aspects of the tool and all the associated tools and panels required to even have a basic understanding of it.
Does the Pen Tool still give you nightmares? Send your Photoshop and Graphics questions to ericgoodnight@howtogeek.com, or simply add them in the comments section below. Your question may be featured in a future Photoshop article on How-To Geek.
Image Credits: All artwork copyright the author. Please do not use without permission. Pixels versus Vectors image credited in its original article.