A Comma Separated Value (CSV) contains data separated by commas (and sometimes other characters) and is generally used to exchange data from one application to another. If you have a list of data in a Word document, converting it to a CSV file can help you get it into other apps.
Let’s say you’ve been keeping all of your email contacts organized in a Word file and you’d like to let an online application clean it up for you. You’re likely going to need a CSV file to achieve this. In fact, several of these applications you’d find online may only support CSV files because the file works across the Mac, Windows, and Linux platforms. Pretty efficient.
Go ahead and open the Word file that contains the data to be imported. In this example, we’re going to be showing a very small email list.
As you can see, all of our data is separated by commas and are on separate lines, similar to the row/column structure you’d find in Excel. The structure of a CSV file can get a bit complicated, but this is a very basic example.
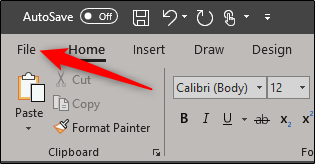
Once you’re ready, click the “File” tab located at the top-left of the window.
In the pane on the left-hand side, select “Save As.”
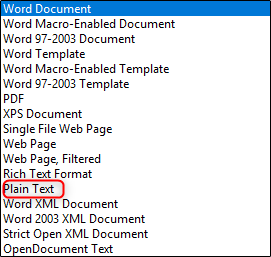
Select the “Plain Text” file type from the list of options. This will save your file as a TXT file. Click “Save.”
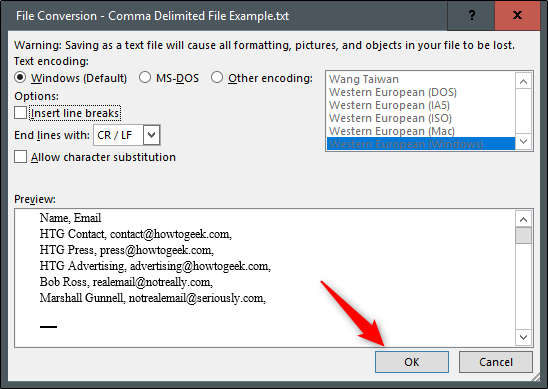
Once you save, you will receive a warning message stating that saving as a text file will cause formatting, pictures, and objects in your file to be lost. With a simple file such as this, we have nothing to worry about. Leave everything as is and click “OK.”
Now, let’s open up Microsoft Excel. When you open Excel, select “Open” in the left-hand pane.
Locate the recent file that we saved as a TXT file. Note that you might have to select “Text File” from the file option type drop-down when browsing or else the file will not appear. By default, Excel will only show Excel files.
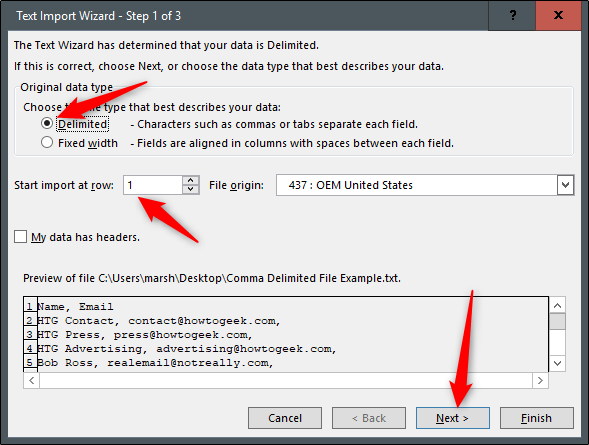
Once you’ve selected the file and clicked “Open,” the Text Import Wizard window will appear. Here, make sure that the “Delimited” option is selected. You can also choose the row at which your data begins. We will keep ours on the first row. When you’re ready, click “Next.”
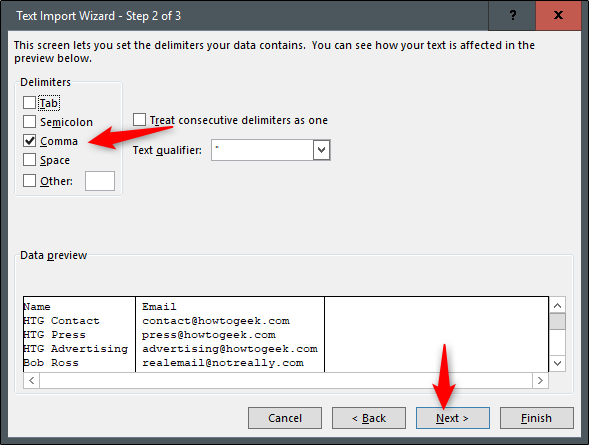
In the next window, make sure you select “Comma” in the Delimiters section. You’ll notice a change in the preview window. When you’re ready, click “Next.”
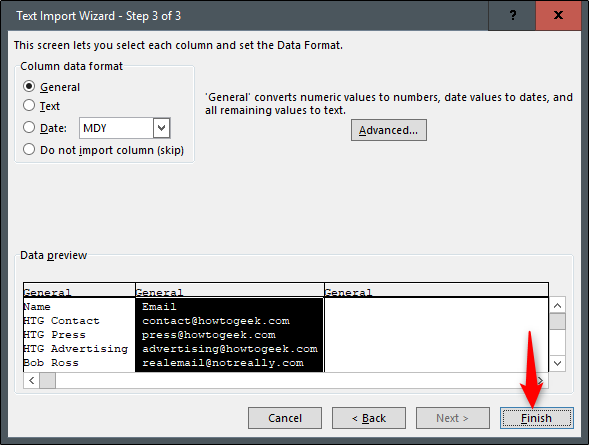
In the final window, you’ll need to specify the column data format. We’ll leave ours at “General,” but depending on what type of data you’re importing, you might want to choose a different option. When you’re ready, click “Finish.”
Our data should now be successfully imported and neatly organized in Excel!
Now all that’s left is to save the file as a CSV file. Head over to the “File” tab.
Select “Save As” in the left-hand pane.
In the file type box, you’ve probably noticed there are three different types of CSV files. They are as follows:
- CSV UTF-8
- CSV (Macintosh)
- CSV (MS-DOS)
There is very little difference between the first and third option. You’ll want to select the second option if you’re a Mac user. In this example, though, we’ll be selecting the “CSV (MS-DOS)” option.
Now all that’s left to do is click "Save." You’ve now successfully converted your Word file to a CSV file.


