Quick Links
Laying down some vocals? Starting your own podcast? Here's how to remove noise from a messy audio track in Audacity quickly and easily.
This is the second part in our series covering how to edit audio and create music using your PC. Be sure to check out the first part in the series, where we covered the basics of using Audacity, and then check out how to add MP3 format support as well.
Removing Noise in Audacity
Open up your file in Audacity, and find the largest contiguous silence in the track. What we're going to do is find a baseline for the "noise" so that Audacity knows what to look for. You can play through the audio to find some silence, but once you do, hit the "Stop" button, and highlight the silence by left-clicking and dragging. It's just like selecting anything else, really.

Next, go to Effect > Noise Removal.

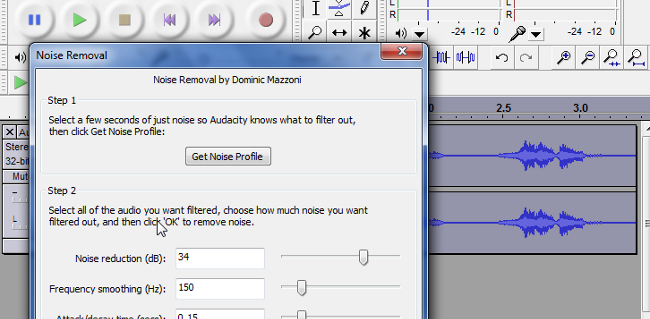
You'll see a window pop up like so:

Click on the "Get Noise Profile" button and the window will go away. Now, select the portion of the track you want to remove noise from. For me, it was everything, so I hit CTRL+A to select all.

Again, go to Effect > Noise Removal. By moving the slider for noise reduction, you're telling Audacity how much to filter out. Higher values will be more aggressive removal, while lower values will be more subtle.

You can click the "Preview" button if you want to listen to a small snippet of your track. You can leave the other two sliders alone, and hit OK when you're done. Give your track a listen, and if you need to tweak, you can always hit CTRL+Z to undo and start over. If you reduce by too much, the track will noticeably sound a little off. It's best to be more subtle, that way the audio still sounds natural. The changes may not be so obvious on the waveform, so I zoomed in to illustrate the smoothing of the waveform. Here's what it looks like before and after the effect is processed:

Enjoy your noise-free audio.