Quick Links
Security is super important, but sometimes speed is of the essence. If you live and work in an environment where you are confident of your privacy, your Mac can automatically sign you in without a password. Here's how.
Warning: If you follow this process and your Mac is lost or stolen, anyone with access to it will be able to access your data, completely unfettered. That may be a risk that is worth taking, but only you can make that decision. If you use this technique, we recommend enabling it when you're at home or in another secure location and disabling it when you're not.
Assuming you want to proceed, let's get started. We performed this process on macOS 10.14 Mojave.
How to Enable Automatic Login on Your Mac
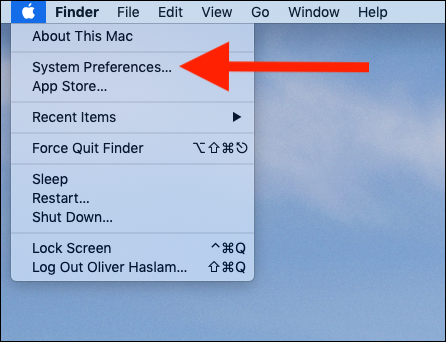
To start, lock the Apple logo at the top of the screen and then click "System Preferences."
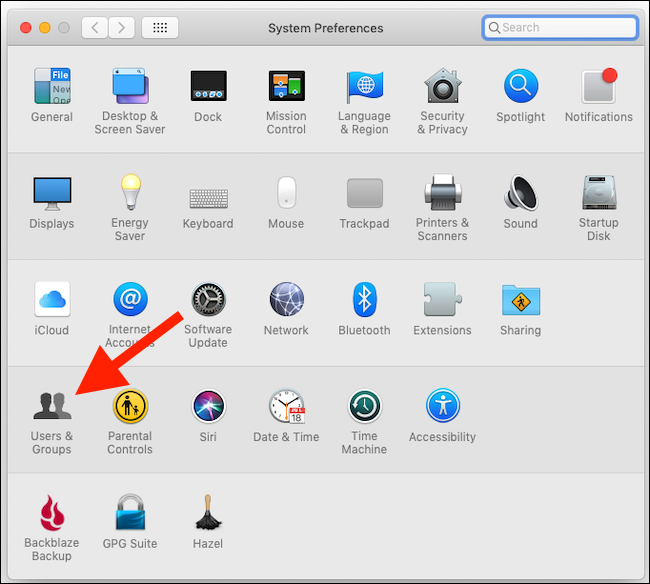
Next, click "Users & Groups."
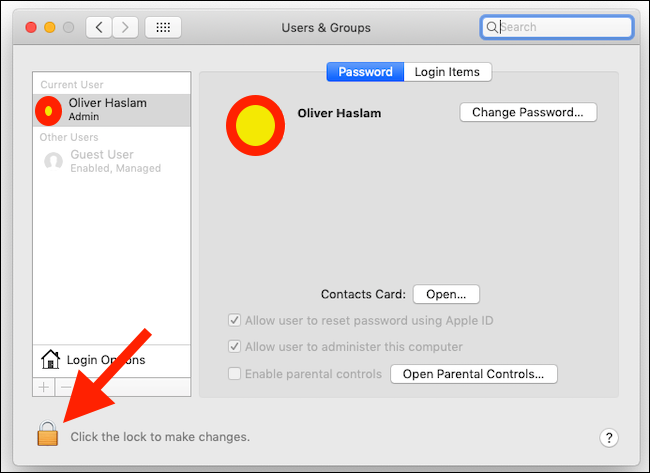
Click the padlock icon and enter your account password. This needs to be an account with administrator privileges to work.
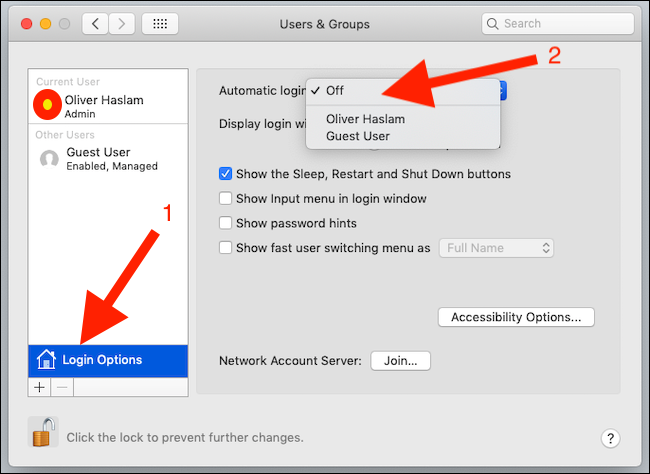
Once you have successfully authenticated, click "Login Options" and then click the "Automatic login" drop-down. Select the name of the user you wish to have your Mac automatically log in. Again, you'll need to enter a user password, this time for the account you selected to log in.
Note: if your user account is grayed out, you likely have FileVault encryption enabled or that user account uses an iCloud password to sign in. You must disable FileVault encryption (System Preferences > Security & Privacy > FileVault > lock icon > Turn Off FileVault) and use a local password (System Preferences > Users & Groups > [Account Name] > Change Password) before you can enable automatic login.
Once this process is complete, the next time you restart your Mac it will automatically log into the pre-selected account.

