Microsoft has been busy adding new tools to Office over the last few years, and Forms is one you'll find useful if you want to create a survey, poll, quiz, or questionnaire. Let's take a look at how it works.
Forms is an online-only tool that's free to use, though you will need to sign in with a free Microsoft account. You can export all the responses to the form into Excel (also free to use online) for viewing, filtering, and reporting. If you've never used it, open up the Forms site and click either the big green "Get Started" button in the middle of the screen or the "Sign in" link in the top right. Sign in to your Microsoft account or create yourself a new account.
Once you've done that you'll see a splash screen if you've not created a form before, which you can go ahead and close.

How to Create a Form
Forms is pretty intuitive to use, but there are some bells and whistles hidden away if you know where to look. We're going to keep it simple by creating a basic questionnaire, so click "New Form" to start.

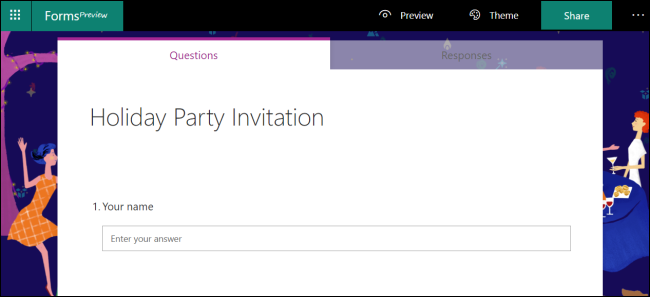
This opens a blank form. Click "Untitled form" and type in a name for your questionnaire.

Once you've entered a title, you've got the option to add an image and a description. For now, we're going to get straight into the questions, so click on "Add question" to get started.

When you add a question, you can choose the question type: multiple choice, some text, a rating, or a date/time. If you click the three dots at the end, you'll also get the option to add a ranking, a Likert scale or a Net Promoter Score question.

We'll go with a multiple choice question. Click "Choice" to open a new multiple choice question.

Add the question and then add whatever options you want people to choose from. We've stuck with the default two choices, but we made the question required, so people have to choose. There's no "Save" option in Forms, as your data is saved automatically as you go. If you want people to be able to choose more than one of the answers you list, you can select the "Multiple Answers" option.

When you're finished, you can click away from the question to see how it'll look to people who fill it in. (Note the red star, which means anyone filling in the form is required to answer this question.)

Click "Add question" to add another question, and continue until you've added all the questions you want. Click the "Preview" option on the top right menu to see the whole questionnaire as your users would see it, and try entering answers to see if it works as expected.

If you want to change the theme of the questionnaire, click the "Theme" option and pick either a solid color or background image. If you want to use a custom image for the background, there's an "upload image" button in the bottom right.

Before you share your form with people, there are some additional settings you can access by clicking the three dots in the top right of the page and then clicking "Settings" from the menu.

The only Settings option that's on by default is "Accept responses." This means that when you share the questionnaire with people, they'll be able to fill it in.

The other settings let you choose a start and end date for when people are allowed to fill in the form, whether to randomly shuffle the order of the questions for each person who opens it, whether you get an email notification when someone fills the questionnaire in, and the option to customize the default thank you message that people see when they've finished the questionnaire. Change these settings as you see fit, and you're ready to share your questionnaire.
Click "Share" in the top right of the page. This will give you four options to share the questionnaire with people:
- A link you can copy (the default option)
- A QR code you can download as a .png file
- An HTML tag you can embed in a web page
- An email that contains the link

If you work in an office that uses Office 365, you might have additional options that allow you to share the questionnaire with just people in your organization. Select whichever option you want, and share your questionnaire with people!
How to View Responses to Your Form
Once people start filling in your questionnaire, you'll want to look at the responses. We'll assume you've gone off and done other things for a while, so log back into Forms, and you'll see your questionnaire on the front page.

Click on it, and then on the "Responses" tab.

You can view the individual answers by clicking "View results," or you can export all the responses to Excel.

If you want to see a summary or delete existing responses, click the three dots and choose from the menu.

That's the basics of creating your questionnaire in Microsoft Forms. There is extra functionality for creating a quiz and branching (showing different questions based on the responder's answers) if you want to explore more, but for most people, this introduction will cover what you need.