Quick Links
Although most advertisements have made their way online, you can’t deny the power of a flyer. If you have a product or service you’re selling and want to post a flyer on your local bulletin board, vertical tear-offs at the bottom make it easy for people to grab your contact info. Here's how to make them in Word.
Creating Vertical Tear-Offs
Make sure the meat of your flyer contains enough content and design to attract passerby. Microsoft provides a few flyer templates that can get you going in the right direction, or you can create your own. However, make sure you leave enough white space at the bottom to give room for your vertical tear-offs.
Once you’re finished with the flyer’s content and design, it’s time to create your vertical tear-offs.
As we mentioned before, it’s important to leave enough space at the bottom for the tear-offs. A good rule of thumb is to give the bottom of the page a 3” margin (which is what we're going with in our example), but it depends on how much information you plan to put in your tear-offs.
To set the margin, go to the “Layout” tab and click the “Margins” button.

From the drop-down menu, choose the “Custom Margins” option at the bottom.

The Page Setup window will open with the “Margins” tab already selected. Set the bottom margin to 3” and then click “OK.”

That should give you plenty of room for your tear-offs.
To make the tear-offs, we're going to use a table in the document footer. The table should only be one row but can be between eight and ten columns. Again, this depends on the amount of information you want to put in your tear-offs.
Double-click the footer area of the document to open it. Next, switch to the “Insert” tab and then click the “Table” button.

On the drop-down menu, use the grid to create your table. We're going with an 8x1 table---eight columns and one row.

Now, you'll need to resize your new table to match the 3” margin. Just grab the bottom edge of the table and drag.

Now that you've got the table set up, it's time for the text. Most tear-offs use a vertical text direction to fit in more information.
To rotate the text, highlight all the columns in your table, right-click any of the selected columns, and then select “Text Direction” from the context menu.

You can choose whichever orientation works best for you. Once you select your orientation, click “OK.”

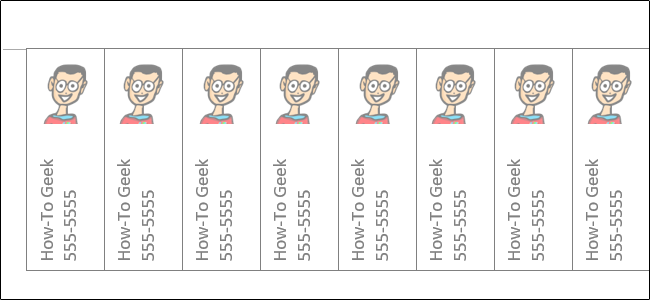
Now you can enter your information---name, phone, email, or whatever else you want.

You can use a different font, change the text size, or even insert a small image---it's all up to you.
If you do insert an image, be prepared for the table to get a little out of whack because Word defaults to inserting the image inline with the text. Don’t worry; it’s an easy fix.
First, click the “Layout Options” icon next to the image.

On the pop-up menu, select the “Behind Text” options.

Now all that’s left is to resize the image and position it where you want it.

Now, copy and paste the contents of that cell into the other cells of your table.
All that's left to do is print it out, cut the lines on the sides of the tear-offs, and hang your flyers. Good luck!