Quick Links
If you're an iPhone or iPad owner you've probably come across share and action extensions, but what are they and how do you use them? Both add power and capabilities to apps, and they can change the way you use your devices.
A share extension makes it quick and easy to share content with people or, in some cases, other apps. Imagine reading a great guide on How-to Geek, but you need to leave to catch a train. Using a share extension, you could save that guide to your favorite read-later service. Want to send it to a friend? There's a share extension for that, too. Think of share extensions as ways to get data out of apps in some way, and you'll be spot on.
Action extensions work much the same way, but let you use features from other apps without having to open them explicitly. A great example here is creating new tasks and projects in your favorite task manager, using the source as an attachment. Before the arrival of iOS 12 and its improved support for password autofill, accessing passwords from within password managers was also a great example of a powerful use for action extensions.
Both action and share extensions work the same way, which means if you know how to use one, you know how to use both. We're going to explain how to enable extensions, re-order them, and use them here.
How to Enable an Action or Share Extension
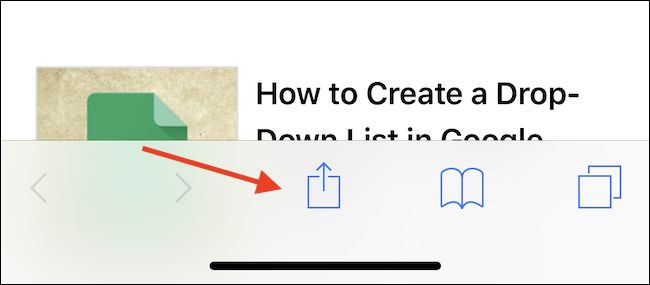
To enable an action or share extension, open an app that allows you to share content. Safari is a good example because everyone has it and it's usually on the home screen. Once open, visit a website and tap the "Share" button in the navigation bar at the bottom of the screen.
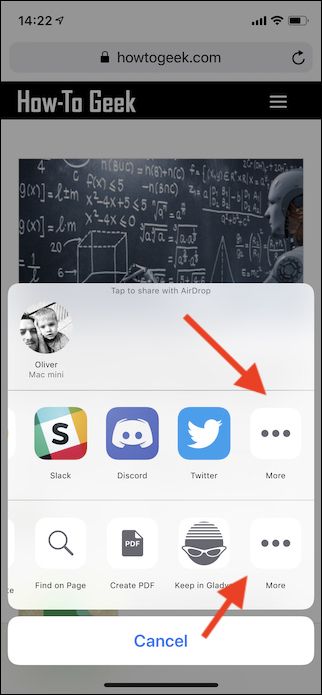
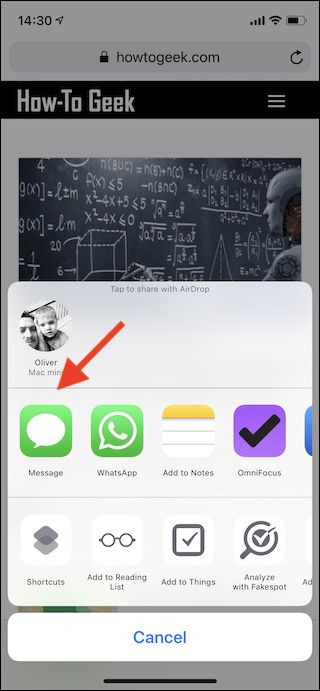
You will now see the Share Sheet, an area that shows share extensions on the top row and action extensions on the bottom. Depending on which type of extension you want to enable, scroll all the way to the far right and tap the "More" button.
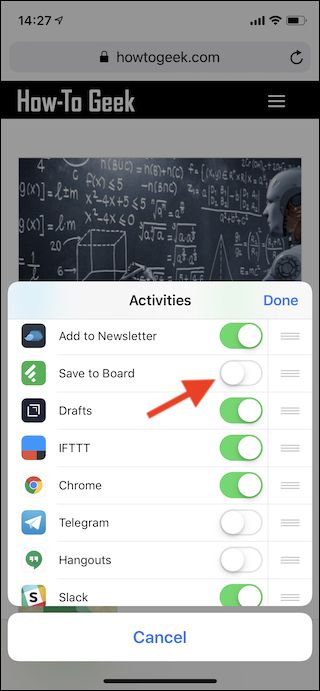
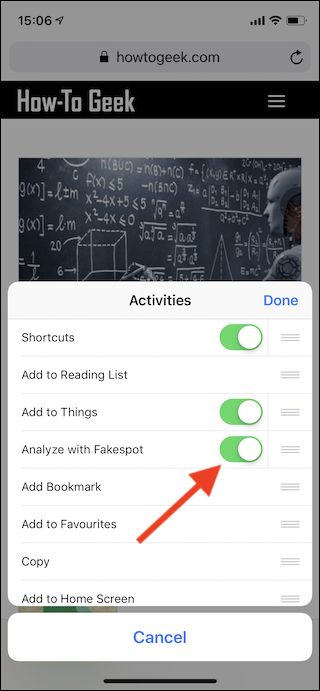
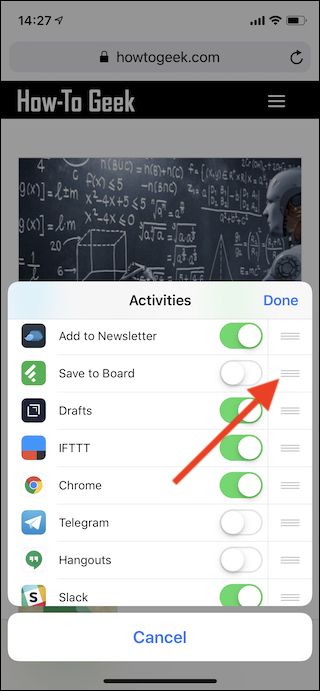
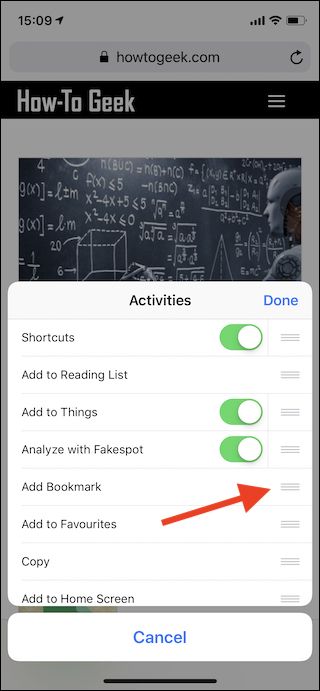
The next screen shows every available action or share extension, depending on the row you selected. To enable an extension, toggle the switch beside it.
How to Reorder Action or Share Extensions
Re-ordering extensions is vital if you have a lot of them enabled, making it easier to find the ones that you use most frequently. To get started, let's use Safari as our jumping off point once more. Again, after visiting a website tap the "Share" button. You'll see the Share Sheet we mentioned earlier with share extensions in the top row and action extensions in the bottom. To re-order those extensions, again scroll to the far-right of the list and tap the "more" button. Now, when you see the list of extensions, tap and hold on the three horizontal lines beside one and then drag it up or down the list to reorder it.
How to Use Action or Share Extensions
Once you have all of your extensions enabled and ordered just so, using them is a simple case of tapping the "Share" button and then tapping the icon of the extension that you want to use. One thing to remember here is that only extensions that work with the content at hand show up in this view. That means that extensions that can only accept or work with images will not appear if you are sharing a website, for example.


