Outlook includes a Quick Steps feature that lets you apply multiple actions to a message with one click. Outlook includes several default Quick Steps, but you also can create your own (and delete the default ones if you don't need them). If you regularly perform the same set of actions, creating a Quick Step and assigning it a hotkey can save you a lot of time. Here's how they work.
The Default QuickSteps
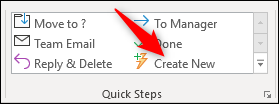
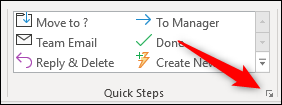
You can find Quick Steps on the "Home" tab of Outlook. When you first start, you'll see the default Quick Steps there. You can click any of them to apply the included actions to a selected message.
The default quick steps include:
- Move to ?: Opens a window for you to select a folder to which you'd like to move the message.
- To Manager: Creates a forwarded copy of the currently selected message with your manager's address in it.
- Team Email: Creates a blank message addressed to the members of your team. (If your email is managed by your employer then depending on how your Exchange administrators have configured your mailbox, Outlook may already know who your manager and team members are. If not, you'll have to fill these in the first time you use these quick steps.)
- Done: Marks the message as read and complete, and then sends it to a specified folder. The first time you use this one, you'll have specify the folder, but from then on Outlook will remember your choice and send it to that folder every time you use the Quick Step.
- Replay & Delete: Opens up a reply to the currently selected message and then deletes the currently selected message after you send the reply.
Outlook only displays Quick Steps that are available. If you haven't got a message selected, for example, then only the "Team Email" Quick Step is shown because the other defaults work on an existing message.
How to Create a Quick Step
To add a new Quick Step, click the "Create New" option in the Quick Steps box.
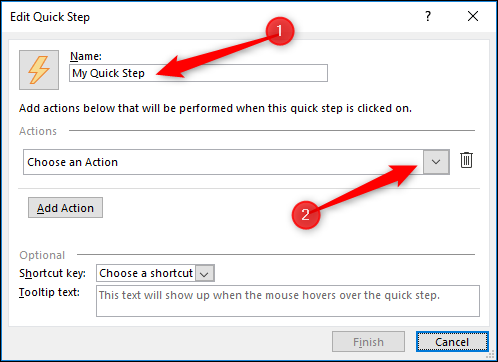
This opens up a new window where you can name your quick step and choose the actions you want it to perform.
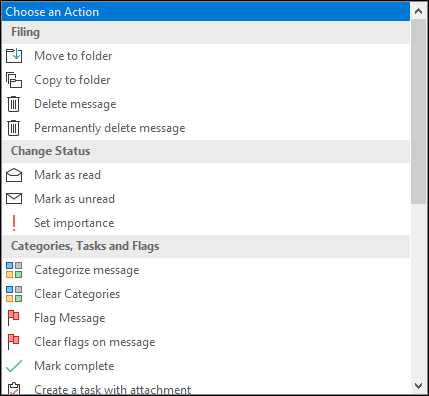
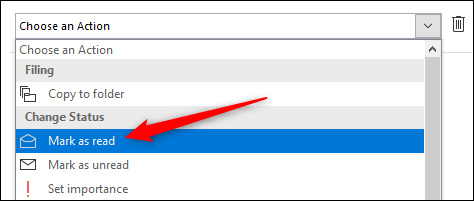
When you click the "Choose an Action" drop-down menu, you get a list of possible actions, each of which may give you additional options to select.
We're going to add two actions: one to move the message to a folder and one to mark it as read.
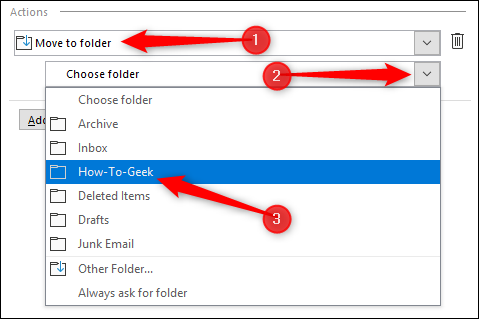
Select the "Move to folder" action and choose the folder to which you want messages moved.
Next, click "Add Action" to add a second action.
Select "Mark as read" from the drop-down menu.
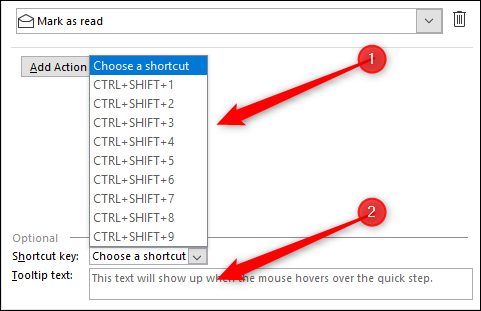
Optionally, you can choose one of the built-in shortcut keys and add some text to be displayed when you hover over the Quick Step with your pointer (a brief description reminding your of the actions the Quick Step takes is helpful).
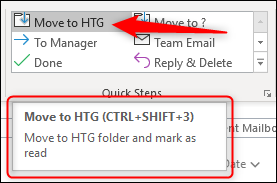
Click "Finish," and your new Quick Step will appear in the Quick Steps box in Outlook. If you hover over the Quick Step, you'll see the shortcut key you chose and any tooltip text you entered.
Now all you have to do is select your messages and click the new QuickStep (or hit the shortcut key combo) to apply its actions.
How to Edit or Delete a QuickStep
If you want to edit or delete a Quick Step, click the small arrow at the bottom right of the Quick Steps group on the Ribbon.
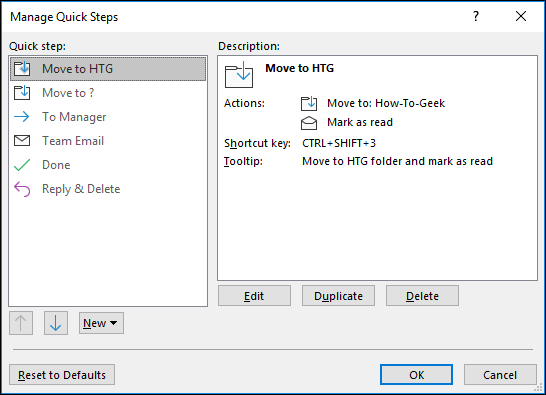
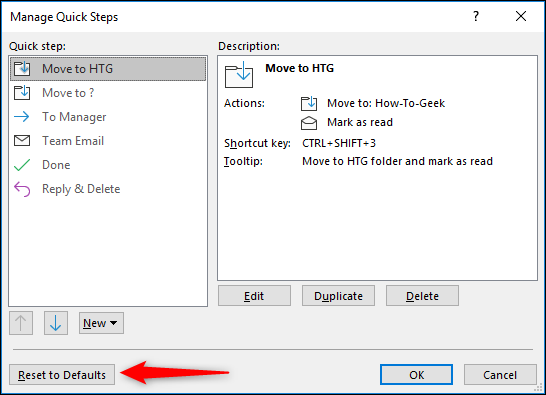
This opens the "Manage Quick Steps" window.
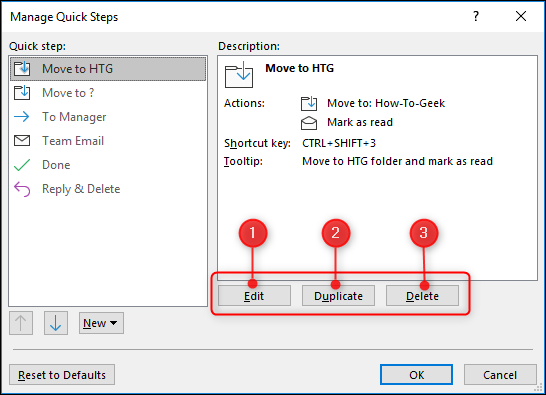
Here you've got the option to edit, duplicate (which creates an exact copy of the selected Quick Step if you want a similar one but with a slight variation), or delete a Quick Step.
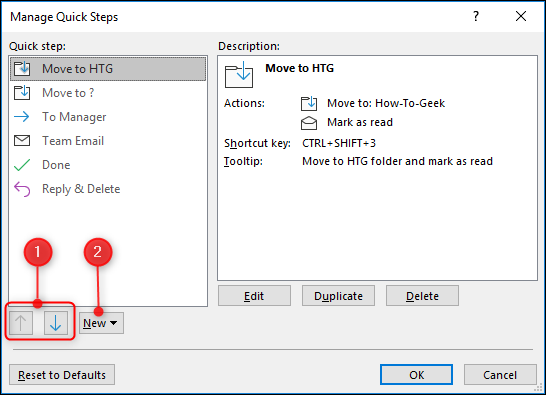
You can also change the order in which your Quick Steps appear on the Ribbon or create a new Quick Step.
Finally, there's the option to "Reset to Defaults."
Selecting the "Reset to Defaults" option deletes any Quick Steps you've created and recreates any default Quick Steps you might have deleted. It also removes any changes you've made to the default Quick Steps. Because you can't undo this action, you'll be shown a warning. Click "Yes" to make the reset happen.
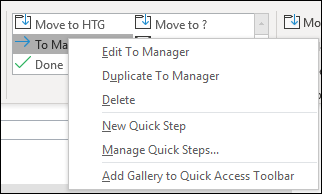
You can also bypass the "Manage Quick Steps" window for individual Quick Step actions by right-clicking a quick step in the ribbon. This brings up a context menu where you can edit, duplicate, or delete the Quick Step.
And that's Quick Steps. We haven't gone through all of the possible actions you can add to a Quick Step because there are tons of them and it's a pretty intuitive interface once you know how it works. If you want to make your Outlook experience more efficient and less time-consuming, Quick Steps are a great place to start.

