Photos are some of the most important files people want to keep safe. Storing them in the cloud is nice, but you might also want the peace of mind of having your pictures stored locally. Luckily, it's easy enough to copy your Mac's Photos library to an external drive.
This guide assumes you're using the actual "Photos" app on your Mac, the default if you've used iCloud Photo Stream or imported from your iPhone. If you just have your photos in a folder on your Mac, all you need to do is plug your external drive in and move them over. If you're using another app that maintains a library, you'll have to configure things within that app.
Moving Your Photos Library
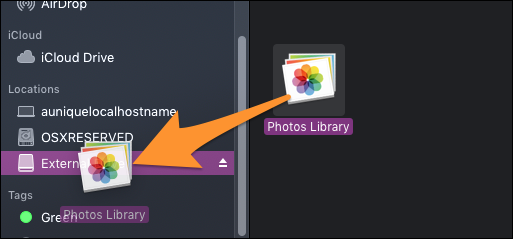
To understand how this works, it's important to know how the Photos app catalogs files. It's actually simple; there's a single file that contains your entire library. If you want to back this up, you plug in your external hard drive and drag the whole file over to that hard drive in the sidebar of Finder.
The harder part comes when you need to change which Photos library you want to use. You'll have to change the location from which the Photos app is reading.
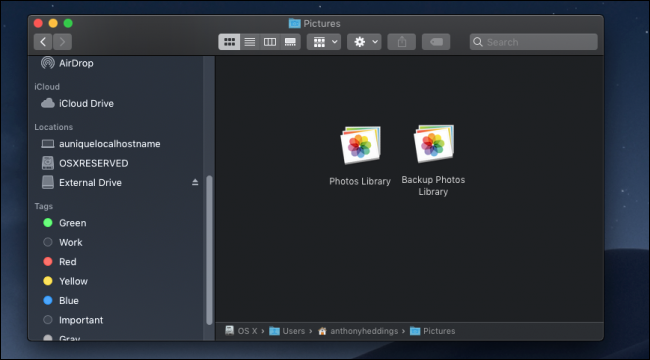
In the image below, I've got two Photos libraries, the default one, and a backup library.
While you can access the backup library just by double-clicking it---which will open it in the Photos app---it's better to switch Photos to use this one by default. You can always switch back to the regular library when you need to.
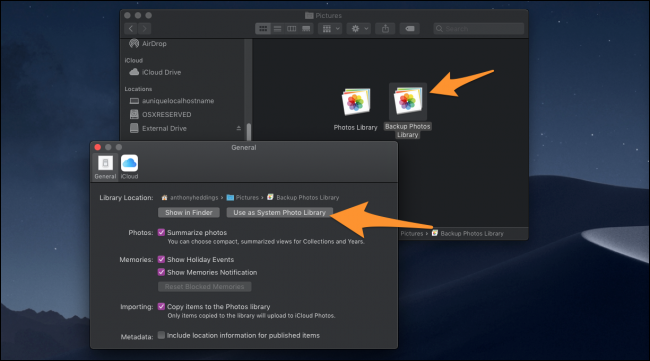
Double click the backup library to open it, then open the preferences for Photos from Photos > Preferences in the menubar.
Select "Use as System Photos Library," which will change the default to the new library.
Back Up Your Drive Automatically With Time Machine
Backing up files manually is not the best solution, as you can never predict when your computer will break. It's better to back up automatically, so you don't have to think about it at all. Apple's built-in Time Machine is the best tool for backing up to an external drive. You can read our guide on setting it up to get started.
Image Credits: dourleak/Shutterstock


