Quick Links
When you've got a PC completely infected with viruses, sometimes it's best to reboot into a rescue disc and run a full virus scan from there. Here's how to use the Avira Rescue System to clean an infected PC.
Download the Image and Make a Bootable USB Drive
- Download the Avira Rescue System ISO.
- Download and install Rufus, or use the portable version.
- Insert the USB drive into the computer.
- Open Rufus, select the Avira Rescue ISO, and then select the USB drive you inserted.
- Click "Start" and then wait for the process to finish.
The Avira Rescue System can be installed on a USB drive or a DVD. If you're going to use the USB drive --- which is definitely the better option --- you'll need a USB drive with at least 4 GB of storage space.
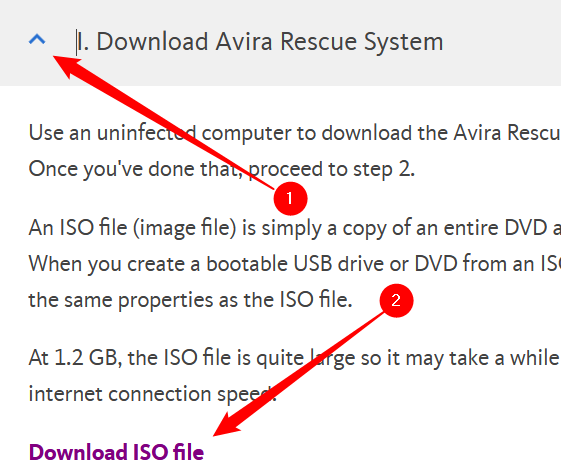
Download Avira Rescue System from the Avira website. You'll need to click the chevron (tailless arrow) next to the section titled "Download Avira Rescue System" to reveal the download link. The file is about 1.2 gigabytes, so it could take a few minutes.
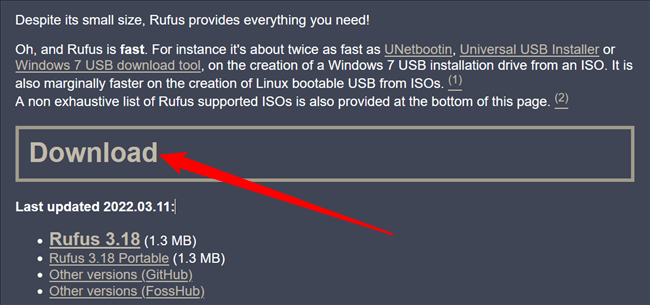
You also need to download and install a utility called Rufus. Rufus takes an ISO file, like the system rescue utility from Avira, and uses it to create a bootable USB drive. You can use the regular Rufus installer or the portable version --- the features are identical, so
it doesn't matter which ones you use.
Install Rufus or launch the portable version. The files should be in your default downloads folder, unless you've changed the location. Then select your USB drive from the drop-down menu, and select the Avira Rescue System ISO by clicking "Select."
Using Rufus to make a bootable USB drive will completely erase any files currently on the USB drive. Be sure to check it for important files first.
Double-check you have the right USB drive selected, and then click "Start." Be prepared to wait --- creating a bootable disk can take a while, especially if you're using a USB 2.0 flash drive or port.
Download and Burn the Image to a Disc
After you download the ISO image from Avira, you'll need to burn that ISO image file to an optical disc. We prefer using the method built into modern versions of Windows, but ImgBurn works if you need or want a separate tool.
Using the Avira Rescue System to Clean an Infected PC
- Boot into the Avira Rescue System OS.
- Launch Avira Rescue System, if it doesn't automatically.
- Run an update to get the latest definitions.
- Run a full system scan.
Once you've rebooted and put the USB drive or CD in, you'll probably need to change your boot order or boot one time from the USB or CD. Once it boots, you'll need to select your language --- use the arrow keys to move up and down the list, and then hit Enter to pick a language. You may have to hit Enter again to "Start Avira Rescue System."
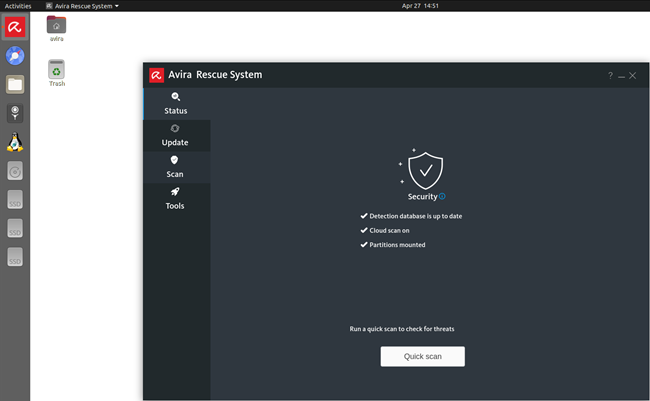
The Avira Rescue System should launch automatically once the desktop loads. Click on the red umbrella icon in the top left-hand corner of the screen if it doesn't. This is what you should see.
If you're looking at this and thinking "Huh, this seems familiar...", that's because the Avira Rescue System operating system is a lightweight, highly customized version of Ubuntu Linux.
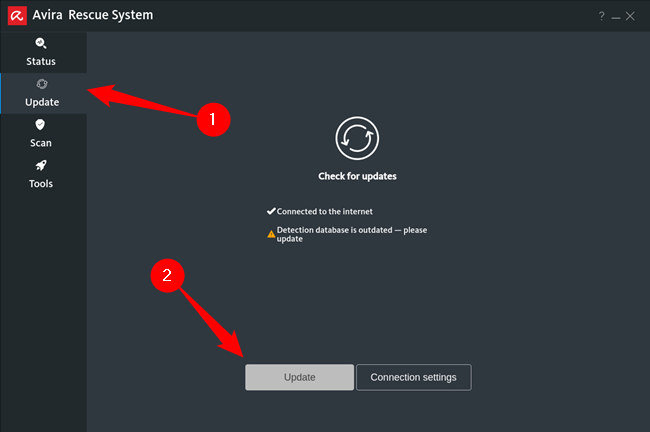
The first thing you'll want to do is switch to the Update tab, and then hit "Update." Click "Yes" on any prompts that might appear when you check for updates.
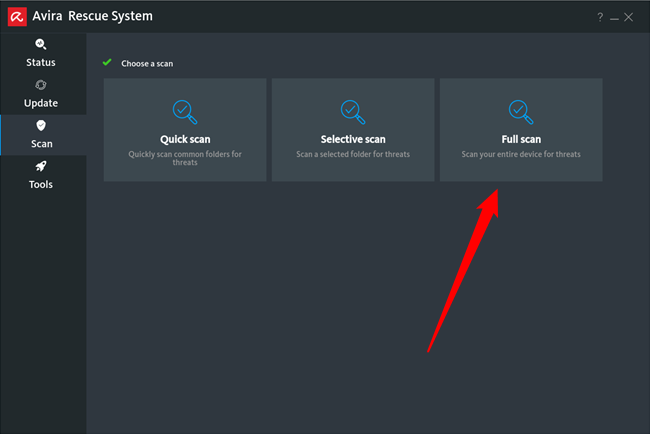
Now switch over to the "Scan" tab and select the scan type you'd like to run. If you don't know, you should probably click "Full Scan," just to be safe. The time required for the scan to run will increase with the size of your hard drive.
If a virus is detected you'll be notified. Be sure to follow any recommendations about removing malware. It's as simple as that. Enjoy your virus-free PC.

