Ubuntu Linux uses groups to help you manage users, set permissions on those users, and even monitor how much time they are spending in front of the PC. Here’s a beginner’s guide to how it all works.
Users and Groups
Ubuntu is set up for a single person to use when you installed it in your system, but if more than one person will use the computer, it is best for each person to have their own user account. This way each person can have separate settings and documents, and files can be protected from being viewed by the other users on the same PC. Normally Linux computers have two user accounts—your own user account, and the root account, which is the super user that can access everything on the PC, make system changes, and administer other users. Ubuntu works a little differently, though—you can’t login directly as root by default, and you use the sudo command to switch to root-level access when you need to make a change. Linux stores a list of all users in the '/etc/groups' file. You can run this command in the Terminal to to view and edit the groups and users in your system:
sudo vigr /etc/groups
Creating User Accounts
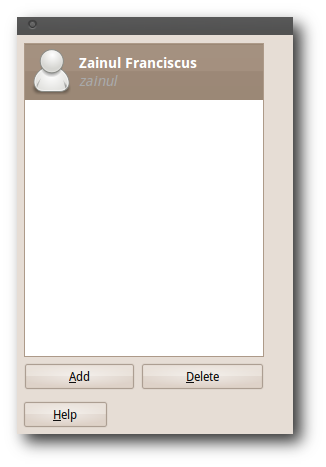
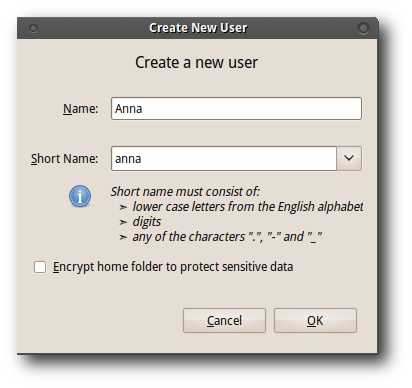
To create a new user, you can head to System –> Administration -> User and Groups, and click the “Add” button to add a new user.
Give the appropriate name that identifies the other user and tick the “encrypt” checkbox to secure their home folder.
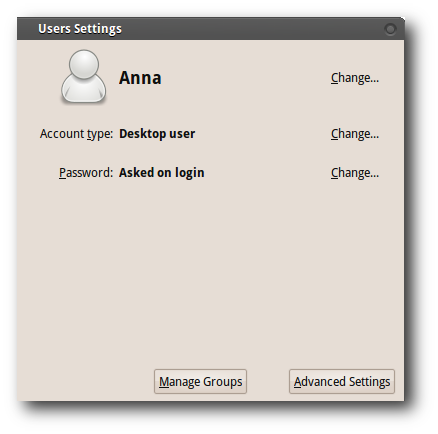
Click the “Advanced Settings” button to configure the user's privileges.
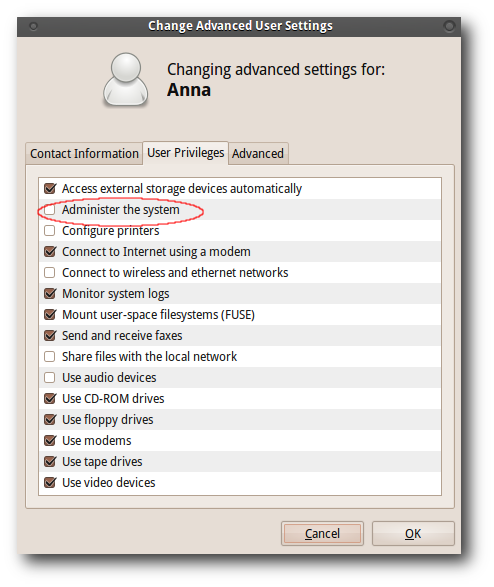
The user management module lists Anna's privileges under the “User Privileges” tab.
We recommend that you remove the “Administer System” privilege from other user accounts. This is to make sure that other users cannot easily change critical system settings that may jeopardize your Linux box.
Linux File and Folder Permissions
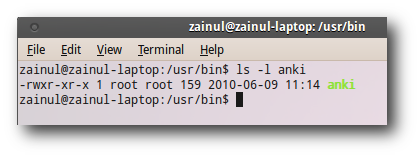
Each file in Linux has a set of user and group permissions, and you can use the ls -l command to show the full set of permissions and attributes from the terminal.
Reading from left to right, each item in the list means:
<permissions> 1 <file owner> <file group> <file size> <file date> <file name>
For instance, in the example showing a file named anki, the permissions are rwxr-xr-x, the file is owned by the root user and belongs to the root group, and it’s 159 bytes. The permission flag has four components, the first character being the flag, usually used to indicate whether it’s a directory or a file—a directory would show a “d” and a regular file will show a “-“. The next 9 characters are broken up into sets of 3 characters, which indicate user, group, and everyone permissions.
<flag><user permissions><group permissions><everyone permissions>
In this particular example, we’ve got rwxr-xr-x, which can be broken up like this:
<flag><user permissions = rwx><group permissions = r-x><everyone permissions = r-x>
The permissions correspond to the following values:
- r = read permission
- w = write permission
- x = execute permission
This means that for the file in question, everybody has read and execute permissions, but only root has access to write to the file.
Changing Group Ownership of Files and Directories
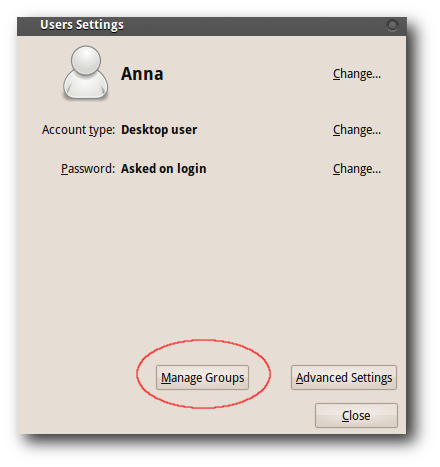
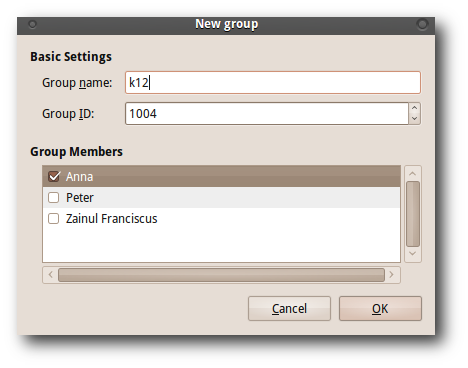
Anna is a 7th grader and her brother Peter just enrolled in a programming course in a university. Anna will be more interested to use the educational software for her mathematics or geography homework, compared to Peter who is more interested to use software development tools. We can configure Anna's and Peter's access to these applications by assigning them to the appropriate groups from the “Manage Groups” module.
Let's create two user groups, a K-12 student group, a University student group, and assign the appropriate user accounts to each group.
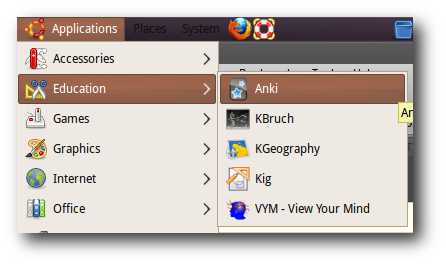
We should give the K-12 students the privileges to run the educational software.
Linux stores most of the executables under /usr/bin, for example, Linux stores Anki under /usr/bin/anki. If you’re not sure where a file is located, the which command is a convenient way to find out the location from the terminal:
which anki
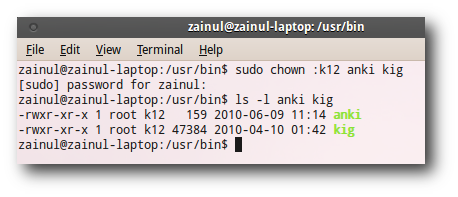
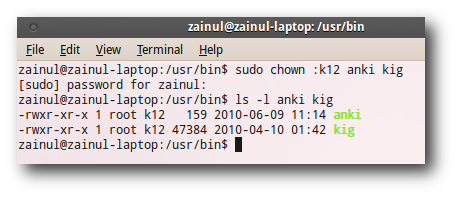
Let's assign Anki and Kig to the k12 group using the chown command, which uses the following format:
sudo chown :[group name] [files list]
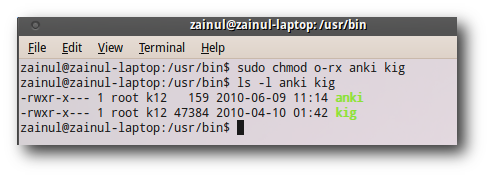
You can also revoke the read and execute access from other user groups using the chmod command.
sudo chown :[group name] [files list]
This command gives the member of K12 group access to Anki and Kig. We should restrict the access rights of the university group from Anki and Kig by removing the read and execute permission from the “Other” groups. The format of the command is:
chmod [ugoa][+-=][rwxXst] fileORdirectoryName
The first command that we executed in the command line removes the read (r) and execute (x) privilege from the “Other” group. The “O” option indicates that we are modifying the access right of the Other group. The '-' option means that we want to remove certain file permissions specified in the parameters that follow the '-' option. The man page of chmod gives a detailed explanation of these options.
man chmod
Monitoring Computer Usage
Timekpr allows us to set give each user a limited amount of computing time, and you’ll need to add the following PPA to your software sources so that you can install Timekpr from the Ubuntu Software Center.
        deb http://ppa.launchpad.net/timekpr-maintainers/ppa/ubuntu lucid main
deb-src http://ppa.launchpad.net/timekpr-maintainers/ppa/ubuntu lucid main
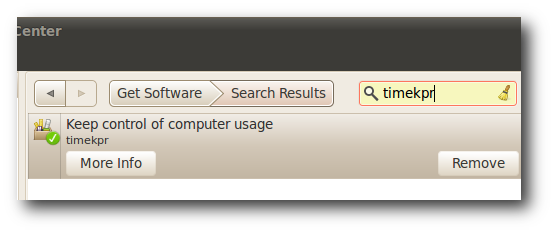
Ubuntu Software Center is the easiest way to install Timekpr—just use the search box and it should come right up.
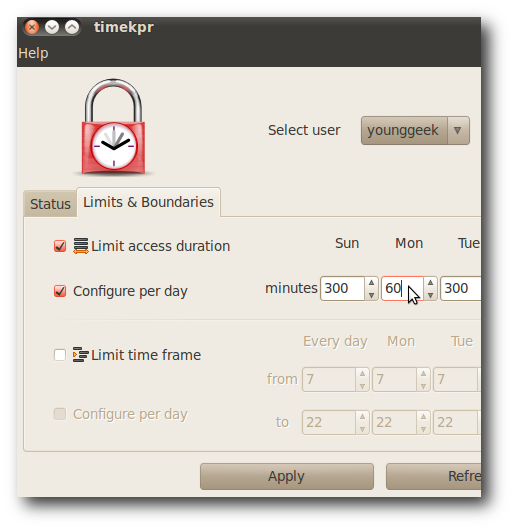
Timekpr allows us to limit the computer usage time by a certain time frame on each day of the month. For example, we can specify the computer time usage for 300 minutes on Sunday and 60 minutes on Monday.
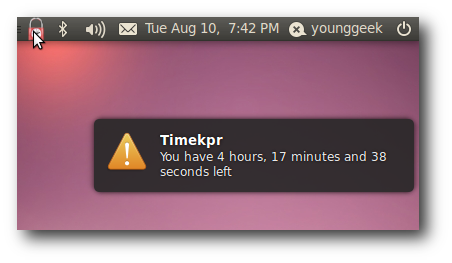
Timekpr will appear on the user’s task bar and lock the desktop when the computing time of the user is up.
User and Groups is quite a big concept to cover within one article. Did we miss something important ? Feel free to share some knowledge with the other readers in the comments.


