Quick Links
Apple will likely release the stable version of macOS Mojave sometime in September or October of 2018. If you've already opted into the beta and want to opt back out, you can downgrade back to High Sierra.
What You Need to Know
If you installed macOS Mojave on a secondary volume (or partition) on your Mac, you can quickly remove that volume.
Otherwise, this process will be easiest for you if you followed our recommendation to create a Time Machine backup before installing the Mojave beta. You can restore the entire Time Machine backup to put your Mac back into the state it was in before you installed macOS Mojave. Your files will be reverted to that state, too, so you'll want to back up any new files or files that have changed since you installed the beta so you can restore them afterward.
If you don't have a full Time Machine backup created on High Sierra, you must install High Sierra from scratch. You'll lose everything, including your personal files and installed applications, so be sure you have everything you need backed up first.
Consider Waiting for the Stable Release
Look, let's be honest: At this point, you might want to stick with macOS Mojave until it becomes a stable operating system within the next month or two. Mojave should be pretty stable by now, and Apple will hopefully fix any lingering bugs soon.
By opting out of the beta now, you will probably have to restore from an old backup or wipe your Mac and start from scratch, both of which are inconvenient and time-consuming. When the final version of Mojave is released, you can upgrade from the beta directly to the stable version without losing any of your stuff.
How to Remove a Secondary Mojave Partition
If you created a secondary partition for macOS Mojave, this is an easy process. If you don't remember whether you created a secondary partition, you probably didn't. The default option is to upgrade from the stable version to the beta, replacing High Sierra with Mojave.
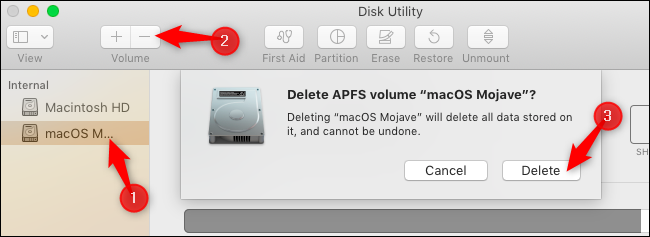
First, boot back into High Sierra. Reboot your Mac and while it's starting, press and hold the "Option" key. This lets you access the Startup Manager and select the High Sierra drive. After High Sierra starts, head to Finder > Applications > Utilities > Disk Utility, select the Mojave volume and then click the "-" button above Volume to remove it.
Warning: You will lose all files on the macOS Mojave volume, so back up anything important before you do this.
How to Restore High Sierra From a Backup
If you have a High Sierra backup you want to restore, you can do so from Recovery Mode. However, you must erase the macOS Mojave drive before restoring the backup.
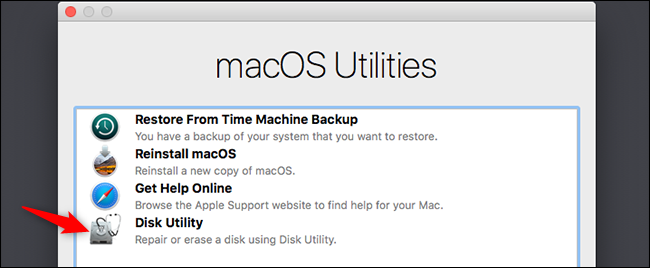
First, reboot into Recovery Mode. Reboot your Mac and press and hold Command+R as it boots. Your Mac will download the recovery files from Apple's servers and load Recovery Mode normally.
Click the "Disk Utility" option in Recovery Mode.
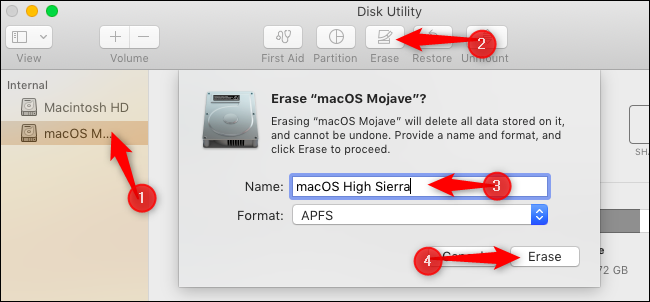
Select the macOS Mojave volume and click "Erase" on the toolbar. Give the volume a new name---like "macOS High Sierra"---if you like and then click "Erase" to continue.
Warning: This will delete the contents of the macOS Mojave volume, including your personal files. Ensure you have any important files backed up before continuing.
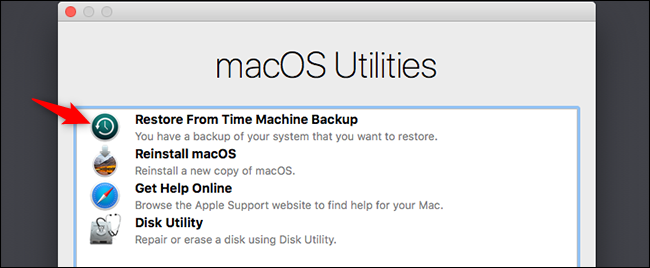
Quit the Disk Utility application, go back to the main Recovery Mode screen, and click "Restore from Time Machine Backup."
Go through the standard restore process to fully restore your Mac from a Time Machine backup. You'll be asked to connect the Time Machine backup drive to your Mac if it isn't already connected.
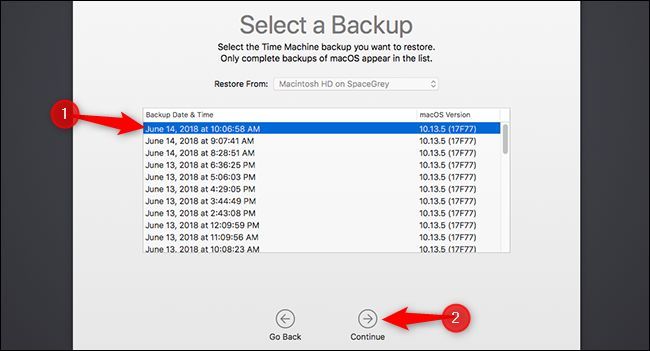
When you're prompted to select a backup, choose the most recent one made on macOS version 10.13, which is High Sierra.
Finally, you must choose the drive to which you want to restore your macOS system. Choose the one you just created.
After the process completes---and it could take a while, depending on the size of the backup and speed of your backup drive---you'll have your macOS High Sierra system back, just as it was when you created the backup.
How to Wipe Your Mac and Install High Sierra
If you don't have a High Sierra backup, you'll have to start over from scratch. This means erasing your macOS Mojave system and installing a fresh High Sierra system. You will probably have to create High Sierra installation media to do this, too.
However, if your Mac originally came with High Sierra, you don't need to create a bootable installer before continuing.
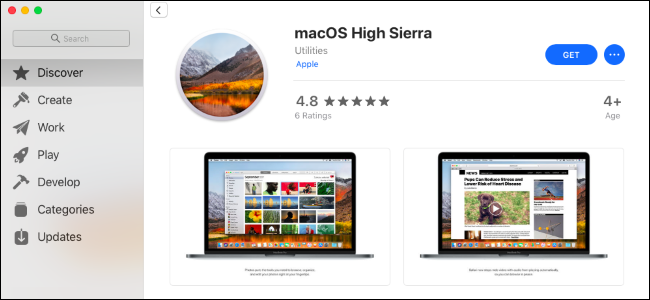
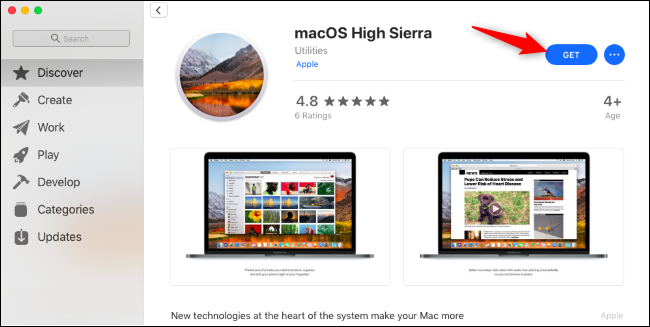
If your Mac didn't originally come with High Sierra, you can create a High Sierra from within macOS Mojave. Open the macOS High Sierra page on Apple's website, click "View in App Store," and then click "Get" to download High Sierra.
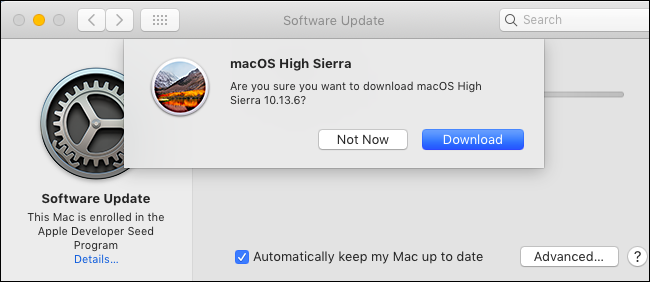
Click the "Download" button when your Mac asks if you're sure you want to download High Sierra. The download is about 5.22 GB in size.
Your Mac will warn you that High Sierra is too old and can't be opened on Mojave. That's fine.
After it's downloaded, use the macOS Terminal to create a bootable USB installer. You will need a USB drive with at least 8 GB of free space. (Unfortunately, you can't use the graphical DiskMaker X for this on Mojave just yet, so you must use the terminal.)
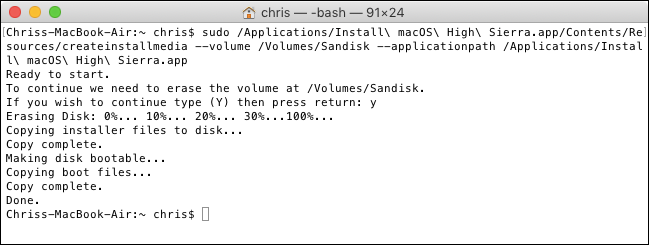
First, connect a USB drive to your Mac and open a Terminal window from Finder > Applications > Utilities > Terminal. Second, run the following command, pointing it at the path of your USB drive.
For example, if your USB drive is named "Example" and is mounted at /Volumes/Example after you plug it in, you must open a Terminal and run the following command:
sudo /Applications/Install\ macOS\ High\ Sierra.app/Contents/Resources/createinstallmedia --volume /Volumes/Example --applicationpath /Applications/Install\ macOS\ High\ Sierra.app
Follow our detailed instructions for creating a bootable macOS High Sierra installer if you need more information.
The command will take a while on the "Copying installer files to disk" phase, depending on how fast your USB drive is. That's normal, so just give it a few minutes.
When you're ready, restart into Recovery Mode by rebooting your Mac and holding Command+R as it boots. Click the "Disk Utility" shortcut in Recovery Mode.
Select the macOS Mojave volume and click the "Erase" button on the toolbar. Enter a new name for the volume, if you like, and click "Erase" to wipe it.
Warning: This will erase everything on your macOS Mojave volume. Back up any important files before doing this.
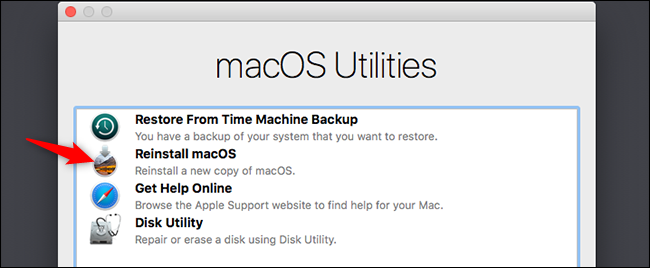
If your Mac originally came with High Sierra, exit Disk Utility and choose the "Reinstall macOS" option in Recovery Mode to reinstall High Sierra.
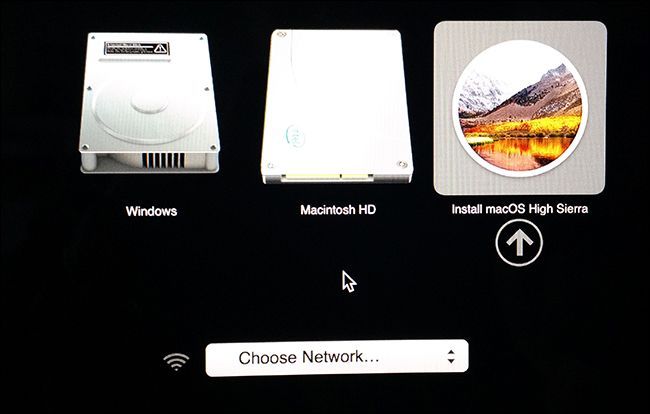
If your Mac didn't originally come with High Sierra, restart your Mac and hold the "Option" key while it's booting to open the Startup Manager. Select the "Install macOS High Sierra" option to boot from the drive you just created and begin installing High Sierra on your Mac.
You can upgrade to the stable version of macOS Mojave normally when it's released. Of course, you can wait as long as you like before upgrading to confirm whatever issues you were experiencing are fixed, too.

