So you’ve installed the iOS 12 beta and, well, you're experiencing some bugs. That's okay, because you can quickly downgrade to the stable iOS 11.4.1.
Let's Start with a Few Warnings
Downgrading will completely wipe your iPhone or iPad, and that can present a problem. Let’s say you didn’t follow our advice to do a full backup before installing the iOS 12 beta. In that case, if you downgrade to iOS 11, you’re looking at a full device wipe and any data you don’t have backed up in another way (like photos copied to your computer outside of iTunes or iCloud) will be erased.
And, even if you did back up your device while it was on iOS 11, any changes made or data created on your phone between the iOS 12 beta update and the rollback will be lost.
If you were just playing around with the iOS 12 beta on a spare device, that’s not a big problem. If you installed the iOS 12 beta on your primary device and you didn’t back it up first, however, you might want to consider just sticking with iOS 12 to save yourself the lost data. It should get more and more stable as Apple releases new beta updates, anyway.
Lastly, this tutorial will only help you downgrade from the iOS 12 beta to iOS 11 and it will only work up until the public release of iOS 12. After that, Apple will stop signing older iOS firmware versions and you will not be able to downgrade from iOS 12.
Those cautions aside, let’s jump right into the pretty easy rollback process.
What You Need
To follow along today, you need just a few things. You’ll need your device, a USB data cable for said device, an up-to-date copy of iTunes, and you’ll need to download the appropriate iPSW file for your device. For the unfamiliar, iPSW files are the firmware files for iOS devices. Using an iPSW file to reset or restore your device is like performing a complete factory reset.
You can get the latest iPSW file for your device on a website like IPSW.me. This website links to the actual iPSW files on Apple's servers, so you know your download is coming straight from Apple. Just select your device, and then download the latest signed iPSW file for it. You can only use signed iPSW files. At the time of writing, the latest version was iOS 11.4.1.
Unsure exactly which device you have? Check the model number on the case and use this iOS device list to make sure.
After carefully confirming which iPSW file you need for your device, download the file to your computer and head on to the next section.

How to Roll Your Device Back to iOS 11
First, if you’ve enabled the “Find My iPhone” feature for your iPhone or iPad, you will need to turn that feature off. You must do this from the iPhone or iPad itself. Head to Settings > [Your Name] > iCloud > Find My iPhone (or Find My iPad) and make sure the feature is turned off.

With the iPSW file in hand, plug your iOS device into your PC or Mac with the USB cable, and then fire up iTunes. Inside iTunes, click on the device icon (located in the upper left corner and highlighted in the screenshot below).

Within the device’s “Summary” page (the default view), locate the “Restore [Device Name]” button. Press and hold the Option key (Mac) or Shift key (Windows) and click the button. You must press the keyboard key while clicking the button in order to load the file browser to select a custom restore file. If you don't, iTunes will only allow you to select from local backups you’ve made.

When you click the Restore button, you won’t be prompted to back up your device, get any data off it, or warned in any fashion. The presumption is that, because you know this super secret key combination, you know what you’re doing.
In the file browser that pops up, navigate to the iPSW file for your device in the location you saved the download. Select it (if you have multiple devices, make sure you select the correct one for the device you’re currently wiping and restoring), and then click “Open” to start the process.

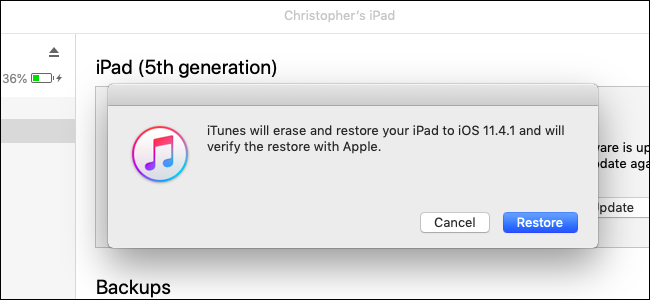
Click "Restore" to continue and erase the contents of your iPhone or iPad.
If you see an error message instead, you probably downloaded the wrong iPSW file for your device.

Once you click that “Restore” button, it’s go time: your iOS device will be wiped and the iOS software will be downgraded from iOS 12 Beta to the latest version of iOS 11. When the process is finished, your device will boot back up as if you’d just turned it on for the first time---welcome screen and all. At that point, you can either start with a totally fresh copy of iOS 11 or you can copy your old iOS 11 backup (if you made one) from iTunes or iCloud.

If you made a backup in iTunes, iTunes will ask you if you want to restore that backup to your device right after it finishes installing iOS 11. Select the backup and click "Continue" to do so.

At this point, be it with a fresh install or your old iOS 11 backup restored, you’re back on iOS 11 and can stay there as long as you want. However, you'll probably want to upgrade to iOS 12 when the final, stable version is released later in 2018.