Quick Links
Apple's macOS 10.14 Mojave offers "Dynamic Desktop" wallpapers that change based on the time of day. You can get something similar on Windows, either by using the standard background settings or by digging into the Task Scheduler.
Set Up a Slideshow That Changes on a Schedule
Windows 10 and Windows 7 both let you set up a slideshow and have it automatically change the picture after a period of time. So, if you provide four background wallpaper images, you can have Windows flip through them every six hours, changing your background depending on the time of day.
We tested this using the official macOS Mojave desktop backgrounds, which someone helpfully uploaded to Reddit. However, you can use any desktop background images you like.
First, make a new folder and place the desktop backgrounds you want to use in it. If you plan to have your desktop background change every six hours, place four background images in it.

Windows will go through the folder in alphanumerical order, so you'll need to name the images appropriately. The correct order depends on the current time of day.
For example, if it's nearing the time when you want your sunset background applied, you should place a 1 in front of the filename of your sunset background, a 2 in front of your night background, a 3 in front of your sunrise background, and a 4 in front of your sunset background.

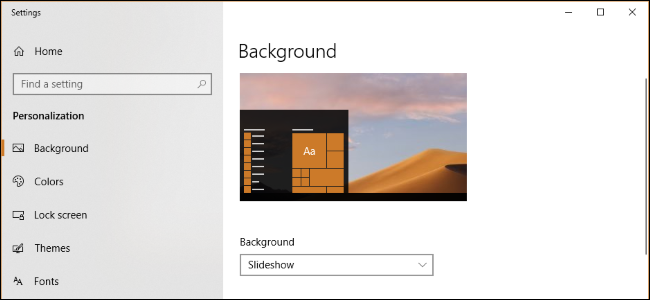
Next, open the desktop background configuration screen by right-clicking the desktop and selecting "Personalize" or by heading to Settings > Personalization > Background on Windows 10.
Click the "Background" box, and then select the "Slideshow" option. Under "Choose albums for your slideshow, click the "Browse" button, and then select the folder containing your background images. Under "Change picture every," click the box and select "6 hours" if you have four background images you want to cycle through. You can also select "1 hour" here if you want to provide 24 background images.
Ensure the Shuffle option is turned off. If Shuffle is enabled, you'll get random background images and they won't match the time of day.

Windows will immediately set your desktop background to the image that is first alphanumerically in the folder. It will also immediately begin counting down from six hours.
In other words, if you want to see a sunset background at 4 p.m., a night background at 10 p.m., a sunrise background at 4 a.m., and a day background at 10 a.m., you should enable the slideshow background at exactly one of these times.
For example, if the sunset background is alphanumerically the first one in the folder, you should enable the slideshow background at exactly 4 p.m..

On Windows 7, the interface looks a bit different, but you can do the same thing.
Right-click the desktop, select "Personalize," and then click the "Desktop Background" option. In the Desktop Background window, click the "Browse" button to the right of Picture location, and then choose the folder containing your wallpaper images. Select the background images you want to use, and then enable the timed slideshow feature on the "Change Picture Every" dropdown menu.

How to Change Your Desktop Backgrounds With the Task Scheduler
You can have Windows automatically change your desktop background on a schedule via the Task Scheduler, too. It's a more complex process because Windows doesn't include a built-in command that changes your desktop background. You can change the registry setting that points at your desktop background, but we couldn't find a built-in command that would reliably "refresh" that setting and apply your new wallpaper.
Instead, we found that Microsoft's own BgInfo tool worked pretty well. BgInfo is meant for writing system information text onto your desktop background, but it provides a reliable way to change your desktop background using commands. You'll need to create several BgInfo configuration files containing the settings you want to apply, and then you'll create scheduled tasks that automatically run these from the Task Scheduler.
To get started, download BgInfo from Microsoft and extract its files into a folder. Launch the "Bginfo64.exe" program if you're on a 64-bit version of Windows, or the Bginfo.exe file if you're on a 32-bit version of Windows.

After you fire up BGInfo, first select all the text in the main box and erase it. Type a single space character (or multiple space characters) here. This will prevent BGInfo from inserting any text into your background and ensure it will only change the wallpaper.
Second, click the "Background" button.

In the Background window, select the "Use These Settings" option. Set the "Wallpaper Position" to either "Center" or "Stretch"---whatever you want to do with your background image. Then, click the "..." button to the right of the "Wallpaper Bitmap" box, and then browse to one of the background images you want to use.
Click "OK" when you're done.

Next, click File > Save As, and then save your configuration as a .bgi file.
For example, we selected our day background image file while creating this profile, so we named it Day.bgi.

Now, you're going to repeat this process to create a separate .bgi profile representing each of your background images, naming them after the times of day you want to use them.
When you're done, your save folder should have all your images and a .bgi profile for each.

After you've created your .bgi files, you can use the Task Scheduler to automatically apply them on a schedule.
Click Start menu, type "Task Scheduler" into the search box, and then press Enter.

In Task Scheduler, click Action > Create Basic Task to create a new task.

Give the task a name, and then click the "Next" button. For example, if this task will apply your sunset wallpaper around sunset, you might name it "Sunset Wallpaper."

Select the "Daily" trigger, and then click the "Next" button again

Enter the time when you want the wallpaper to appear. For example, if sunset takes place around 9 p.m. in your location, you might set the wallpaper to appear at 8 p.m.. Select whatever time you like.
Ensure the task is set to recur every "1" days, and then click the "Next" button.

Select the "Start a Program" action, and then click "Next" again.

To the right of the "Program/script" text box, click the "Browse" button, and then browse to the Bginfo64.exe or Bginfo.exe program you used earlier.
In the "Add arguments (optional)" box, type the following text, replacing "C:\path\to\file.bgi" with the path to the BGI file you created earlier:
"C:\path\to\file.bgi" /timer 0 /silent
For example, if the Sunset.bgi file we created on our system is located at C:\Users\chris\Downloads\Mojave, we'd enter:
"C:\Users\chris\Downloads\Mojave\Sunset.bgi" /timer 0 /silent
Click "Next" to continue.

Select the "Open the Properties dialog for this task when I click Finish" check box, and then click "Finish" to create your task.

In the task window that opens, click over to the "Actions" tab, and then turn off the "Start the task only if the computer is on AC power" option. This allows the task to run even if you're using a laptop on battery power.

Finally, switch to the "Settings" tab, and then enable the "Run this task as soon as possible after a scheduled start is missed" option. This ensures the task will run and Windows will change your desktop background, even if your computer was shut down at the scheduled time.
Click "OK" to finish configuring the task.

You'll find your created task under the "Task Scheduler Library" folder in Task Manager. To check that it works properly, right-click it and select the "Run" command. Your wallpaper should immediately change.

To finish this process, create several more scheduled tasks using the same technique, selecting a different time of day and pointing each at the appropriate .BGI file you created earlier. For example, if you created four total BGI files for four backgrounds, you need to create three more scheduled tasks that will automatically change your background images at the correct time of day.
As the seasons change, you can return to the Task Scheduler and adjust the times of day when your desktop backgrounds change, too. To do so, locate a task under Task Scheduler Library and double-click it. Click the "Triggers" tab, click "Edit," select a new time of day, and then click "OK" twice to save your changes.

Hopefully, Microsoft will add a Dynamic Desktop-style feature to a future version of Windows 10 and eliminate the need for all this fiddling.