Quick Links
The desktop is a convenient place to save files, but can quickly become messy. macOS Mojave solves this with the "Desktop Stacks" feature, which automatically organizes your files into stacks. You can get something similar on Windows, too.
We'll be using Stardock's popular Fences software for this. Fences lets you arrange your desktop's icons into different "fenced" areas. While you can manually drag and drop icons between fences, Fences also offers automatic organization rules--and you can roll up these fences to hide their included icons for a cleaner desktop look, just like how Stacks work on macOS Mojave. Fences provides many other powerful features Stacks can't match, too.
How to Create Stacks-Style Fences
Download and install Fences to get started. Stardock charges $10 for Fences, but also offers a 30-day free trial so you can see whether Fences is worth it to you. Fences is also available as part of the $30 Object Desktop suite of software. Object Desktop also includes other useful applications like WindowBlinds for installing Windows desktop themes.
You can start with Stardock's recommended starter fences or create fences on your own, whichever you like.

To create new fences, just draw them on your desktop with your mouse. In other words, left-click your desktop, hold the mouse button down, draw a rectangular or square area, and release your mouse cursor. Select "Create Fence Here" in the menu that appears.

Name the fence whatever you like. For example, if we want a fence that will contain all our downloaded images, we could name it "Images," "Pictures," or "Photos."
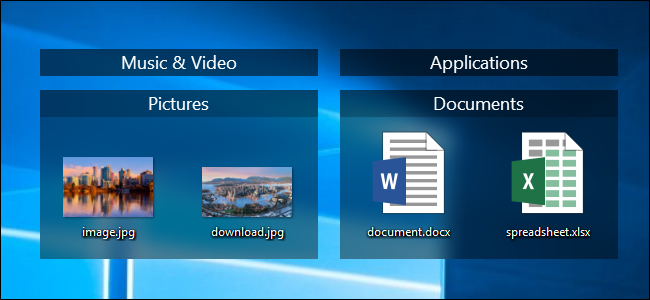
Of course, you can create fences to organize your desktop however you like. For our purposes here, we're going to create fences that correspond to the different types of files we want to organize.

Repeat this process to create additional fences for different file types. For example, we could create fences for "Documents," "Programs," and "Music & Video" files.
Position the fences wherever you want them on your desktop by dragging and dropping their title bars.

You can arrange your own Fences manually by dragging and dropping icons from your desktop into various fences, if you like. macOS Mojave doesn't allow you to do this. But, if you want automatic organization, continue on.
To remove a fence, hover your mouse cursor over it and click the "x" icon at the right side of the fence's title bar.
How to Automatically Organize Your Desktop Icons
Next, we'll set up some organization rules. To open the Fences configuration window, right-click your Windows desktop and select the "Configure Fences" command.

Select "Sorting & Organizing" in the left pane. The options here let you configure where new icons you add to the desktop are placed. You can also apply your rules to all current desktop icons, too.
For simple file type-based fences, enable the check boxes under "Type-based rules," and then select the fences you want to place different file types in. For example, to place image files into an images fence, enable the "Images" checkbox, click "Choose a fence," and then select a fence you've created.
You can also select whether new icons will appear at the start of the fence or at the end of the fence. To have them appear at the top, check the "Add new icons as the first icon of the target fence" option after clicking the name of the fence here.
If you don't see a fence appear as an option here even after creating it, close the Fences configuration window and then reopen it.

Repeat this process to choose where Fences places your files. You can get really advanced with it---for example, you can click "Send certain file types to different places" if you want to assign custom rules to specific file extensions.
The other options here also allow you to automatically sort your files based on whether their name contains certain text, what time of day they were created, or if they have large file sizes.
At the top of the window, you can select where all new icons are placed if they don't match another rule. By default, they go to "the general desktop" and aren't placed in a fence, but you can choose a specific fence for them.
You can even click the "Change the order in which rules are applied" option at the bottom of the window and reorder the rules to control precisely how your files will be arranged.

Any rules you create apply to new files when they're placed on your desktop. To apply your rules to all files currently on your desktop, click "Apply rules now" under Additional options at the bottom of the pane.

Fences will recommend you take a "snapshot" of the state of your fences before applying the rule. You can use this snapshot to undo your change. To create a snapshot, click "Layout & Snapping" in the side panel, and then click "Take Snapshot" under Layout snapshots.
To restore a snapshot in the future, return here, click a snapshot, and then click "Restore Snapshot."
Even after applying your rules, you can drag and drop icons around to rearrange them how you like. To enforce your rules at all times, click "Keep rules applied at all times" on the Sorting & Organizing pane. Fences won't let you manually place icons into different fences anymore.

How to Roll Up Your Fences Like Stacks
Your icons will now be automatically organized into the different fences you specify. To minimize those fences so they'll stay out of the way when you aren't looking for your files---just like Stacks---double-click their title bars.
You can then hover your mouse over a stack to see its included files or double-click its title bar to open it once again.

If you like looking at a cleaner desktop, but don't really want to roll up your fences, you can also double-click your desktop any time to hide or show all your desktop icons.
You Can Use Fences to Manually Organize Your Desktop, Too
This is just one example of something you can do with Fences. Many Fences users ignore all these automatic rules and just use Fences to organize desktop shortcuts and other important files manually, and you can do that, too---or some combination of using automatic rules and manual organization. For example, you might want all new files to go to a fenced named "New" and then just move them around yourself.
You can customize Fences further from the Configure Fences window. For example, you can choose the color and appearance of your fences on the Color & appearance pane.
The "Folder Portals" option is particularly useful and allows you to view a portal to a folder in a fence on your desktop. For example, you could create a portal to your Downloads, Dropbox, Google Drive, or OneDrive folder on your desktop. The folder wouldn't actually be stored on your desktop---but you could see its contents in a fence on your desktop.

Overall, Fences is a super handy app, and we've really only touched on its features. One of the best things about it is that Fences always remembers how you have your icons organized. So, after you get things set up, you never have to worry about Windows suddenly reordering your icons for no good reason.