Your Synology NAS includes a QuickConnect feature that lets you access its DiskStation Manager interface remotely. Here's how to set it up.
You were likely greeted with the QuickConnect setup page when you first installed your Synology NAS, but it's possible that you may have skipped it. If you changed your mind, though, it's never too late to set it up. Plus, it's fairly easy to do.
To get started, fire up DiskStation Manager, and then open up Control Panel.

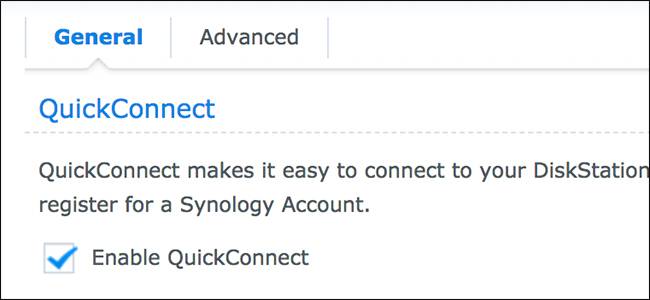
In the Control Panel window, click the "QuickConnect" setting.

Click the "Enable QuickConnect" check box to enable the feature.

Next, click the "Log in to or register a Synology account" option.

You probably already created a Synology account when you set up your NAS, so just log in using your credentials, and then hit the "Log In" button. If you haven't already signed up for an account, you can do that here as well.

After you log in, create a QuickConnect ID. This is a username of sorts that you'll use to access your NAS remotely.

After that, tick the check box to agree to the terms of service and privacy policy, and then hit the "Apply" button.

When that's done, a new box appear with the link you'll use to access your NAS remotely from a web browser, as well as the ID you'll use when remotely accessing your NAS from a mobile device using Synology's mobile apps.

Whenever you're away from home, you can simply go to
http://quickconnect.to/YourID
(where "YourID" is your QuickConnect ID). You'll then have access to your NAS's user interface just like you would if you were at home. And if you want to access your NAS's files on your mobile device, you can download Synology's apps and enter your QuickConnect ID when logging in.