Quick Links
Upgrading your desktop PC’s graphics card can give your gaming a pretty big boost. It's also a fairly easy thing to do. In fact, the hardest part is choosing the right card right card in the first place.
Your primary choice in graphics cards is between the two major makers of graphics chipsets---Nvidia and AMD. After narrowing that down, you'll find that there are lots of card manufacturers making different cards based on either of those chipsets. In the end, there are hundreds of customized models available on the market. You'll also need check for some basic compatibility issues with your PC. Does your motherboard have the right kind of slot for a modern graphics card? Will the card you want fit in your case? Can your power supply handle a card with higher power demands?
Join us as we walk you through figuring those things out, narrowing down your card choices, and then physically installing your new card.
Note: Even though AMD makes both CPUs and graphics cards, you can use graphics cards based on either of the major chipsets on whatever CPU you're running. In other words, you can run an NVIDIA card just fine on a PC with an AMD CPU.
Step One: Check for Basic Compatibility
Before you go shopping for a new graphics card, you need to limit the parameters of your search to the cards that your system can actually run. This isn’t as big a deal as you might think. If your computer has a free PCI-Express (PCI-E) slot and a decent power supply, it can probably run the lion’s share of modern graphics cards. Let’s start with that, why don’t we?
Make Sure Your Motherboard Has the Right Kind of Slot
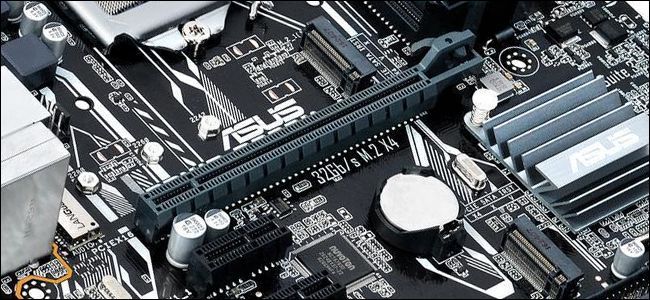
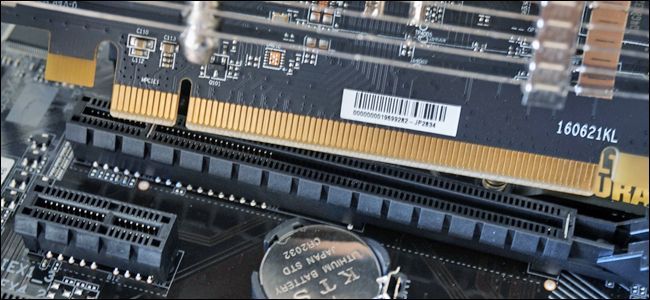
Today’s graphics cards all use the PCI-E standard for plugging into your computer’s motherboard. This standardized slot gives high-speed access to your PC’s processor and RAM, and its position on the board allows easy access to the rear of the case, letting you plug one or more monitors directly into the card itself.
Almost all modern graphics cards require a PCI-E x16 slot, and almost all motherboards that feature any full-sized PCI-E slots at all will have one. If you only have an x8-speed slot, that’ll work too, though performance on the most intense games might be a little limited. The important part is that you need a full-sized slot and not one that’s designed for smaller x1, x2, or x4 cards.
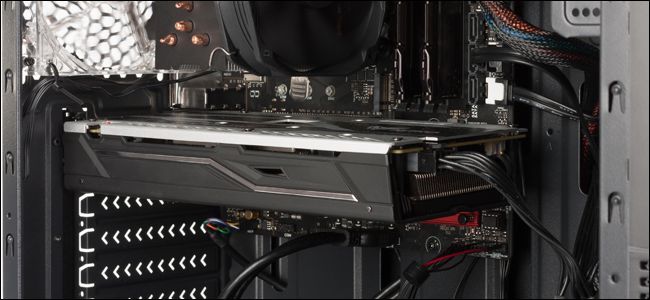
The other thing to keep in mind is that a lot of the higher powered graphics cards are wide enough that they take up the space of two slots. If you've already got another type of card plugged in next to the slot you'll use for your graphics card, you'll need to take that space limitation into account.
Make Sure the Card Fits in Your Case
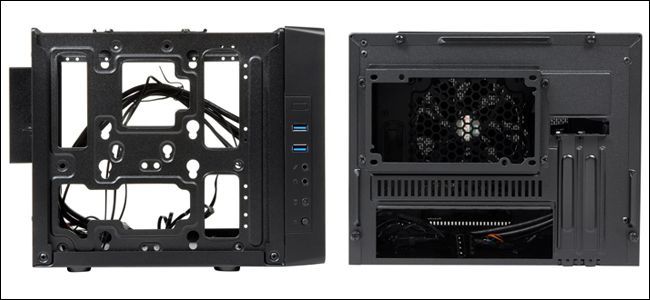
Most full-sized tower cases can accommodate even the biggest graphics cards. If you have a smaller case (like a mid-tower or compact), you'll have fewer choices.
There are two primary issues here: card width and card length.
A lot of the higher powered graphics cards are wide enough that they take up the space of two slots. If you've already got another type of card plugged in next to the slot you'll use for your graphics card, you'll need to take that space limitation into account.
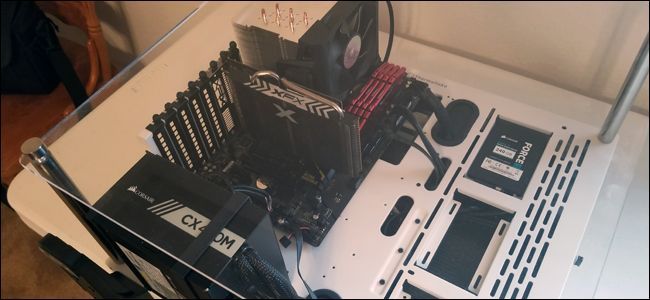
The more thorny issue is card length. While low-end and mid-tier cards are generally short enough to fit most cases, more powerful cards tend to be much longer. And in some cases your available space might be further limited by where hard drives are installed, where cables are plugged into your motherboard, and how power cables are run.
Also some very small PC cases might limit the height of the card you can use.
The easiest way to handle all this is to pop open your case and measure the space you have available. When you're shopping online for cards, the specifications should list the measurements of the card.
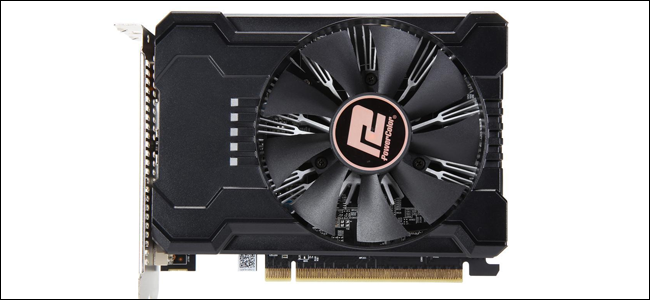
There’s also one more factor to consider: the card's power inputs. Mid- and high-end cards require a dedicated electrical connection to the computer’s power supply. The plug for this cable is either on the top of the card, or on the end of it (the side opposite the monitor connections). You’ll usually need an extra half inch of so of clearance for this plug, in addition to the dimensions of the card itself.
And speaking of power...
Make Sure Your Power Supply Can Handle the Card's Power Requirements
You'll need enough power coming from the power supply unit to feed the the new graphics card, in addition to all of your current computer components.
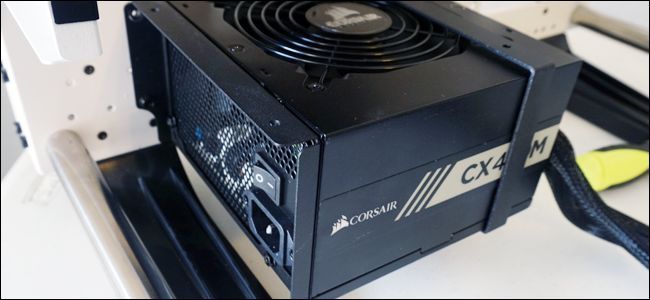
Most of the time this isn’t an issue---a relatively inexpensive 600-watt power supply can handle all but the most power-hungry graphics card plus all the standard PC components. But if you’re upgrading a inexpensive or compact desktop (or any non-gaming PC, really), you need to check your power supply.
Specifications for graphics cards list their estimated power draw (or consumption) in watts. Make sure your power supply has at least that much available (with a 30-40w safety margin) before making your final choice. If it doesn’t, you need to choose a less powerful card or upgrade your power supply at the same time.
If you’re not sure how much your other computer components are taking up, use this handy online calculator. Find the power draw of other components, add them all up, and see if there’s enough left in your power supply to comfortably operate your new card.
If your current PSU can’t power the card you want, and you can't upgrade the power supply, you’ll need to choose a less powerful card.
The other thing you need to check is whether you have an available power cable of the right type. Some low-power cards can run from the electricity supplied by the motherboard alone, but most cards need a separate input straight from the power supply.
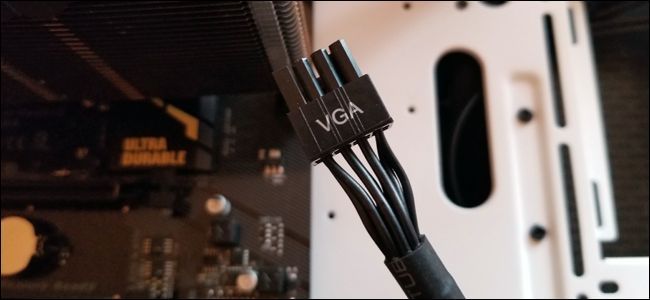
Check the specifications on the card you’re choosing. If the card needs a separate input, it will require either a 6-pin or 8-pin plug. Some more powerful cards even require multiple connections. Make sure your power supply has the right cables and plug types for the card you want. On many modern power supplies, those plugs are even labeled PCI-E.
If you don't see the right types of plugs, but your power supply is otherwise powerful enough for your card, you may be able to find adapters (like these 6-pin to 8-pin adapters). There are also splitters (like these that can split a single 8-pin plug into two 6- or 8-pin plugs).
Make Sure You Can Connect a Card to Your Monitor
Of course, you’ll need a monitor that can actually accept the video output of your new card. This usually isn’t a big deal---most new cards come with at least one DisplayPort, HDMI, and DVI connection. If your monitor doesn’t use any of those, adapter cables are cheap and plentiful.
What If I Can’t Upgrade?
If you can’t upgrade your motherboard, power supply, or case to work with the specific graphics card you want, or you’re using a laptop and you want more power than is available, you also have the option of using an external graphics card enclosure. These are basically external boxes into which you can plug a PCI-E graphics card. They have their own power supply and a way plugging into a PC (usually via USB 3.0 or USB-C). Some come equipped with a graphics card already; some are empty enclosures for plugging in whatever card you want.
They aren’t an ideal solution. They do require an extra power outlet and a high-speed connection to your PC. Plus, they don't offer the same level of performance as an internal card. In addition, these enclosures start at about $200 (without the graphics card itself). At that point, you have to start considering whether upgrading your PC or just building a low-cost gaming desktop is a better route to take. But for laptop owners or those who want a relatively easy way to add graphical power, they’re an interesting alternative.
Step Two: Choose Your New Card
Once you've figured out what your PC can handle, it's time to choose your new card. And there's a lot to choose from. The first thing to take into account is your budget, and then you can narrow down from there.
Set Your Budget
The graphics card market is fairly competitive, and as a general rule, the more money you spend, the more powerful the graphics card. Choose the best card that fits your budget.
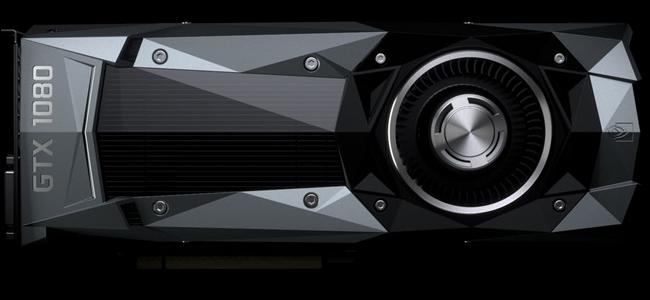
Of course, there’s a difference in how much you can afford and how much you’ll want to actually spend. As a rule of thumb, any card above the $250-300 point (as long as it’s installed in a capable PC) should be able to handle almost any new game that comes out. You can spend more to get more power and more features---a typical goal is 60 frames per second in whatever type of game you like to play---but once you get past the $500-600 range, you’re looking at diminishing returns. The super-premium tier (the $800 and up cards), can handle pretty much any game at 60 frames per second on a typical 1080p monitor, with some going even faster or boosting resolutions to 4K or higher.
Note: Due to the continuing influence of the cryptocurrency mining market, prices for graphics cards are somewhat inflated at the moment. Cards usually at the $300 level or below are more or less unaffected, but more powerful cards like the GTX 1070 or RX Vega (and higher) are seeing sticker prices hundreds of dollars above MSRP. To put it bluntly, it sucks.
At lower price points (the $130-180 range), you can still play most games with a few compromises. You may need to lower the resolution setting or the graphical effects for newer games, but anything designed with a lower hardware tier in mind (like Rocket League or Overwatch) will still look great. And of course, older games and indie 2D titles will run just fine.
Check Reviews and Benchmarks
Even in a particular budget range, you’ll find a lot of choices between different brands and configurations. Here’s where you’ll need to dive into the subtle differences to make your decisions.
We can't cover every card in this guide, but the web is your friend here. Read professional reviews of the cards you're looking at, and check out user reviews from places like Amazon and Newegg. These reviews often point out little features or problems that you won't read about elsewhere. You can also search for benchmarks to see how different cards compare, and sometimes how well those cards run particular games.
Consider a Few Additional Points
A few other general points to consider:
- VR headsets like the Oculus Rift and HTC Vive need even more power than playing with a standard monitor, because they’re rendering two video streams at once. These headsets generally recommend a GTX 970 card or better.
- Choosing between AMD Radeon and NVIDIA GeForce cards isn’t typically all that important---both companies offer designs at various price points and compete well with each other. But they do have frame-syncing technologies that are incompatible with each other. These are software and hardware tools that reduce stuttering graphics and frame loss, making the hardware-intensive V-sync setting unnecessary. AMD uses FreeSync while NVIDIA uses G-Sync. Both require monitors that are explicitly compatible with each system, so if you have a FreeSync or G-Sync monitor, you definitely want to get an AMD or NVIDIA card, respectively.
- High-end gaming motherboards still offer multiple 16x PCI-slots, and both ATI and NVIDIA offer multiple-card connection setups (Crossfire and SLI, respectively). But in the last few years, advances in hardware have made these setups more or less unnecessary. You almost always see better gaming performance from a more expensive, more powerful single card than any combination of cards in Crossfire or SLI configurations.
- Almost all card manufacturers and retailers have surprisingly generous return policies. If you accidentally order the wrong card, you can usually return it within 14 days, so long as you keep your receipt (or confirmation email). Of course, this doesn’t apply if you buy your card from secondary markets like eBay or Craigslist.
Step Three: Install Your New Card
After you finally get your new card, it’s time to plug that sucker in. And after the headache of sorting through reviews, choosing a new card, and parting with your money, this part is easy. You’ll need a cool, dry place to work with plenty of table or desk space, a Phillips-head screwdriver, and optionally an anti-static bracelet to protect your PC's internal components.
Shut down your computer, unplug all the cables, and move the computer to your working area.
Now, it's time to remove the cover from the case. On most full-size PCs, you just need to remove a side panel so you can get to the card slots---usually on the left side of the PC if you're facing its front. On some PCs, you'll need to remove the whole case. And some manufacturers make this harder than others. When in doubt, check your manual or just search the web for how to take the case off your computer model.
After getting the cover off, lay your PC on it's side. You should now be looking down at your computer’s internals. If you have a current graphics card that you’re upgrading, you’ll need to remove it first. If not, skip to the next section.
Removing An Existing GPU
The graphics card should be pretty obvious. It's plugged into one of the slots on the motherboard---usually the one farthest from you if you're facing the bottom of the computer---and has its monitor connections sticking out the back of the PC. It may or may not have cables from the power supply plugged into it. And it may or may not have fans right on the card.
First, look for a power connection on the installed card. This will be a black plug with multiple pins, plugged into either the top or rear of the card. Unplug the cable and set it aside. If you don't see one, don't worry about it. It just means your existing card doesn't need separate power.
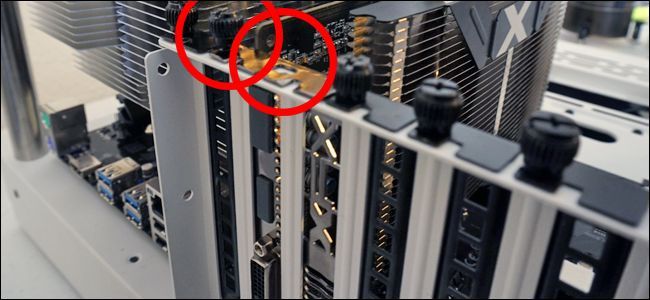
Now, look at the metal piece where the graphics card touches the back of the PC. You'll see one or two screws (depending on whether it's a single or double slot card) securing it to the case. Remove these screws and set them aside---you’ll need them for the new card.
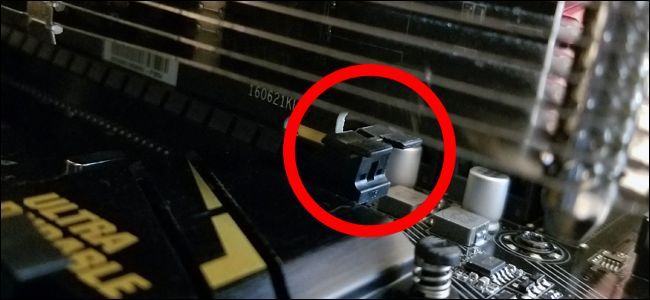
Now, this next part can get a little tricky, depending on how crowded your case is. Your card likely has a little plastic tab that holds it securely into the slot on your motherboard. You'll need to reach under the card and push that tab to release the card. Sometimes, you push the tab down; sometimes to the side. And with bigger cards and more crowded cases, that tab can be hard to reach.
If you have trouble, just be patient and make sure not to force anything. You can also check YouTube for videos of people demonstrating this on different types of rigs.
Now, you’re ready to pull the card out. Gently grasp the card with your hand and pull up, starting with the side closest to the back of the case. It should come free easily. If it doesn't, you probably didn't get that plastic tab pushed all the way.
You’re now ready to plug in the new card, which is basically the same process in reverse.
Installing A New GPU
If you just removed an existing card, you know where the new card goes. If you're installing a card where there wasn't one before, find the PCI-E x16 slot on your motherboard---check this article if you’re not sure which one it is. Remove the corresponding “blank” metal piece from the case’s expansion slot, or two if it’s a double-width card. You may need to remove some screws to do this---set them aside.
Gently slide your card into place on the PCI-E slot. As it’s going in, be sure to align the metal piece that connects with the case with the tab that accepts it.
When it’s in and perpendicular to the motherboard, push down gently until you hear the plastic tab at the end of the PCI-E slot “pop” into place. You may need to push it a little with your finger to make sure it’s physically locked into the receiver slot on the card.
Next, use the screws you set aside to secure the graphics card to the metal piece at the back of the case.
And finally, connect the power cable if your card requires one. Whether you’re using a 6-pin connector, an 8-pin, or multiple power connectors on a high-powered card, the plugs should only be able to fit in one way.
Double check all the connections and screws to make sure they’re firmly in place, and then replace the side panel or case cover. You’re now ready to move your PC back to its usual spot, plug in all your power and data cables, and turn it on. Make sure to connect your monitor to your new graphics card, not to the video-out connection on the motherboard itself!
If your display is blank after turning everything on, go back through this guide---you may not have installed the card correctly. The most common troubleshooting problem is a card that’s not fully inserted into the PCI-E slot; double-check the plastic tab and make sure it can lock in place.
Another cause for this happens when you're installing a new card on a system where you previously used the internal graphics built into the PC's motherboard. Most PCs automatically detect whether you've got a discrete video card installed and make it the default display. Some systems may not. Check your BIOS and you should find a setting that lets you set your default display.
If the monitor still isn’t showing the boot screen, you may have a more serious compatibility issue.
Step Four: Install Graphics Card Drivers
When your PC starts, everything will probably look fine. Windows includes basic drivers for most video cards. To get the most out of your new card, though, you’ll need to download and install the correct drivers.
Luckily, this is pretty simple these days. NVIDIA and AMD both offer downloads directly on their website, separated into card and operating system directories. You'll also find options for automatically detecting your card and showing you the drivers you need. Just select whichever ones apply to your system and download them in with your web browser. This might take a few minutes---the complete graphics suites are generally a few hundred megabytes.
You even have the option of installing apps from either company (NVIDIA's GeForce Experience or AMD's Gaming Evolved Client) that feature advanced options like keeping your drivers up-to-date and optimizing graphics settings for games.
Image credit: Patrik Slezak/Shutterstock, Newegg, Newegg, Newegg, Newegg, Dell, NVIDIA

