If your Synology NAS drive is giving you problems, or you're just upgrading to a whole new system, there are a few ways you can reset it, depending on what you want to do with it.
In total, there are three ways to reset a Synology NAS: resetting just the network settings (which will also reset the admin login password), resetting and reinstalling DiskStation Manager (still keeping all your data intact), or resetting everything (including erasing all data on the hard drives).
Before we go over each method, though, it's a good idea to install the Synology Assistant app on your computer (which you can do from this page). It lets you view the status of your NAS drive without having to access the drive itself. It's also great to have if the IP address of your NAS drive changes when you reset it and you aren't sure what the new IP address is.
In any case, here are the three methods of resetting your Synology NAS drive.
Reset Network Settings
If your NAS drive is giving you some network issues and the problem isn't that you need a new Wi-Fi router, you can do a simple reset of just the network settings. This also resets your admin login password, and you'll be prompted to create a new one after resetting the network settings .
Start by locating the reset button on the back of your NAS drive. It's usually right next to the USB and Ethernet port(s).

Next, get a paper clip or a SIM card removal tool and hold down the reset button for about five seconds---until you hear a beep. Then let go immediately.
After that, fire up Synology Assistant, and then double-click your NAS drive to access it and login.

The default username is "admin" and the default password is left blank. Click "Sign In" after entering in these credentials.

You'll then be prompted to create a new password. Hit "Submit" when you've done that.
On the next screen, click the "Log in Now" button.

From there, just login with your new password and you'll be back up and running!
Reinstall DSM, but Keep Data
A more likely scenario for a handful of users would be completely resetting the DSM operating system, but still keeping all of their data intact on the hard drives---this is great for those upgrading to a new NAS box, or if DSM is just giving you some issues and you just want to wipe and start fresh. Be sure to create a backup of your configuration so that you can restore it after reinstalling.
To get started, locate the reset button on the back of your NAS drive. It's usually right next to the ethernet port(s).
Next, get a paper clip or a SIM card removal tool and hold down the reset button for about five seconds---until you hear a beep. Then let go immediately. Right after that, hold down the reset button again for five seconds until you hear another beep. Let go immediately after that.
Your NAS will beep a couple more times, and then the NAS drive will reboot. After a couple of minutes, the status light will blink orange. DSM is now ready to be reinstalled.

Open up Synology Assistant, and then double-click your NAS drive (it will say "Configuration Lost" next to it) to access it.

Click the "Re-install" button.
Next, hit the green "Install Now" button.

Wait for the NAS to reinstall DSM and reboot itself. This usually takes 15 minutes or so.
When the NAS has rebooted, click the "Connect" button.
You'll then create your admin account and go through the same setup process you did when you first got your NAS drive. You can read through our Synology setup guide to get going again after reinstalling.
Reset Everything and Erase All Data
If you want to go the more extreme route, you can completely reset everything, including wiping all data off the hard drives. This is also a bit easier to do since you can do this right from DSM, rather than having to deal with the physical reset button on the device. Before you get started, though, it might be a good idea to back up everything first.
Login to DSM, and then open up the "Control Panel" window.

Click the "Update & Restore" option.

Switch to the "Reset" tab at the top.

Hit the red "Erase All Data" button.

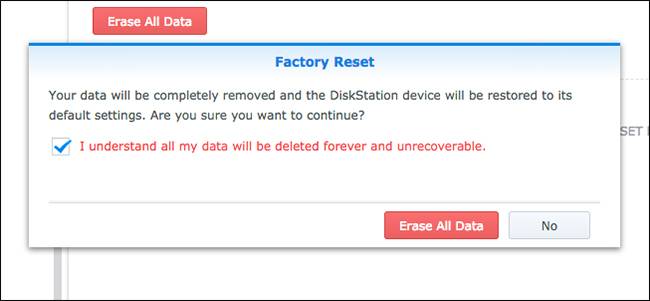
When the pop-up window appears, check the box next to the red text, and then click the "Erase All Data" button.

Next, enter in your admin login password and hit the "Submit" button.

Your Synology NAS will begin the reset process. This could take anywhere from 10-20 minutes, but once it's done, you can fire up Synology Assistant and your NAS will indicate that it's "Not Installed." At that point, you've completely reset your device.

And now you're ready to set it up from a fresh start.