Quick Links
The Nintendo Switch has a dedicated button to take screenshots. It can now even record videos in some games, too. These screenshots and videos are saved to your Switch's internal storage or a microSD card, and you can view them, move them around, and post them to Facebook or Twitter right from your Switch.
Or, of course, you can remove the microSD card and pop it into a PC, the way you would with a normal camera. Always be sure to shut down the Nintendo Switch before removing the microSD card. To do so, long-press the Power button located next to the volume controls and select Power Options > Power Off.
How to Take a Screenshot
The Nintendo Switch's controllers have a dedicated "Capture" button that works in any game or system menu.
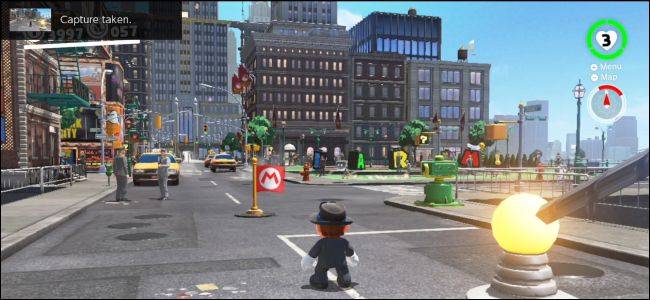
On the Joy-Con controllers, look at the bottom of the left Joy-Con. You'll see a square button with a circle inside it. Press the button to take a screenshot. You'll hear a sound and you'll see a "Capture Taken" notification on your screen.

On the Nintendo Switch Pro Controller, look at the middle of the controller. You'll see the same square button with a circle inside it to the left of the Home button. Press this button to take a screenshot. You'll hear the same sound and see the same "Capture Taken" notification.
How to Record a Video
With the Nintendo Switch OS 4.0 update, Nintendo added the ability to record gameplay to the Nintendo Switch. At launch, this only works with Legend of Zelda: Breath of the Wild, Super Mario Odyssey, Mario Kart 8 Deluxe, ARMS, and Splatoon 2. More games will add support for this feature in the future.
To record gameplay, you use the same Capture button you use to record screenshots. Just press the button and hold it down instead of pressing it normally. Your Nintendo Switch will automatically capture and save a video of the last 30 seconds of your gameplay You'll see a "Saving" notification while it's saving the clip.

How to View Screenshots and Videos
To view all your screenshots and videos, head to your Nintendo Switch's home screen, select the "Album" icon, and press the A button on your controller to open it.

The Album view shows all your screenshots and videos, whether they're stored on your console's internal memory or on a microSD card. Select a screenshot or video and press A to view it.
If you like, you can select "Filter" or press Y and filter the Library to show only screenshots, only videos, content from a specific game, media stored on the internal system memory, or media stored on the microSD card.

How to Share a Screenshot or Video on Facebook and Twitter
You can share a screenshot directly on Facebook or Twitter from your Nintendo Switch.
To do this, head to Home > Album and select a picture or video. Press the A button to view it and then press the A button again to access the Editing and Posting screen.

If it's a screenshot, you can select "Add Text" to add text directly to the picture. The text tool allows you to choose a size, color, and position for the text.
Select the "Post" option to post your screenshot or video to a social media account.

You'll be prompted to choose a user account on the Switch and then choose either Facebook or Twitter. If you haven't previously linked a Facebook or Twitter account to your Switch, you can do it from this screen.
You'll be prompted to enter a comment that will appear on your social media post. After you do, select "OK" and your Switch will post the screenshot or video to Facebook or Twitter.

How to Edit a Video Clip
You can trim a video clip down if you don't want to share all 30 seconds of it. To do so, head to Home > Album, choose the video you want to edit, and select "Editing and Posting" or press A. If it's a video clip, you can select the "Trim" option here use the slider bar to choose which part of the video you want to keep. Select "Save" or press A when you're done to save your changes.

How to Choose Where Screenshots and Videos Are Saved
Your Nintendo Switch can save your screenshots and videos to either its internal storage or a microSD card. The microSD card can be removed and taken to a computer where you can access the screenshots and videos, if you like. By default, the Switch will save your screenshots and videos to the microSD card if you've inserted one. Otherwise, it will save them to its internal system storage.
Note that the Nintendo Switch doesn't come with a microSD card, so you can only do this if you've purchased a microSD card for your Nintendo Switch or have one lying around.
To do this, open your home screen and select "System Settings".

Head to Data Management > Manage Save Data/Screenshots and Videos > Manage Screenshots and Videos > Save Location and choose either "microSD Card" or "System Memory" as your preferred save location.

How to Copy a Screenshot or Video Between the System Storage and microSD Card
You can copy any screenshot or video to a microSD card, which can be removed from your Nintendo Switch and taken to a computer where you can copy the screenshots or videos from it. You can also copy screenshots and videos from the microSD card to the system storage, if you want to remove the microSD card from the console.
To copy an individual screenshot or video, open the Album view from your home screen, select the screenshot or video you want to copy, and press the A button to view it. Press A again to enter the Editing and Posting menu.
From the Editing and Posting menu, select "Copy". Your Nintendo Switch will copy it from the internal storage to the microSD card or vice versa.

How to Delete a Screenshot or Video
To delete a screenshot or video, head to the Album view from your home screen. Find the screenshot or video you want to remove from your switch and press the X button. Select all the media you want to delete and then select the "Delete" button.

How to Copy or Delete All Screenshots and Videos
Your Nintendo Switch allows you to manage your screenshots and videos all at once. For example, you can copy all the screenshots and videos between your Switch's internal storage and microSD card, or delete all screenshots and videos from your internal storage or microSD card.
For example, this would allow you to copy all the screenshots and videos from your Nintendo Switch's system memory to a microSD card so you could take them to a computer.
To do this, head to Home > System Settings > Data Management > Manage Screenshots and Videos. Select either "System Memory" or "microSD Card" here.

Select the "Copy All Screenshots and Videos" or "Delete All Screenshots and Videos" option---whichever you want to do.
