One of the best features of Photoshop is one of the worst, as well: you are overwhelmed with options. Have a quick look through the default panels and learn more of what Photoshop can do in your hands.
Adjusting Panels
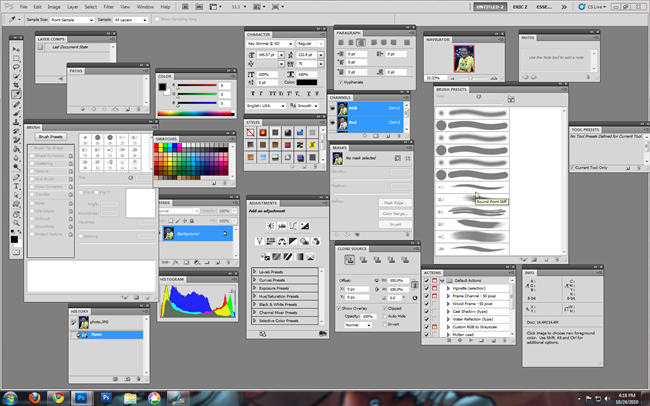
The default panels are snapped to the right side of your PS window. They are a fine set to begin with in Photoshop, and you can always adjust them, hide them, show them, or whatever makes the most sense to you. Photoshop workspaces are largely about personal comfort and have little to do with the so-called "correct" way to use Photoshop.

Your default set of panels from "Essentials" will look like this. If you lose any of them, you can get them back by going to the

in the workspace area of your menu bar. You should see an option in the contextual menu that says "Reset" which will reset your workspace to the default panels.


The panels can be condensed by clicking the

on the right of the panel. They can further be condensed or expanded by clicking and dragging on the left side of the panels.

It's also simple to create "Free Floating" panels by clicking and dragging them away from the snapped areas on the left and right.

It can be simpler to edit panels this way, and later return them to the snapped area, grayed out here by Photoshop as they are dragged to become free-floating.

Panels can be added back to the snap area by dragging them to the far right of your PS window. Release your mouse button when your cursor is nearly on the farthest right part of the screen, just within the dark gray window. You should see the blue line illustrated above, telling you you're setting your new panel set to snap on the side of your screen.
Exploring Default Panels
The "Essentials" workspace is also the default set of panels. These will be what we'll go over first.

Mini Bridge: Adobe Bridge is an image file browsing program similar to Faststone, XnView, or Google Picasa. CS5 has integrated a smaller version of Bridge to allow more visual browsing of your images within your panels. This can be extremely helpful, although any of the aforementioned programs work just as well, if not better. Bridge tends to be a bit on the pokey side, and uses more resources than you might expect.


Visual browsing within Photoshop, however, is helpful. Bridge loads when you open the panel and ask to "Start Browsing." Intuitive tools help navigate to folders on your machine; important and frequently used files or folders can be added to Favorites for quick recall later.

When you find an image you wish to load, either double-click it in Mini Bridge, or right click and pick "Open" from the contextual menu.

History: One of the most important features of Photoshop, History allows users multiple levels of undo, allowing you to reverse a long series of mistakes. This can allow you to edit photographs or images more naturalistically, experimenting with effects that may or may not come out correctly.

As you can see, the above image has some random nonsense done to it I'd like to undo entirely.


Opening the History Panel, you can walk backwards through all of the steps you've done on your image, or even revert the file by clicking the topmost area, directly below "History."

You have a great deal more control over your editing with these multiple levels of undo.

Color: A simple panel, color allows you to pick and edit your foreground and background colors without opening the color contextual menu.

You can adjust your Red, Green, and Blue values from 0 to 255. Higher values will give you brighter colors, as you are adding brighter and brighter light to your current color. You can also pick color straight from the rainbow at the bottom of the panel, if that seems more naturalistic.
You can also click the

to adjust options, and pick sliders from different color modes. If you are a beginner, you won't be interested in this until you learn about color modes first.

Swatches: A good resource for beginners and professionals alike, swatches are a panel of saved colors.

By default, CS5 has a saved palette of 122 colors for you to use.


You can create new swatches from your foreground color by simply clicking the
and selecting "New Swatch."

Whatever color you have selected will become available as a swatch.

Styles: As a panel of saved "Layer Effects," styles can be an interesting way for beginners to start experimenting or veterans to save their most common layer effects for reuse.

Simply clicking any of the default styles will apply them quickly to your active layer. You can manually edit them, or click the

to remove all layer effects.


Many of the defaults may appear strange.


Others may have some limited use.


Many may leave you scratching your head. They are not all useful. However, clicking the
will allow you to save whatever effects you have on your current layer, which can prove useful.

Adjustments: The adjustment panel creates layers that change and filter your image dynamically. While you can apply Hue/Saturation, Contrast, or Levels to your photograph, it would be permanent. Adjustments creates new layers on top of your image, that can be adjusted inside this panel.

Clicking "Levels" automatically creates a new adjustment layer.


You are given the option to adjust the Levels sliders and change the contrast of my image.


These changes can be undone without using the history or the undo functions.


Multiple adjustment layers can be stacked, each one dynamically editable at any time, even when the image is saved and reopened. Notice how they appear as separate layers in the layers panel.

The example from earlier, now with the Hue/Saturation and Levels adjustments.

Masks: The masks palette is a method for blocking out parts of layers, reducing them to transparency. This is an elegant, non-beginner way to remove a background from a layer without using effective but destructive editing techniques.

The mask panel has features unique to CS5, and can help even beginner users cut out backgrounds from images with little to no effort.


Layers: Layers are the hallmark feature of Photoshop, allowing users to create 2d images in multiple editable parts.


New art can be created in layers without disturbing separate layers above or below.


Layers can be copied and masked, among other things. Adjustment layers are also created and managed in this panel.


Layers can be stacked on top of one another, giving weird, fun, or unexpected combinations of effects.


Opacity and Blending Modes are also controlled here. Image editing with layers can quickly create rich images, and makes editing easy.

Channels: Digital images display colors in combinations of primary colors, each with values.

These primary colors are viewable separately your color channels. Beginners can safely ignore the channels panel, as there are few uses for beginner or even intermediate users to use channels.

If you care to play with channels, save your image and experiment. You can find a beginner's primer on channels here, if you care to learn more before diving in. However, you can do worlds of photo editing without using or even understanding them, so use your own judgment if you prefer to ignore them or learn to use them.

Paths: Another difficult area of Photoshop, paths are vector based primitives operating similar to the ones in Illustrator. Vectors themselves are not difficult to understand, but the Pen Tool is difficult and frustrating for new users to dive into.

While the path panel is very straightforward, and paths and vectors fairly easy to understand, the Pen Tool and Paths in Photoshop are better left for a more in-depth article.
Photoshop tips left you confused? Start at the Beginning! Check out the previous installments of the How-To Geek Guide to Learning Photoshop.