Quick Links
Caulk is vital in areas like the bathroom and kitchen where water has the opportunity to creep into all sorts of crevices and cause problems. If the caulk in your house is looking a bit aged, here's how to re-caulk it and give it a fresh, new look.
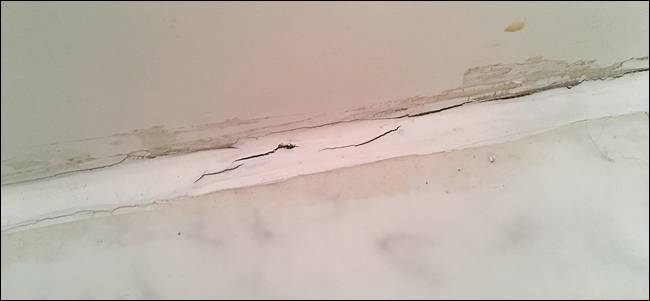
If you're unfamiliar to caulk, it's that white (or clear) rubbery stuff that lines the edges of bathtubs, sinks, and kitchen counters to seal joints or seams. It keeps water from going down into cracks where you can't see it, which could then grow mold. However, caulk is often overlooked, and you likely have some areas in your bathroom or kitchen where the caulk is old and cracking.
Thankfully, caulk isn't a permanent sealant by any means, as you can replace it with fresh, new caulk with a little bit of elbow grease.
What You'll Need

There are a handful of tools and materials that you'll need to get the job done, with some optional things that can make the job a bit easier. We recommend:
- A caulk removal tool
- A utility knife
- A scraper (plastic is best, but metal works if you're careful)
- A caulking gun
- Silicone caulk
- A damp sponge and a damp rag (some extra dry rags are handy for cleanup as well)
- Painter's tape
- A vacuum to cleanup the mess
You'll likely want to use a combination of the caulk removal tool, utility knife, and scraper to remove the old caulk like I did, but you may also discover that using just one of these tools works well for you. You can buy caulk stripping agents that make removing the old caulk easier, but I find that even removing stubborn caulk isn't that difficult if it means saving some money.
It's also a good idea to ventilate the area with a fan or an open window---silicone caulk sort of has an unpleasant vinegar-like smell to it.
Step One: Remove the Old Caulk
Start off by taking your utility knife and cut into the old caulk lengthwise in order to break it up and make it easier to pick at with your other tools.

Next, take your caulk removal tool and dig into the old caulk to pry it up. This should get most of the caulk.

For any caulk that has stuck to the surface of your tub or sink, use your scraper to scrape it off.

During this whole process, make sure to grab onto loose pieces and pull them out with your hands.

You don't need to get every last bit of old caulk removed. As long as you have around 95% of it out, you're good to go.
Step Two: Clean the Area
Removing old caulk creates a mess, and before you apply new caulk, you'll want to sweep up any debris that's left behind using a vacuum. It helps if you have an attachment that can get into small crevices.

After that, take a wet sponge, scrub pad, or a rag and wipe the area clean. Make sure to give it time to dry before applying the new caulk, or get a towel and dry the area.

Step Three: Apply New Caulk
Now that you have a clean canvas to work upon, it's time to apply the new caulk. Start by taking your painter's tape and laying it down onto the adjacent surfaces about 1/4-inch from the joint. This will create a nice, smooth line of caulk, just like if you were painting a line on a wall. I had to go a bit wider with the tape since the flooring doesn't quite butt up right next to the shower structure. Your situation may differ.

Next, grab the caulk tube and cut off the applicator tip at an angle with a utility knife.

Get your caulking gun and extend the metal piercer out from the underside of the gun.

Stick it into the caulk's applicator tip and push it in until you pierce a hole in the caulk tube. After that, pull it out, clean off the piercer, and retract it.

Next, place the caulk tube into the caulking gun by dropping in the rear of the tube first and then the front.

Alternate squeezing the trigger and letting it go until you feel some pressure and see a little bit of caulk coming out of the applicator tip.

Place the tip where you want the caulk to start and slowly apply pressure to the caulking gun's trigger.

Slowly move the caulking gun along the joint, making sure that you get plenty of caulk into the places where it needs to go so that you get full coverage. As you move along, you'll need to let go the trigger to reset it and then apply pressure again in order to push out more caulk.

Don't worry if your caulk job looks like crap at first---we'll smooth it out to make it look a lot better in a bit. Plus, caulking is an artwork in and of itself that takes a ton of practice to do perfectly, and even I have yet to achieve that kind of greatness myself.

Once you've globbed the caulk onto the seam, grab a damp sponge or a damp rag. Wet your finger and slide it along the joint to get rid of excess caulk and smooth it out. Once you have a lot of caulk in your finger, wipe it off with the sponge or rag and continue on. Make sure to constantly keep your finger wet. Caulk is very sticky and the wetness helps to keep it from sticking to your finger too much.

Once you have all of the excess caulk removed and mostly smoothed out, now is the time to look at your work and see if there are any other areas that need extra smoothing. Again, wet your finger and slide it along to smooth it out.

Slowly peel up the tape to reveal your beautiful straight caulk lines and bask at the glory of your work. Again, don't worry if it doesn't look perfect. Caulking isn't exactly easy, and it takes a skilled caulker (caulkist?) to make it look flawless.

Be sure to give the caulk up to a day or two to fully cure before subjecting it to moisture and general use, but after that it'll be good go and should do a much better job than the old caulk did (not to mention it'll look a lot better overall).