Quick Links
"Create a backup of my NAS?" you might say. "isn't the NAS the backup though?" Not so fast---not all backups are equal, and a backup isn't truly a backup until there's a cold storage copy of it somewhere. Let's take a look at how to back up your Synology NAS for the ultimate data redundancy.
Although the Synology NAS platform---including the Disk Station Manager operating system that runs on it and the propriety automated Synology Hybrid Raid (SHR)---is a rock solid and easy way to back up data from your computers, it suffers, by the very nature of things, from some of the same issues that plague any always-on backup system.
Namely, because it's always on and plugged into your home power, any awful fate that befalls your home also befalls it (like a house fire or lightning strike). Further, if you want to obey one of the cardinal rules of proper backup practice, no bit of data is ever truly backed up unless there is an offline cold-storage copy of it somewhere. Plus, if you're planning on doing any serious overhauling of your Synology NAS (like a total swap of all the disks, migrating to a new NAS unit, or so on) even though the built-in tools for doing so provided by Synology are very user friendly, you should always back up your data to play it safe.
Preparing for Your Backup
To proceed, you'll need the following things:
- A Synology NAS with a data port and its Disk Station Manager software up to date.
- An external hard drive or hard drive array with sufficient storage space for the data you wish to back up.
- The Hyper Backup application package installed on your Synology NAS (installed by default; download again via the package manager if necessary).
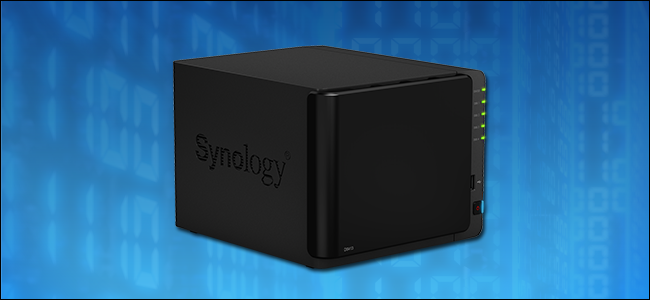
To get started first locate the data ports on your Synology NAS. The particular unit we're using for demonstration purposes, the DS916+, has one USB 3.0 port on the front of the unit as well as 2 USB 3.0 ports and a single eSATA port located on the back of the unit, seen below.

Plug your external enclosure into the appropriate port and, if applicable, make sure to turn the power on to the external enclosure. With the drive plugged in and powered up, you're ready to follow along with the backup and restoration sections of the tutorial.
Backing Up Your Data with Hyper Backup
After that, simply open up the web-based interface for your Synology NAS and sign into the administrator account. Click on the menu button in the upper left-hand corner.

Within the application menu, select "Hyper Backup".

The first step in Hyper Backup is to select your backup destination. Select "Local Shared Folder & External Storage". Click "Next".

Select "Create Backup Task" and then, from the "Shared Folder" dropdown menu, select "usbshare1" to select your external drive. The default directory name is simply "[yournasname]_1", but you can change it to whatever you want. Once you've selected the folder and directory name, click "Next".

On the next screen, select all the folders whose data you wish to back up to your external drive. You do not need to select all the data on your NAS and can, if you wish, exclude any folders and/or volumes. Once you've selected the volume and/or folders you wish to back up, click "Next".

If you wish to back up any applications, now is the time to select them. Note: the list is not a complete list of all applications on your Synology NAS, merely those that have a component Hyper Backup can backup. Click "Next" to continue.

Next, you'll be presented with quite a few potential options for your backup, including whether or not you want to compress the data, encrypt it, schedule a backup routine, and so on. Because our goal is not to leave the disk tethered to the NAS (we want a cold backup we can run, create, and then take offline) we'll be unchecking "Enable Backup Schedule" and "Enable Integrity Check Schedule" as they are unnecessary for our purpose. Further, we'll check "Remove destination external device when task has successfully finished", so that the drive automatically unmounts when the task is done. Click "Next" to continue.
NOTE: if you want to manually connect an external drive on a set routine (say, every Sunday night before you go to bed), then you can schedule things accordingly. We find that its much easier to simply run the routine (which will be saved when we're done) manually when we need it.

Finally, you can opt to enable "backup rotation". This is great feature if the backup system in question will be running with a high degree of frequency but of negligible benefit for one-off backups. The backup rotation feature is essentially Synology's take on incremental file versioning and, when active, will create versions of the files as they change over time (if there is available space on the backup media). This kind of versioning is handy if you find yourself, a year from now, in need of a much earlier version of some project files. Enabling backup rotation is completely optional, and given our focus on making a clean one-off backup, we skipped enabling it. Click "Apply" when ready and, when prompted, click "Yes" on the "Back up now?" pop-up dialogue box.

Once you've confirmed you wish to start the backup, you'll see the Hyper Backup monitoring screen, as seen below:

Once the process is complete (which, depending on the total size of the files you're backing up, could take anywhere from minutes to days) you'll see the success screen and your disk will be safely ejected.

At this point you've successfully backed up your data and can now store the offline hard drive in a safe location.
Restoring Your Data with Hyper Backup
It's simple to restore your data using Hyper Backup, whether you wish to restore a single file, single directory, or the entire backup. To do so, plug the external hard drive back into your Synology NAS to remount it and then open up Hyper Backup again.
In the main screen of the application you'll see three things of note. First, in the upper left corner, you'll see a list of your backup routines. In the case of this tutorial, there is only one, called "Local Storage 1". But if you have multiple routines, you'll want to select the one you created for your cold storage backup.
In addition, you'll also see the "Restore" button in the lower left corner, shaped like a clock with an arrow spinning around it and the "Backup Explorer" button, a small magnifying glass with a clock in the center, located next to the "Back up now" button.

Which button you use depends on your goal. If you wish to restore a single file, then click on the "Backup Explorer" button. This will open a file explorer for the backup file you've selected. You can then browse through the directory structure of the backup to select either a directory of file you wish to restore, doing so by either clicking the "Restore" button while the entry is selected or right clicking on it and select "Restore" from the context menu.

The other restoration option involves clicking the "Restore" button from the main screen we highlighted above. Click on it and select "Data" (for the curious, "LUN" is an advanced enterprise level backup method that required specialized hardware outside the scope of both this tutorial and the capacity of most home users' setups).

You'll be prompted to select a backup task to restore (a simple affair for us, because there's only one backup task in this set). Click "Next". (Note: if you are restoring data from a data backup set for which you no longer have the backup task in Hyper Backup, you can click on "Restore from existing repositories" to manually select the backup archive.)

The system configuration was automatically backed up as part of the backup task, and is stored with the backup file created by Hyper Backup. Restoring it is option. If you are simply dealing with data and not restoring your entire Synology NAS, we recommend leaving it set to "Do not restore system configuration". If you want more information about what the system configuration backup contains, and what it will potentially replace/overwrite, then definitely check out our guide to backing up your configuration file here.

In the next screen, you'll be prompted to select some or all of the folders contained in the backup. Unlike the file-by-file restoration in the previous Backup Explorer method, you do not have granular file-level selection options here, and can only opt to restore and not restore entire directories or sub-directories. Click "Next" when you're ready.

Finally, you'll see a summary of what will be restored (the configuration file, if applicable, the version, and the folders). Click "Apply" to complete the process if the displayed information is satisfactory.

After clicking apply, the backup application will churn through the files and restore them, confirming the directories copied when complete. Once the process is over, you can manually eject your external drive by clicking on the eject icon located in the menu bar of Disk Station Manager:

With your disk(s) stored safely away after restoring your backup, you're done. Your information is on your NAS, on the backup disks, and, thanks to the offline status of the backup disks, you've got a true blue cold-storage backup of your data.