When System Restore was introduced in back in Windows ME, it helped save some major computer snafus for plenty of users. The feature is still included in Windows 7, 8, and 10, and is a useful tool for fixing a myriad of problems.
You can read more about how to use System Restore in our full guide. But if you're just looking to create a quick Restore Point, the instructions below should help you out.
It is recommended that you create a restore point before installing new software or making any major changes to your computer. Oftentimes, when you install new software, you're given the choice to create a point but if not you can do one manually as well.
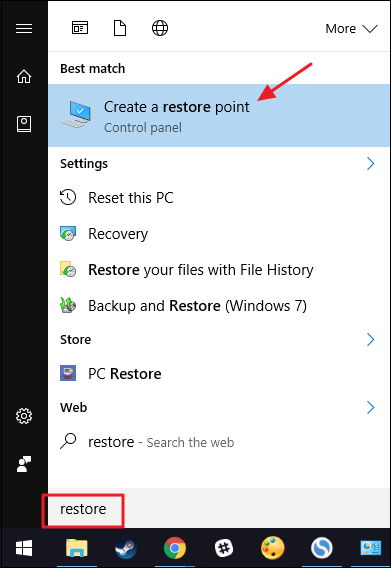
Click on the Start menu, type "restore", and click "Create a Restore Point".
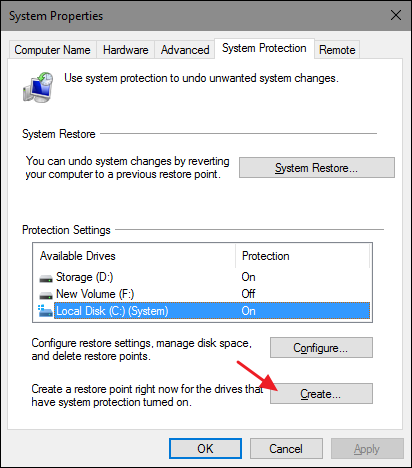
The System Properties dialog screen opens up. Click the Create button.
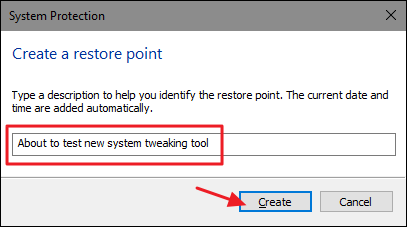
Type in a description for the restore point which will help you remember the point at which is was created.
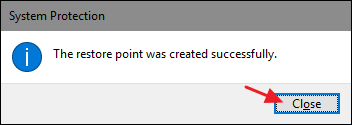
The time it takes to create the restore point will depend on the amount of data, computer speed etc.
All done! Now if something goes wrong you have the satisfaction knowing that you can go back in time to the point before the changes were made.


