Quick Links
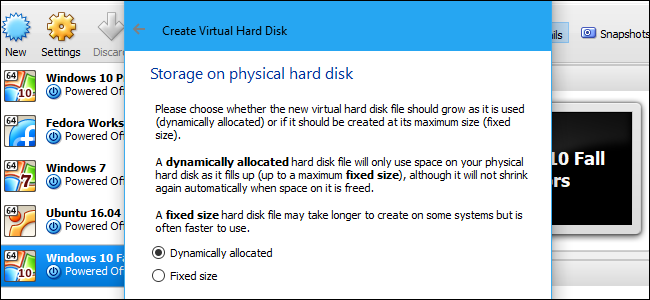
VirtualBox allows you to choose either a dynamically allocated or fixed size disk when creating a new virtual hard disk file. Dynamically allocated disks are faster to create and can grow to larger sizes. Fixed size disks may be faster to use, but can't grow any larger once they fill up. You can convert between the two formats and resize disks, if you like.
Before continuing, we recommend shutting down the virtual machine rather than suspending it and saving its state. VirtualBox should say the virtual machine is "Powered Off."
Step One: Locate the VBoxManage Command and Open a Command Prompt
VirtualBox allows you to convert a fixed disk to a dynamic disk or a dynamic disk to a fixed disk, but this option isn't exposed in its graphical interface. Instead, you have to use the
VBoxManage.exe
command.
Locate this command to continue. On Windows, you'll find it in the VirtualBox program directory, which is
C:\Program Files\Oracle\VirtualBox
by default. If you installed VirtualBox to another directory, look there instead.

Open a Command Prompt window. To do this, open the Start menu, type
cmd
, and press Enter.

Type
cd
into the Command Prompt, followed by the path of the folder where the VBoxManage command is. You'll need to enclose it in quotes.
You can quickly do this by typing
cd
into the Command Prompt window, and then dragging and dropping the folder icon from the file manager's address bar into the Command Prompt.

If you're using the default path, it should look like the following:
cd "C:\Program Files\Oracle\VirtualBox"

NOTE: These instructions assume you're using VirtualBox on Windows. If you're using VirtualBox on macOS or Linux, you can just open a Terminal window and run the vboxmanage command normally, as you would any other command.

Step Two: Locate the Path to the Disk You Want To Convert
Run the following command in the command prompt window to view a list of all the virtual hard disks on your computer:
VBoxManage.exe list hdds

Look through the list and identify the file path to the virtual disk you want to convert. Let's say we want to modify the virtual disk associated with the virtual machine named "Windows". As we can see in the output below, the path to that virtual disk on our system is C:\Users\chris\VirtualBox VMs\Windows\Windows.vdi .

Step Three: Convert the Virtual Disk
You can now use the VBoxManage command to convert the virtual disk from fixed to dynamic, or from dynamic to fixed.
To convert a virtual disk from fixed to dynamic, run the following command:
VBoxManage.exe clonemedium disk "C:\path\to\source.vdi" "C:\path\to\destination.vdi" –variant Standard
For example, if the source disk is located at C:\Users\chris\VirtualBox VMs\Windows\Windows.vdi and you want to create a new disk named Windows-dynamic.vdi in the same folder, you'd run:
VBoxManage.exe clonemedium disk "C:\Users\chris\VirtualBox VMs\Windows\Windows.vdi" "C:\Users\chris\VirtualBox VMs\Windows\Windows-dynamic.vdi" –variant Standard

To convert a virtual disk from dynamic to fixed, run the following command:
VBoxManage.exe clonemedium disk "C:\path\to\source.vdi" "C:\path\to\destination.vdi" –variant Fixed
For example, if the source disk is located at C:\Users\chris\VirtualBox VMs\Windows\Windows.vdi and you want to create a new disk named Windows-fixed.vdi in the same folder, you'd run:
VBoxManage.exe clonemedium disk "C:\Users\chris\VirtualBox VMs\Windows\Windows.vdi" "C:\Users\chris\VirtualBox VMs\Windows\Windows-fixed.vdi" –variant Fixed

Step Four: Remove the Old Virtual Disk
The above command just clones the existing disk. You end up with both the original disk file and a new disk file.
First, you'll need to actually remove the existing virtual disk from VirtualBox. In VirtualBox, right-click the virtual machine that uses the virtual disk and select "Settings".

Select "Storage" to view connected storage devices. Right-click the original VDI and select "Remove Attachment". Click "OK" afterwards.

The below process will delete the original disk file from your drive. Warning: You may want to back up the original disk file if you haven't already, just in case anything goes wrong with this process.
In the Command Prompt, run the following command to view a list of all virtual disks on your computer:
VBoxManage.exe list hdds
Locate the UUID of the original disk you want to delete. You can copy it to your clipboard by selecting it with your mouse's left mouse button and then right-clicking it.

Run the following command to remove the original disk from VirtualBox's registry and delete it. You can right-click in the Command Prompt window to paste the UUID.
VBoxManage.exe closemedium UUID --delete

Step Five: Rename the New Disk
You should now rename the new disk file so that it has the same name as the original one. Just navigate to it in a File Explorer or Windows Explorer window.

Right-click the VDI file, select "Rename", and change it to the original name. For example, here we renamed the Windows-fixed.vdi file we created to Windows.vdi.

Once you've renamed the disk, remove the old disk name from VirtualBox. Click File > Virtual Media Manager in VirtualBox and locate the renamed disk's original name---it will have a yellow warning icon to the left of it. Right-click it and select "Remove". Click "Remove" again to confirm and close "Close".

Step Six: Insert the Disk In VirtualBox
Head back into VirtualBox, right-click the virtual machine associated with the virtual disk, and select "Settings". Under Storage, right-click the SATA controller and select "Add Hard Disk".

Select "Choose Existing Disk" and browse to the file you just renamed.

Click "OK" to close the virtual machine settings window. You should now be able to boot the virtual machine normally. Its disk will be either a fixed or dynamic disk---whichever you converted it to.
