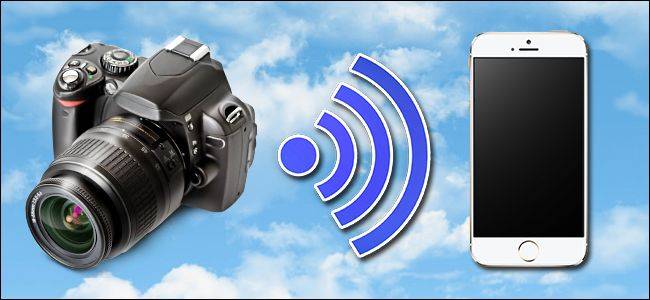
You've got a great digital camera. You've got all your social media apps on your phone. Wouldn't it be nice if you could snap a beautiful shot with your DSLR and shuttle it right over to your phone to throw up on Facebook or Instagram? With an inexpensive upgrade, any camera can become a Wi-Fi enabled one.
One of the handiest features you'll find on newer digital cameras is built-in Wi-Fi connectivity that allows you to transfer files to a computer on your local network or to a nearby smartphone via an ad-hoc Wi-Fi network. If you have an older camera (or newer one that simply didn't ship with the feature), don't worry---you aren't out in the cold. A Wi-Fi SD card can add Wi-Fi connectivity to any camera you have, as long as it has an SD card slot.
UPDATE: Keenai, the company behind the Eye-Fi product we recommend in this article, announced on September 4, 2018, that they are shutting down. Eye-Fi cards should continue to function in stand-alone mode (which means no cloud syncing) as long as the apps are available in the app store. There will be no future updates to their apps. The Keenai service used for storing your data in the cloud will shut down on November 30, 2018. After December 1, 2018, you will no longer be able to access your data. Keenai's website has instructions on how to retrieve your data from the service.
We discussed this at length in our tutorial on wirelessly transferring photos to your local computer from your camera, and many of the same things apply here. Instead of re-hashing our selection process, we'll just say that we recommend the Eye-Fi Mobi Pro ($50). You can check out our previous article if you want more info on the different Wi-Fi SD cards out there and how they work.

Setting Up the Mobi Pro with Your Phone
Grab your mobile device and download the appropriate software for it by either following one of these links for iOS, Android, or Windows Phone, or searching for it in your device's app store under "Keenai". Why Keenai? The Eye-Fi company was purchased a few years back, and the software (but not the card itself) has new branding as a result.
Run the application and then plug in the registration code from the physical card that came with the packaging of your Eye-Fi. Once you've entered it, click "Install Profile". (The "Install Profile" will only appear for iOS users; everyone else can skip to the next step.)

Click "Install" on the profile page that pops up. If it prompts you for a passcode, enter the passcode you use to unlock your device to confirm you wish to install the profile.

You'll be returned to the Keenai application where it will instruction you to pop the Eye-Fi card into your camera and turn it on. Do so now. Take a few pictures to power the card and activate the Wi-Fi radio. Then open up the Wi-Fi settings on your phone or tablet. There, look for a new Wi-Fi network with a name that starts with "Eye-Fi". Select it. You shouldn't be asked for a password but if you are, the password is always the registration code off the card that came with your Eye-Fi card.

Now that you've established a direct connection between the Eye-Fi card in your camera and your mobile device, transferring photos is as simple as taking the photos while connected to the card and then looking in the Keenai app.

In the screenshot above, you can see the three photos we took after completing the setup process: a photo of our dog and two photos of the iPhone accepting the transfer of of the first photo. We're in business! We now have wireless transfer on the go so we never have to stop and dump our photos to our laptop just to get them on social media.
Enabling Selective Transfer
We highly recommend you enable selective transfer. Without it, your Eye-Fi card will just chug along in the background, attempting to transfer as many photos as it can from your camera to your mobile device. If the goal of using the card is to do just that (transferring every single photo so you can, say, back them up using Google Photos or iCloud) then that's fine---but it's time consuming and chews up your camera's battery.
Most people don't want to transfer every single photo, especially if they just ripped through dozens of shots using burst mode. Instead, it's more practical to simply transfer the individual photos you want to edit and share. The Eye-Fi includes a neat way of managing this selective transfer that works across different camera platforms. Once enabled, any time you "protect" a photo against deletion on your SD card, the Eye-Fi software on the card itself notes that the protection flag has been set and initiates the transfer. While the protection process varies from camera to camera, most cameras have some sort of clearly labeled button or button combination that triggers it, as seen below.

Unfortunately (and we consider this a gross oversight on the part of the Eye-Fi company), you can't toggle on the selective upload function of the Eye-Fi Mobi Pro using the mobile application---you must use the desktop application. On the upside, however, it's trivial to change the setting.
To do so, download the Eye-Fi card management software. Like the mobile software, the desktop software is also branded "Keenai". Install the software and run it. It will launch a startup wizard intended to guide you through both registering for the Keenai cloud photo storage and linking the Eye-Fi card to the software so you can modify the settings. If you wish, you can go through the whole setup wizard (the biggest perk for doing so is to activate the free online photo storage trial that comes with the Eye-Fi card), but the fastest way to toggle the selective backup on is to simply cancel out of the all the steps of the wizard, stick your SD card in an SD card reader attached to the computer, and then right click on the Keenai software in your PC's system tray. There, select "Options".

In the resulting Options menu, look for the "Activate" button in the lower corner. Click it.

Because your Eye-Fi card is currently mounted on your PC via the card reader, it will read the activation number directly off the SD card.

Confirm the code in the slot matches the card that came with your Eye-Fi, and click "Next". At this point you can close the wizard. It will want you to continue the process of setting up the card for use in a camera-to-computer wireless workflow, but we're not interested in that: all we wanted was to get the card in the Keenai software so we can toggle some settings.
After closing the wizard, open up the "Options" menu again. You'll see your Eye-Fi card listed. Click on the arrow under the "Advanced" column and then activate the toggle for "Selective Transfer". (You can also active "Wireless RAW transfer" if you wish and have a use for RAW file transfer in your mobile workflow). Don't change any other advanced settings. Click "Save" at the bottom of the Settings window.

Eject the card from your computer and put it back into your camera. Now anytime you're snapping away and want to send some of your shots over to your mobile device, you can do so simply by flagging them, as mentioned above, with your camera's image "protect" feature. Only the flagged images will transfer over to your device.
With a little outlay of time and money upfront you can easily convert your "dumb" camera to a smart one and enjoy all the convenience of computing on the go (like easy uploads to social media right from your phone) with the superior photos only a dedicated camera can provide.