Quick Links
Two-sided printing is great in theory, because it uses less paper for multi-page documents. It's also frustrating when you forget to turn the option off when you don't need it.
macOS makes two-sided printing the default for supported printers. It's the ecologically friendly thing to do, we suppose---at least, in theory. We've personally thrown out more than a few documents because of this default. Many of the things we bother to print these days---airline or event tickets, for example---need to be on their own pages. Often, we'll quickly try to print some tickets, see that they've come out two-sided, swear under our breath, and then re-print the tickets one-sided.
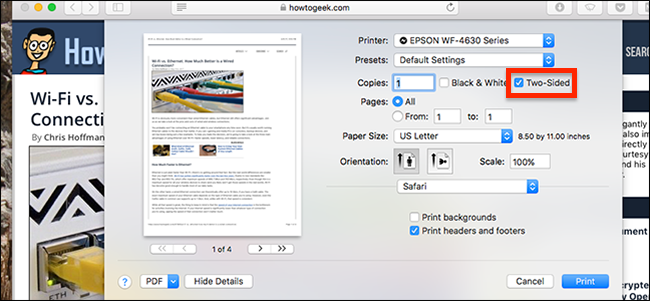
Sure, it's easy enough to turn off the "Two-Sided" option in the print dialog each time you print, but it's also easy to forget. The good news is that you can change the default setting. That way, your printer will print one-sided pages unless you turn the "Two-Sided" option on. Changing this default requires opening the Terminal, and then accessing a browser-based user interface. It's a bit convoluted, but don't worry: it's not as hard as it sounds.
Step One: Enable the CUPS Browser Interface
Printing on macOS is handled by CUPS, an open source system developed by Apple. Users can change CUPS settings with a browser-based interface, but this interface is disabled by default. To enable it, open the Terminal, which you'll find in Applications > Utilities. At the terminal, run the following command:
sudo cupsctl WebInterface=yes

The first word in this command, sudo, runs the command with administrative rights. The second word, cupsctol, is the name of the command that can change CUPS' settings. The third word, WebInterface=yes, tells the command to enable the web interface.
Step Two: Open CUPS Settings in Your Browser
Next, open up your web browser of choice and head to http://localhost:631. Clicking that link should work, but copy and paste the URL if it doesn't. If everything is working, you'll find yourself at the CUPS settings home page. You're accessing this through a browser, but the page isn't online: everything you're seeing is on your computer.

You will be asked for a username and password; enter the credentials you use to log into your Mac.
Step Three: Find and Change the Two-Side Printing Option
In the CUPS settings, head to the "Printers" section, where you'll see a list of printers. Click the printer for which you want to change settings and you'll be taken to the printer's configuration page. Click the "Administration" dropdown menu.

In the list that opens, click "Set Default Options."

You're taken to a page that shows a series of dropdown menus controlling various default options. The one you're looking for is named "2-Sided Printing."

Click this dropdown, and then select "Off (1-Sided)" from the list of options. Click the "Set Default Options" button to save your changes.

And you're done! You can now close your browser. To test the changes, just print any document. You'll see that two-sided printing is no longer enabled by default.

Yes, it's a bit complicated for adjusting a single settings, but at least you won't suffer any more accidental two-sided print jobs. And, of course, you can still use two-sided printing when you actually want to.