Quick Links
If you like the idea of a security camera that's completely wireless in every way, Netgear's Arlo Pro system is one to consider. Here's how to set it up and begin keeping tabs on your home while you're away.
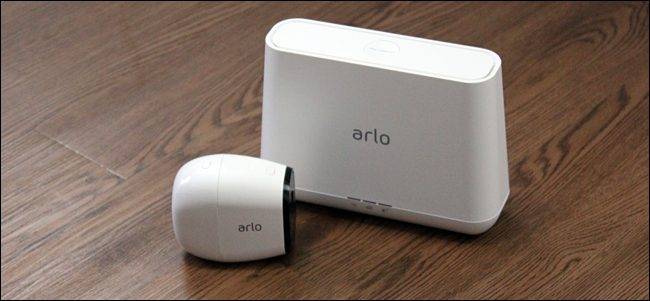
Wi-Fi cameras have their issues---at least when compared to wired cameras---but they certainly offer easier installation. One thing that separates the Arlo Pro from other Wi-Fi cameras is that it's battery-powered, meaning you don't need to plug it into an outlet to stream and record video. Most other Wi-Fi cams need to be connected to some kind of power source, even though they connect via Wi-Fi to transmit the data.
Arlo Pro also uses its own central hub (called the Base Station), to which all of your Arlo cameras connect. This is because the cameras use Z-Wave to communicate wirelessly, rather than Wi-Fi like most other consumer-based security cameras (such as the Nest Cam). Because of that, Arlo cameras need to connect to the Base Station, which in turn communicates with your home's Wi-Fi network.
Step One: Download and Set Up the Arlo App
Even though you have to use the Base Station, the setup process is pretty painless and only takes about 10 minutes. To start off, download the Arlo app to your smartphone. It's a free app that's available for iPhone and Android devices.

Next, open up the app and tap the "New to Arlo" button.

On the next screen, select which Arlo product you're setting up. In this case, it's the "Arlo Wire-Free."

The app then tells you to install the Arlo Base Station hub. To do this, plug one end of the included Ethernet cable into the Base Station and the other end into a free Ethernet port on your router. Plug in the power cord, and then press the "On-Off button next to the power connector on the back of the hub.

Once you've got the Base Station set up, hit "Continue" in the app.

Wait for the hub to power up. The app automatically searches for the hub on your network.

When it's ready, tap "Choose Timezone" in the app.

Select your time zone, hit "Save" in the top-right corner, and then tap the back arrow in the top-left corner.

Tap "Continue" to proceed.

Next, give the Base Station a name. You can be as creative as you want here, but something simple will work just fine. Hit the "Continue" button when you're done.

Step Two: Create a Netgear Account
Next, you'll need to create an account with Netgear. Start by typing your email address and tapping the "Continue" button.

The a name and password for your account, agree to the terms and privacy policy, and then hit "Next" at the bottom.

Step Three: Sync Your Arlo Cameras to the Base Station
Now, it's time to sync your Arlo cameras to the Base Station. You'll do this one camera at a time.
Make sure your cameras are within a couple of feet of the Base Station during the syncing process (you'll be able to move them farther away afterward, of course). Hit "Continue" in the app.

If the camera's battery isn't installed already, go ahead and open up the back cover on the camera and insert the battery.

Start by pressing the sync button on top of the Base Station for around two seconds. The far-right green light will begin to blink.

After that, press the sync button on the camera itself until the blue LED light on the front of the camera begins to blink.

Once the Base Station and the camera are both in sync mode, they'll automatically connect to each other. After the camera and Base Station are connected, hit "Continue" in the app until you get to the "Sync Complete" screen. You can then hit "Finish" or "Add More Cameras," if you have more than one camera to connect.

Step Four: Update the Base Station and Camera Firmware
After you're done syncing all your cameras and hit "Finish," you're taken to the main screen of the Arlo app, where you'll promptly be told that an update is available. Tap "Update Base Station" and wait for it to update.

You'll then do the same thing with the cameras after the Base Station is done updating.

Step Five: Check Out Your New Security System
Once everything is updated, you can tap the "Live" button to see a live view of your Arlo camera.

Within the app, you can sound the alarm, manually record video, snap a photo, enable and disable audio capturing, and even adjust the brightness of the camera.
You can also arm and disarm the system either manually, on a schedule, or based on your location by selecting the "Mode" tab at the bottom of the app.

From there, select the Arlo Base Station.

On this screen you can arm or disarm the system, which is really nothing more than just turning the motion and audio detection on or off.

You do have to jump through a few hoops getting your Arlo system set up---mostly because the cameras connect to the Base Station instead of directly to Wi-Fi---but setup is reasonably straightforward. And once you've got things set up, the system works well.