Quick Links
You encrypt your Mac's system drive like you should: if your computer is stolen, your data is safe from prying eyes. But on your desk, right next to your Mac, is a carbon copy of everything on your hard drive: your Time Machine backup. Wouldn't anyone who grabbed that drive have access to all the same information?
Yes they would, which is why it's important to encrypt your Time Machine drive. There are two ways to do this, and both are relatively straightforward. You can retroactively encrypt your existing Time Machine backup, which allows you to keep your old backups. The downside: this retroactive encryption can take a long time, which is why you might want to simply create an encrypted partition using Disk Utility and back up to that. Let's go over both options.
The Slow, But Non-Destructive Option: Encrypt Your Current Backups
If you have Time Machine set up on your Mac already, you can encrypt your drive retroactively. The process is going to take a while---for a one terabyte mechanical drive, the process could take more than 24 straight hours---but you can start and stop the process as many times as you like.
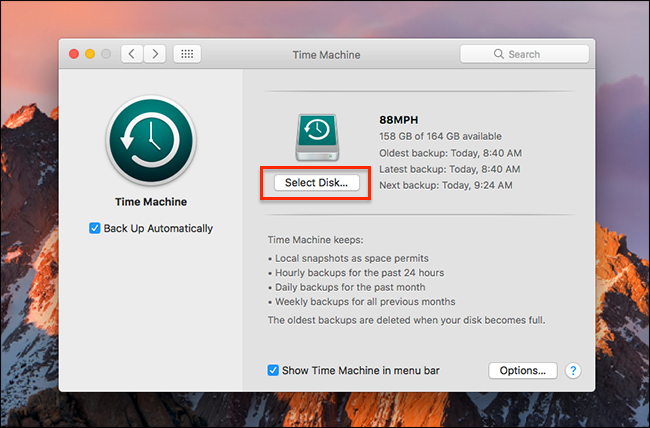
Head to System Preferences > Time Machine, then click "Select Disk."
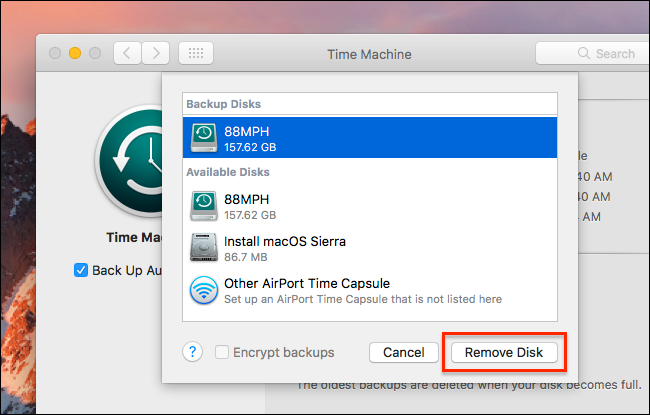
Select your current backup drive, then click "Remove Disk."
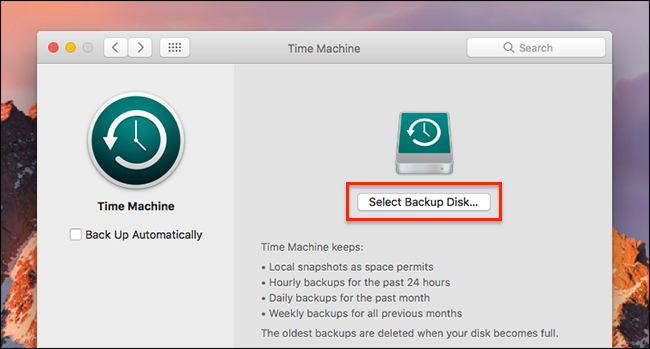
Yes, we have to remove the drive before we can start encrypting, but don't worry: your backups will remain on the drive. Click the "Select Backup Disk" button.
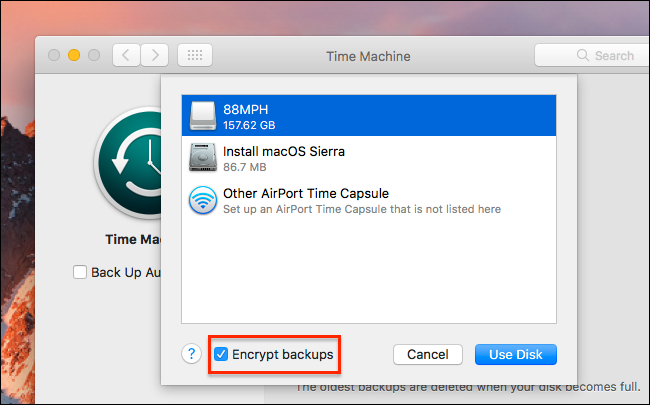
Click your old Time Machine drive in the list of options, then check the "Encrypt backups" option.
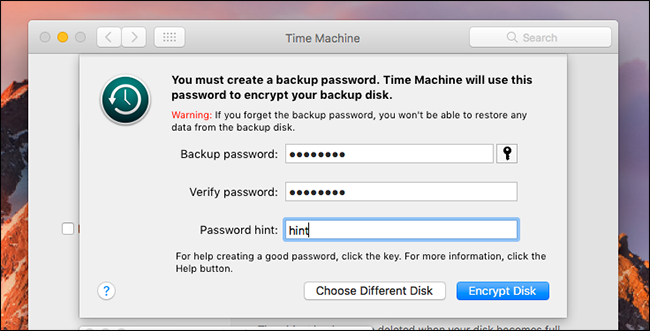
You will be asked to create a password, and to leave a hint. Note that the hint field is mandatory: you can't continue without adding one.
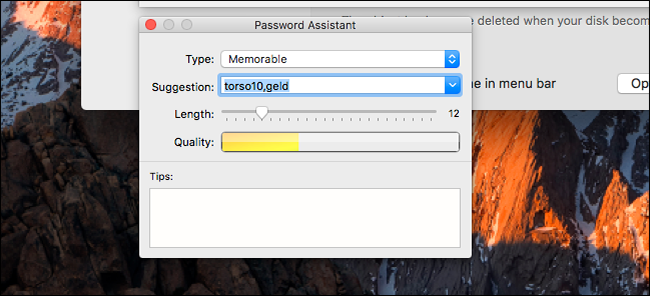
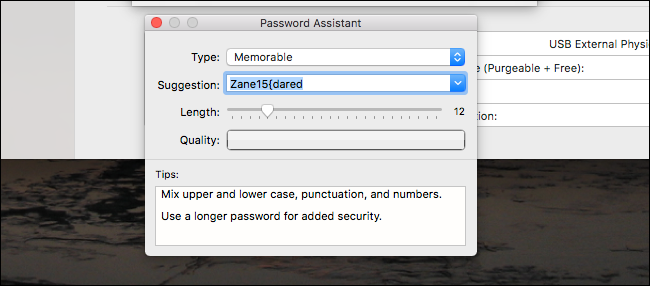
If you lose this password, you can't recover any files from the drive, so don't lose the password. Write it down and store it somewhere safe, like a lock box, and also store it in your password manager. If you need help thinking of a password, click the key icon to bring up the macOS password assistant.
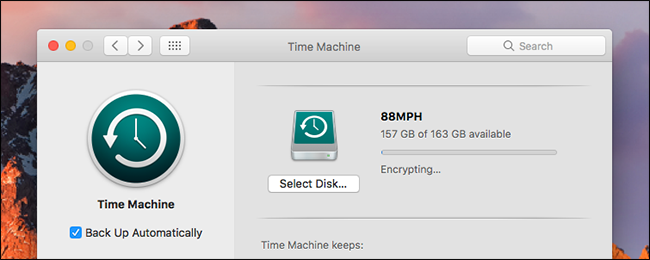
Once you've set a password, click "Encrypt disk." Your mac will start encrypting the drive; you can check the progress in the Time Machine pane in system settings.
This one-time process is not fast. Like we said before, a one terabyte drive can easily take more than 24 hours. You don't need to leave the drive connected until the process is done: unmount the drive and encryption will start again the next time it's connected. And backups will continue as normal during the encryption process.
The Quickest Option: Set up a New Encrypted Backup
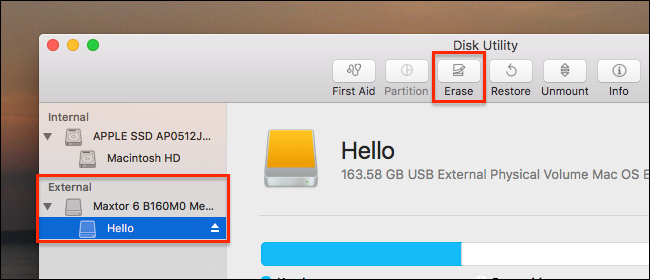
If you're setting up a new hard drive with Time Machine, or are simply willing to start over with a clean partition in order to avoid a long encryption period, you can set up an encrypted partition using Disk Utility. which you can find in Applications > Utilities. To get started, click your external drive in the left panel, then click the "Erase" button in the toolbar.
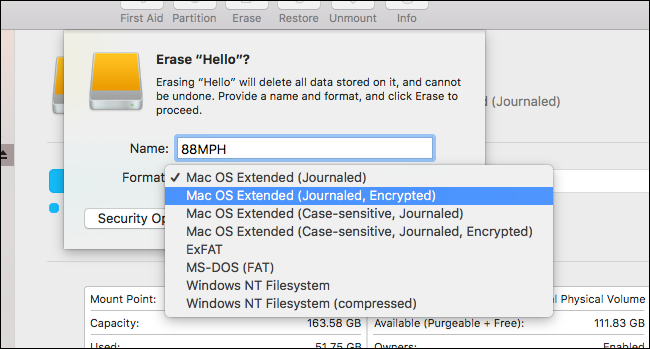
Give the partition some sort of time-travel-related name, then click the "Format" dropdown option.
Choose "Mac OS Extended (Journaled, Encrypted)" from the choices offered, then click the "Erase" button. You will be asked to choose an encryption key.
Whatever you choose, make sure you don't lose this key: you won't be able to recover files from your drive without it. Write it down and put the in your lock box, and store it in your password manager. If you like, you can click the Key icon to bring up the Password Assistant, which can help you create a password.
When you're done, click "Choose" and the drive will be re-formatted. Head to Time Machine preferences and set up your newly encrypted drive as your Time Machine backup. You now have an encrypted Time Machine backup, without the waiting period of the above method.
Photo credit: Valerie Everett

