Quick Links
Parallels is easily the best virtualization software on the Mac, and earlier this year, they quietly added a new app called Parallels Desktop Lite to the Mac App Store---and unlike its cousin, it's free to download. The catch: if you want to use Windows virtual machines, you're going to have to pay for a $60 a year for a subscription.
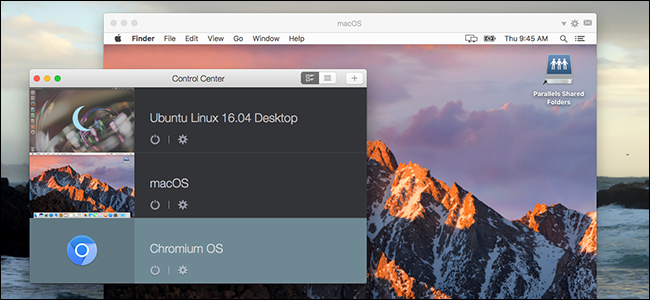
But the program itself is completely free otherwise, meaning if you want to create Linux, Chromium OS, or even macOS virtual machines, you don't need to pay a dime.
Should I Use Parallels Lite, or the "Full" Version of Parallels?
So how it Parallels Desktop Lite different than Parallels Desktop? Parallels outlines all of the differences here, if you're curious---there are a few limitations related to Mac App Store sandboxing. Other than that, the main difference is that Lite is free for anything except Windows virtual machines. If you want to run a Windows virtual machine, you'll need to pony up $60 annually.
How does that compare to Parallels Desktop for Mac, the "full" version of this software? Well that product currently costs $70, and is yours as long as you can keep it running. Parallels versions typically stop running every couple of macOS releases, after which you'll need to either stick to an older host operating system or pony up $50 for an upgrade license. Assuming you need to upgrade every two years, which is roughly consistent with our experience, the two pricing plans are about that same.
But that's only if you want to run Windows. If your interest in virtual machines lies entirely on the Linux and macOS side of things, Lite is without question the better deal, because you can't beat free.
Getting Started With Parallels Desktop Lite
Start up Parallels Lite for the first time and you'll see the Parallels Wizard, which makes setting up or adding virtual machines simple.

There are three main options here. The most prominent points you to download Windows 10 from Microsoft, which will cost you around $120 for Windows itself on top of the Parallels subscription. To the right, you'll find the option to browse your computer for any installation images on your computer. Below these two prominent options, you'll see quick tools for downloading several other operating systems, including:
- Chromium OS (the open source version of Chrome OS)
- Ubuntu 16.04
- Fedora 23
- CentOS 7
- Debian 8
Let's get started with setting up a couple of these installers, then move on to setting up macOS in a virtual machine.
Installing Linux or Chromium OS in Parallels Desktop Lite
Click any of the operating systems at the bottom of the wizard and you'll see more information about them.

Click the "Download" button and Parallels will begin the downloading process.

How long this takes will depend on the speed of your internet connection, but for me downloading Chromium OS only took a few minutes. When it's done, you can log into your Google account and start using Chromium OS right away.

It seems like Chromium OS doesn't sync over settings from a Chromebook, which is disappointing, but it's still nice to have access to this system for the occasional test.
I repeated the process for Ubuntu, just for good measure. It was just as simple, and I was using the operating system in no time.

The version of Ubuntu offered is 16.04, which is the most recent Long Term Support version of that Linux distribution. I tried manually installing the more recent 17.04, but had trouble getting Parallels Tools up and running. Your mileage may vary, but in my humble opinion life is a lot easier if you stick to the built-in wizard installers.
Install macOS in Parallels Desktop Lite
If you want a Mac inside your Mac, you'll first need to head to the Mac App Store. Search for the macOS version you want to install, then click the "Download" button.

A caveat: the Mac App Store will not download a version of the OS older than what you're currently running. This means that you cannot create a virtual machine for older versions of macOS unless you have some other means of finding the installers. You can, however, easily download newer versions of macOS in order to test them without installing, which is nice.
Once the installer is downloaded, it will open.

Go ahead and close this with Command+Q---we don't want to re-install our operating system. Head back to the Parallels Wizard, which you can find by clicking the Parallels button in the menu bar, then clicking "New."

Click "Install Windows or another OS from a DVD or image file" and you should see macOS Sierra as an option (if not, click "locate manually" to give Parallels permission to see the rest of your file system.)

Click "Continue" and you'll be asked about storage space.

Click "Continue" after checking that you have enough room, then give your virtual machine a name and choose a location.

Click "Continue" and eventually the installer will launch.

Exciting! Continue through the steps as prompted---you'll install macOS on your newly created virtual hard drive, and the machine will re-boot a couple of times. You can leave this running in the background and work on something else. Eventually you'll be prompted to choose a language and create an account, after which you'll have full access to macOS in a virtual machine.

You can now use macOS in your virtual machine! There's just one thing left to do: install Parallels Tools, so that the virtual machine's resolution will change when you re-size the window, among other integrations. To get started, click the "!" icon at top-right, then click "Install Parallels Tools."

This will connect a virtual disk with the installer to your virtual macOS machine.

Run the installer, then re-start your virtual Mac, and you're all set up!
This is a lot easier than installing macOS Sierra in VirtualBox, isn't it? And the price is the same. Enjoy!