Quick Links
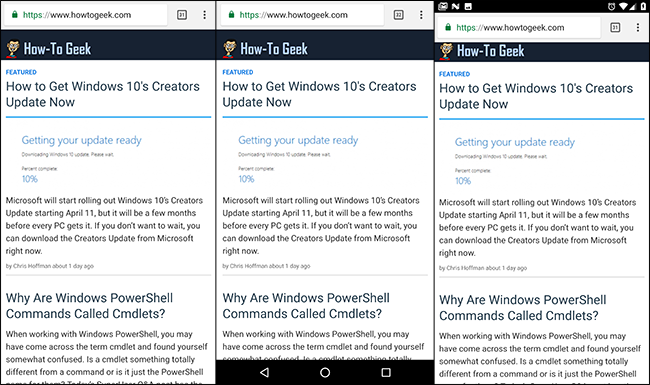
Google released an Android version of Chrome in 2012, and have never bothered to give it a fullscreen mode. If you're tired of waiting on your favorite Android app to offer fullscreen, there's a way to do it yourself with Immersive Mode.
Come on Google, I've literally been begging you for years! There's just no reason not to give us a fullscreen mode. There are ways to do this with third-party apps like Tasker, but assuming you'll always want to keep a specific app in fullscreen, there's a faster and more practical way to do it using only the Android debug bridge (ADB) desktop tool.
What You'll Need
To follow the steps in this article, you'll need the following:
- An Android phone or tablet running version 4.4 (KitKat) or later
- A PC running Windows, macOS, or Linux
- A USB cable
Step One: Enable USB debugging
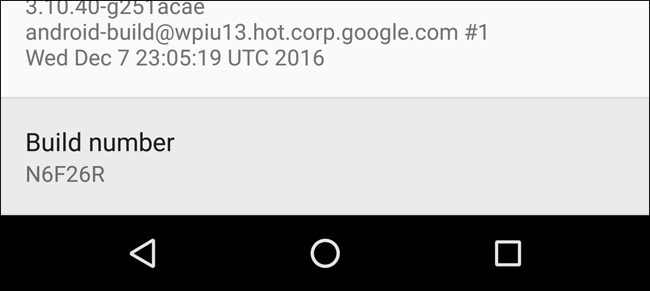
Before you begin, you'll need to enable USB-based debugging on your phone if you haven't already. Open the main Settings menu. Tap "About Phone," and then tap the "Build Number" entry seven times. Yes, really. On some phones the "About Phone" entry may be somewhere else in the Settings menu, but if you poke around you should be able to find it.
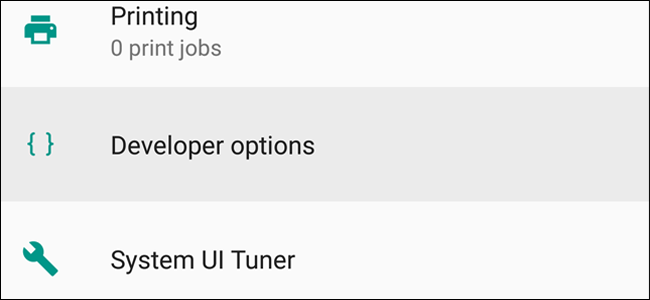
When you see the popup notification that says "You are now a developer," press the Back button and you'll see a new option in the main Settings Menu: "Developer Options."
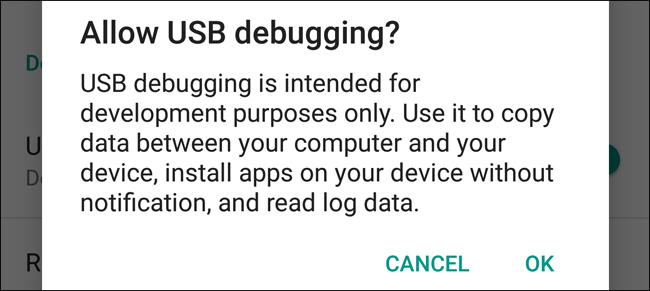
Tap "Developer Options," and inside you'll find the "USB debugging" option under the Debugging heading. Enable it, and then tap "OK."
Step Two: Install the Android SDK and ADB
If you haven't messed around with your phone much, you probably don't have the Android Debug Bridge installed on your PC yet. If not, you can follow this handy guide on how to get it up and running. Make sure you have the USB driver for your phone installed as well.
Once you're done with the installation, come back here and continue to the next step.
Step Three: Find Your App's APK Name
In order to manually adjust an app's settings in ADB, you'll need to know its exact application file name, or APK name. Unfortunately, Android doesn't make it easy to find that out with default tools. But there is an easy way to get the information on your desktop.
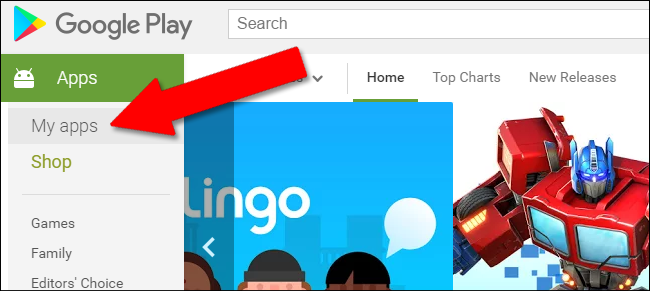
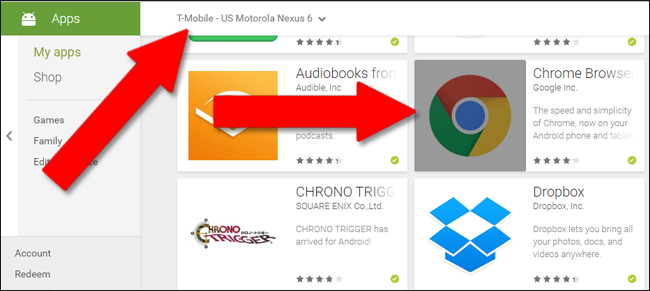
Open any web browser and go to the Google Play Store at play.google.com. Click on "Apps" in the left-hand column, then "My Apps." This give you a list of all the Android apps you've installed through the Play Store.
Click the app you want. If you can't find it immediately, you can click the "All Apps" button beneath the Search bar to narrow it down to only apps installed on one device.
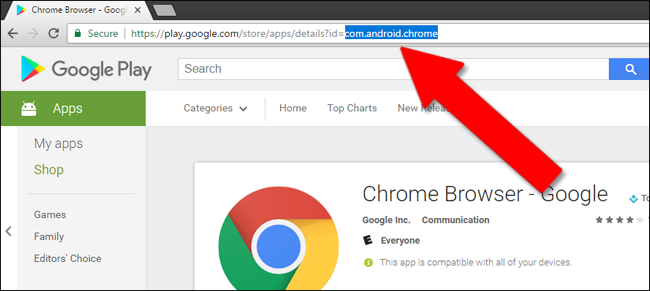
When you've reached the desired app's Play Store page, take a look at the web address in the browser URL bar. After the "id=" identifier tag, the address will show the APK name of the app. In our example (Chrome for Android), the full address is:
https://play.google.com/store/apps/details?id=com.android.chrome
And the APK name we're looking for is "com.android.chrome."
Make a note of your app's APK name before continuing.
Step Four: Verify Your Device Connection with ADB
Next, you'll need to open Command Prompt (in Windows) or Terminal (in macOS) and navigate to a folder named "platform-tools" where your Android SDK is installed.
In Windows, you'll find it at the following location:
/users/your username/AppData/Local/Android/sdk/platform-tools
In macOS, it's located at:
/Users/your username/Library/Android/SDK/platform-tools
Plug your phone or tablet into the computer with your USB cable. Depending on your phone model, you may need to confirm the ADB connection on the phone itself with a pop-up message.
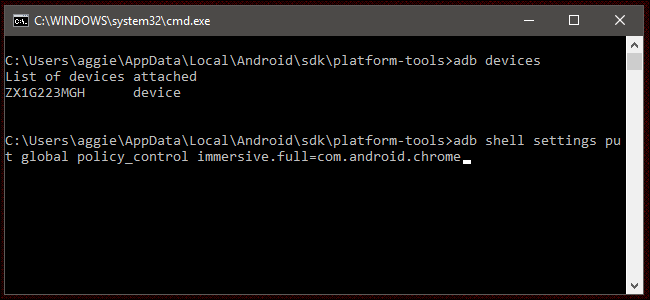
At the prompt, type the following text and hit Enter
adb devices
If you see a single device line under the ADB device command, you're ready to go. If you don't see any devices listed, double-check that your phone or tablet is connected and that you have the drivers installed.
Go ahead and leave the prompt open because you're going to have to enter another command shortly.
Step Six: Choose Your Immersive Mode
There are three different kinds of fullscreen modes we can use with the immersive command.
- immersive.full: hides the status bar on top of the screen and the navigation bar on the bottom, if your phone uses virtual navigation buttons. This is what most people want when they think of a fullscreen app.
- immersive.status: hides only the status bar on top.
- immersive.navigation: hides only the navigation bar on the bottom.
Choose which mode you want to use before continuing. Don't worry, you can apply the command below multiple times if you change your mind.
Step Six: Apply the Command
Next, type the following text at the prompt, substituting the app name you found in Step Three after the = sign. I've used Chrome as my example here, but you can swap out the APK name with any other.
adb shell settings put global policy_control immersive.full=com.android.chrome
This particular command enables fullscreen version of Immersive Mode for the Chrome app. To hide only the status bar or navigation bar, use the immersive.status or immersive.nagivation commands, respectively.
Press Enter to execute the command. That's it! From now on, Chrome on your phone (or any other app you input) will run in fullscreen mode. You can unplug your phone and try it now: simply swipe up or down from the bottom or top of the screen (or the side in horizontal mode) to show the navigation buttons or status bar.
If you ever want to change the app back to its standard operation mode, simply repeat these steps, but substitute this command in Command Prompt or Terminal (again, using the APK name for your app):
adb shell settings put global policy_control immersive.off=com.android.chrome
This method should work with all standard Android devices, but some manufacturers may have modified the mobile operating system to the point where the commands aren't valid. If it doesn't work immediately on your phone or tablet, try unplugging your phone and plugging it back in---the ADB and driver connection can sometimes be finicky.

