Quick Links
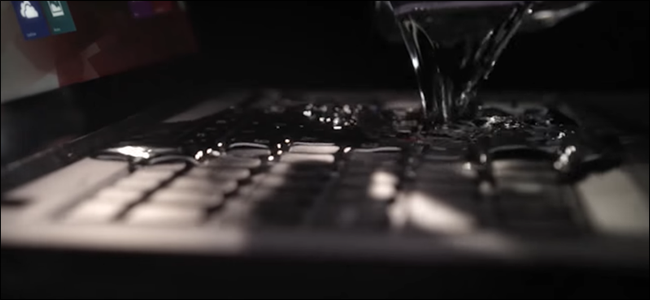
It's every laptop owner's nightmare: a carelessly spilled cup of coffee. A sudden shower when you're working outside. Heaven forbid, some kind of farcical bathroom tumble when you really had to get that TPS report in. Conventional wisdom says that a soaked laptop is a dead laptop, but that doesn't necessarily have to be true, especially if you have a few tools and a lot of patience.
What You'll Need

There's no guarantee that you can fix a water-logged laptop, but if you want to give it a shot, here's what you'll need.
- Tools: You'll probably need a set of Flat-head and Philips-head screwdrivers in multiple sizes. If you have a set of small Torx screwdrivers, grab them too. You'll also probably need some kind of small, narrow pry bar---a Swiss Army knife will work. You can grab all of these in one package with the iFixit Pro Tech Toolkit ($50).
- A can of compressed air: Normally used for dusting and cleaning, this will come in handy in our later steps.
- A safe work space: Someplace clean and dry is what you're looking for, ideally with no carpeting and a wood or rubber space to place components.
- Rice or silica gel packets: Either of these will help absorb moisture.
- Heater: A space heater or a hair dryer will do, if you don't have access to warm, dry heat from some other source.
Most of this can be had at your local hardware store. But if you can't find something---especially the silica gel---continue without it. Time is of the essence when it comes to wet electronics.
Step One: Safety First
Before you begin, you're going to have to face the fact that your laptop might be dead. Sorry, but at this point what you're doing is basically a salvage operation, with a faint hope that you can rescue your hardware and your investment. If you have any alternatives, like a full-coverage damage warranty or a simple upgrade that you can afford, go ahead and make use of them.
But if you really need to rescue your current laptop, don't be stupid about it. If the thing is actively sparking or smoking, get away from it, and if necessary get it out of the building. If you see actual flames, give it a spray with a fire extinguisher. And at that point, you might as well stop reading this article and start shopping for a new laptop.

However, if your laptop seems to be safe, unplug it from its power cord and remove the battery if possible. Now say goodbye to your warranty---which probably doesn't cover water damage, anyway---then continue.
Step Two: Find a Service Manual or Guide
Get to another computer or use your phone---something that can browse the Internet and view PDF files. Then do a Google search for your laptop's model number and "Service Manual" or "Repair Manual." Download and save a copy if you can find one.
A service manual is a special manual created by your laptop's manufacturer, intended for technicians and third-party repair services. It will give you step-by-step instructions on how to disassemble your laptop. Service manuals are usually split up into sections for specific repair jobs (replacing RAM, hard drives, keyboards, screens, et cetera), but by moving between the various sections you should be able to find instructions on how to strip most of the parts out.

If you can't find a service manual---which is a distinct possibility, especially with newer designs---don't give up hope. You still might be able to find an end-user guide on how to disassemble your specific laptop model. YouTube is a good place to search, as is the repair site iFixIt, which hosts disassembly guides for many models. If at all possible you want to find some kind of visual reference for your laptop before you proceed to the next step.

Archive.org has an excellent database of computer service manuals, as does this independent Australian site.
Step Three: Disassemble Your Laptop
Here comes the fun part. Follow the service manual (or whatever guide you've been able to find) and take apart every piece of your laptop that you feel comfortably removing. It's a long, tedious process, even with a guide, so prepare for some frustration.

Start with the easy stuff. Many laptops are designed in such a way that the RAM, hard drive or SSD can be removed with just a screwdriver (and sometimes even other components like the disc drive). Others require you to take off the bottom body panel. Unfortunately, the newer and more complex laptop is (like Dell's XPS 13 and other ultraportables), the less likely it is you're going to be able to easily remove components. You may need to pry apart plastic or metal tabs at the body seams to remove panels. Be as gentle as you can, but some designs will require significant force to open.

As you remove pieces, place them somewhere safe and electrically non-conductive. A rubber mat is ideal, but a wooden table will do in a pinch. (It's also a good idea to work somewhere without carpet and to wear tennis shoes.) You might want to make notes for yourself and take photos with your phone as you go through the process, so that reassembling your laptop will be easier later. Place screws in places where they won't be easily scattered, like empty bowls or bags, or a magnetic parts tray.
Step Four: Dry the Components
Inspect each removed component for moisture or liquid residue. Use a towel or a washcloth to soak up and scrub every bit of liquid or dried material that you can. Be careful not to let anything snag, especially on circuit boards. When you're done wiping a part off, hit it with the canned air to remove any fluff or dust from your towel.
Place the components somewhere warm and dry. Not too warm---excessive heat can do as much damage as water. A room with a space heater on low is ideal here. Placing your non-conductive work area on a warm sunlit porch or deck is an okay alternative, though of course you'll have to be careful of any weather or wind. If all else fails, you can try gently drying them with a hairdryer on low, holding each component securely in your hand and at least two feet away from the blower.

Let the components sit out for several hours, as long as it takes to remove any lingering moisture. There are a few things you can do to speed this along: if you have silica gel packets (those little paper bags marked "DO NOT EAT" included in electronics and luggage), you can carefully spread them around on top of your components. They're designed to suck away moisture, which is exactly what you want. If you don't have any silica gel, you can roll your own moisture-absorbing tool by placing dry rice into a fine mesh bag or a thin pillowcase. Any fabric porous enough to let air through (but not the actual rice grains) will do.
After several hours, inspect all of the components for any lingering moisture or residue. If you see any, repeat this section before proceeding.
Step Five: Reassemble Your Laptop
Now you're going to perform step three in reverse. Once again, you'll need to make use of your non-conductive work area, your service manual, and any photos or notes you've taken during the process. If you have any screws or components left over when your laptop is reassembled, work backwards until you find the step you missed.
Step Five: Power On (and Hope)

Finally, you've reached the moment of truth. Replace your laptop's battery, if it's an external model, and plug it in. Then cross your fingers (editor's note: this is entirely optional) and press the power button.
As we said, there are no guarantees, but if you can get things working, thank your lucky stars---and make a backup as quickly as possible.
Image Credit: Lenovo, iFixit, Future Proof blog, BinaryKoala/Flickr