The Canary home security camera is an easy-to-use camera that connects directly to your Wi-Fi network (or over ethernet) and lets you see what's going on while you're away from home. Here's how to set it up and get started with it.
While the Nest Cam is one of the most popular Wi-Fi cams available, the Canary is a popular option that comes with some pretty cool extra features---like temperature monitoring, or the ability to provide humidity and air quality levels in the room that it's in. Plus, you can connect it via ethernet rather than Wi-Fi if you want.
To set up the Canary camera, you'll first want to download the app to your iPhone or Android device. We'll be doing this setup through the iPhone app, but the process is largely the same on both mobile platforms.

Open up the app and tap on "Get Started".

Enter in your email address and create a password for your Canary account. Then hit "Next" in the top-right corner of the screen.

Tap on "Accept" to accept Canary's terms and policies.

Next, Enter in your name and phone number, and then tap "Next".

On the next screen, you'll select whether or not you want the app to have access to your location, which allows it to automatically know if you're home or away. Select either "Now Now" or "Allow" at the bottom.

However, either way you'll need to let the app know where you live, so it's just a matter of the app finding your location automatically or manually entering in your location details on the next screen.

After that, select either "Not Now" or "Allow" when it comes to receiving notifications.

Next, it's time to set up your Canary camera. In the app, select which Canary device you're setting up---either the newer Canary Flex or the original Canary camera, which is the one we're setting up.

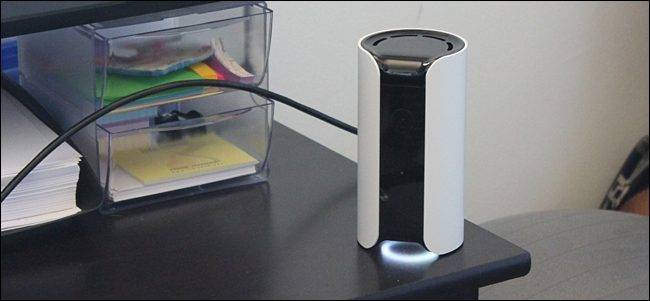
If it isn't already, go ahead and plug in your Canary camera to a power outlet. From there, it will automatically boot up and you'll see a white LED glow on the bottom of the device.

Hit "Next" in the app until you get to the "Activate" screen, which will have you choose either Bluetooth or an audio cable to connect the camera to the app. The Canary comes with an audio cable included in the box, but it's easier to just use Bluetooth, so that's what we'll do.

Next, simply touch the top of the Canary camera until the light at the bottom of the device starts flashing blue. In the app, your Canary camera should appear in the form of the device's serial number. Tap on it to continue.

Next, you can choose whether to connect the Canary camera via an ethernet connection, or use Wi-Fi. The choice is completely up to you, but ethernet will provide the best and most reliable connection, while Wi-Fi is great for when you can't run an ethernet cable to where you want to place the camera. In this case, we'll choose Wi-Fi.

Choose your Wi-Fi network from the list---it must be a 2.4GHz network, not 5GHz.

Next, enter in the password for your Wi-Fi network. and hit "Next".

Give your Canary camera a name by choosing a pre-existing name from the list or type in your own name by selecting "Custom" at the top. Tap on "Next" when you're done.

Your camera may begin installing an update, but in the meantime you can tap on "Continue" to learn more about the Canary camera and the app, as well as choosing some preferences.

Once you're done with that, your camera might still be updating, so hang tight for a little bit longer, but when it's done, you'll get a message saying "Update complete" and you can hit "Next".

From there, you'll be taken to the main screen in the app, where you'll get an overview of your camera and quick access to the different features. Tapping on "Watch Live" will give you a live view of the camera, while "View Timeline" at the bottom will show you saved recordings of when motion was detected by the camera.

When you're viewing the live view, you can sound a siren and even quickly call emergency services if need be.

From that same screen, you can also pinch to zoom, as well as rotate your device in landscape mode to have the video feed take up the whole screen.