If you’re going to be out of the office for a while, Outlook.com makes it easy to set up automatic replies that are sent out when you receive a message, letting the sender know you won’t be reading or answering emails during that time.
You can set up a custom message that will be sent out during a specific time frame, if you choose, to everyone who emails you, or only to people in your Contacts list. We’ll show you how.
NOTE: You can only use Outlook.com with Microsoft email accounts---live.com, outlook.com, hotmail.com, and msn.com.
To get started, go to http://www.outlook.com in your favorite browser and log in to the Microsoft email account from which you want to send an automatic reply. Then, click the gear icon in the upper-right corner of the Outlook.com page and select “Automatic replies” from the dropdown.

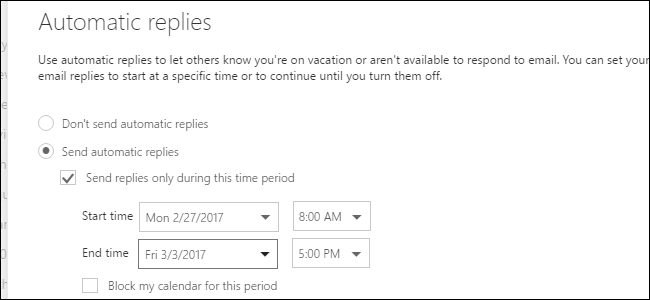
The Automatic replies pane slides out. To turn on automatic replies, click the “Send automatic replies” option. You can set a time period during which the automatic reply will be sent so you don’t have to worry about remembering to turn it on before you leave or turning it off when you get back. To set a time period, check the “Send replies only during this time period” box.

To specify when the automatic reply should start being sent out, click on the “Start time” calendar dropdown and then click on the desired date.

Click on the “Start time” time dropdown and select a time for the automatic replies to start. Then, select a date and a time next to “End time” to indicate when the automatic replies will stop being sent.

You can select some additional options (checkboxes) if you want to block your calendar for this period, automatically decline new invitations for events that occur during this period, or decline and cancel your meetings during this period.
You can also choose to either send the automatic replies to only people in your Contact list or everyone who emails you.
Enter the message you want sent out automatically in the “Send a reply once to each sender with the following message” box. Use the toolbar at the top of the box to format your message.

When you’re done setting up your automatic reply, click “OK” at the top of the pane. Your custom message will now automatically go out during the time period you set in response to emails received that meet requirements you set.

If you set a time period for your automatic reply, it will stop at the end of that period. However, you can also turn of the automatic reply manually by opening the Automatic replies pane again and selecting the “Don’t send automatic replies” option.