Quick Links
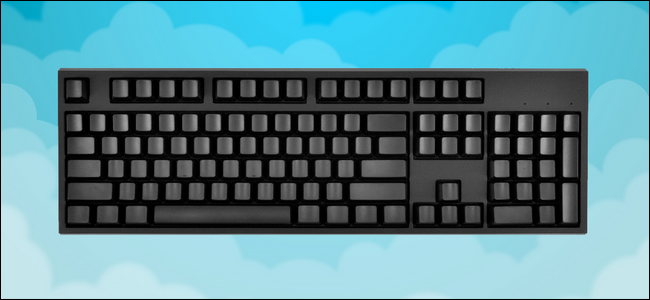
Mechanical keyboards are known for their distinct sound, but that doesn't mean that you (or those you share your living space with) are very fond of the loud clatter. Thankfully, it's incredibly easy and inexpensive to dial down the volume with switch dampeners.
Switch Dampeners: Like Shock Absorbers for Your Keys
Mechanical keyboards are noisier than rubber dome keyboards by their very nature: the crisp action, excellent responsiveness, and tactile sensation you get while typing on their mechanical switches comes at the cost of significantly more noise. Some people, myself included, really love the machine gun-like sound of a touch typist hammering away. But if your roommates or spouse are kept up by your typing, then maybe it's time to turn the CLACKETY-CLACK-CLACK into a less startling clackety-clack-clack .
The best way to quiet the sound of your mechanical keyboard by applying tiny rubber O-rings to your keycaps. These act as little shock absorbers for each key, preventing the keycap from clattering against the surface of the switch beneath it. This won't absolutely silence your keyboard (calling the O-rings silencers is a misnomer), but it will reduce the sound of a loud mechanical keyboard down to a similar volume as a much quieter rubber dome keyboard.

So what's the catch? Well, this will only dampen the bottom-out sound of your keys. If you have switches that "click" at their actuation point, like Cherry MX Blues or Cherry MX Greens, this won't do anything to quiet that click---it'll just quiet the clack of the key hitting the keyboard plate. You may find that you need to switch to quieter keys if o-rings don't do the trick on their own.
But on non-clicky keys, when applied properly, you shouldn't find any downsides. Some people apply the modification and find that they 1) miss the loudness and 2) find that the feeling of the keys bottoming out was part of the mechanical keyboard experience they enjoyed, and they remove the O-rings. While we can appreciate missing the loud report of the keys, if you're properly touch typing you shouldn't be bottoming out the key that hard in the first place, however, and we found that using switch dampeners actually improved our touch typing. The dampeners provided an additional level of subtle feedback (beyond just the tactile bump of the switch itself) that encouraged us to use an even lighter touch when typing.
If that sounds like something you're interested in, let's take a look at how to select and apply switch dampeners to your mechanical keyboard.
Selecting Your Dampeners: Diameter, Thickness, and Hardness Make a Difference
Installing dampeners is pretty trivial, but selecting the right ones requires a bit of research. There are three key elements to consider: the diameter of the O-ring, the thickness (or depth) of the O-ring, and the hardness of the material---all of which contribute to a different keyboard experience.
Diameter: No Substitute for Snug
You want the ring to be snug on the keycap, but not so tight that it is difficult to apply or breaks down from stress. Selecting the right diameter O-rings is usually easy, since Cherry MX switches dominate the keycap market. Practically every search result you find for "keyboard dampeners" is for Cherry compatible O-rings, and there's a good chance your board uses Cherry compatible keycaps.
Nonetheless, it's good to know actual measurements if you're shopping for O-rings somewhere other than a mechanical keyboard shop. O-rings for a Cherry MX keycap should have an inner diameter of about 5mm. Topre switches are a little fatter and require a 7mm O-ring. When in doubt, search for your particular switch brand and see what other people are using.
Thickness: O-rings Change Keycap Travel Distance
You'll find O-ring dampeners on the market in a wide range of sizes, but despite how tiny the differences between them seem, the impact on the feel of your keyboard is significant. On the skinniest end, you'll find 0.2mm O-rings which are so slender as to barely change the distance the key travels. The change is very, very, subtle, and you'll likely never even notice the difference unless you try them side-by-side. These 0.2mm O-rings from the WASD keyboard company are best sellers for a reason.

Incremental changes in the thickness of the O-ring quickly reduce the travel distance and for a Cherry MX-based keyboard. You'll rarely want to venture beyond 0.4mm, though you'll find O-rings as thick as 2.0mm.
Hardness: Squishy, Snappy, or Somewhere In Between
Whether you're buying a bundle of O-rings marketed as switch dampeners or just ordering them from a specialty supply shop, you'll see labels like "50A" and "80A" in the specs. The "A" refers to the "Shore A hardness" scale used to measure the flexibility of rubber substances, named after the man who created it, Alfred Shore. Different scales, like D and R, are used for different rubber applications, but O-rings are measured with the A scale.
On the scale, 0 is incredibly squishy and 100 is rock hard. When selecting O-rings for use with your keyboard, you'll want to look for a hardness of 30-40A on the soft side to 70-80A on the very firm size. We recommend sticking with 40-50A, as once you get into the higher numbers, the ring is firm enough that it tends to lose its sound reducing abilities.
Minor Considerations: Materials, Color, and Number
Lastly, you'll find O-rings in two primary materials: EDPM and nitrile rubber. Which material you choose is pretty much irrelevant, as the properties that differentiate the two rubbers (such as temperature and chemical resistance) will never come into play during their lives attached to your keycaps---either material is perfectly well suited for the task and plenty durable.

The second (very minor) consideration is color. In most instances, the color of the O-ring doesn't matter at all, as the only time you'll see it is during the application process to the underside of the keycap. Whether that ring is blue, red, and black---the most common dampener colors---won't matter.
If, however, you have semi-opaque or transparent custom keycaps, then you may want to consider the visibility of the ring through the keycap. You'll either want one that matches the color of your board's LED lights, if it has any, or clear rings like these. If your keys are only partially transparent (like on the letters themselves), it's unlikely the O-ring color will matter.
Finally, unless you're buying your O-rings from a specialty O-ring shop, you don't really need to worry about the number in the package. Obviously you need enough O-rings for your keyboard (be it an 87-key or 108-key board), but almost all packets of O-rings marketed for keyboards have 125-130 O-rings in them---more than enough for the keyboard plus some spares if an air vent near your desk eats a few while you're installing them.
Installing Your Switch Dampeners
Compared to agonizing over what size and hardness of O-rings you want, installation is a snap. To install your dampeners, all you need is a keycap remover and a little patience. Rather than rehash the entire keycap removal and reinstallation process here, we'll direct you to our guide on replacing the keyscaps. Once you've removed the keycaps as descried in that guide, come back here to install your O-rings.
With the keycaps removed, simply flip them all over and place the O-rings onto the keycap stems. when you seat the O-ring onto the stem of the keycap, try to seat it very evenly and without twisting or distorting the ring. If you press unevenly then you'll find that the keycap travel is adversely affected and feels weirdly mushy, as the dampener doesn't strike the switch evenly.

You want the O-rings to look like the rightmost cap in the photo above---fully pressed down against the edge of the stem. While it's pretty easy to gently push them down with your fingernails, some people like to take apart a cheap ballpoint pen and use the cap or the body of the pen as a tool to push the ring down evenly.
You do not need to apply O-rings to the non-switch support posts on your keys---seen to the left and right of the dampened keycap stem below---as they won't be striking the surface of a switch, but merely attaching to the support spring for that key.

Once you've applied the dampeners to the keycap stems, simply align and keys in their proper locations on the board and press them firmly back into place, taking extra care with the keys, such as the spacebar and shift keys, that have support springs. (Again, see our guide to replacing keycaps for more info).
That's it! You'll have spent far more time research which O-rings you want and waiting for them to arrive in the mail than you will have spent actually installing them. Now's the time to enjoy your quieter keyboard without the risk of waking everyone in your house.
Image Credits: WASD, MechanicalKeyboards.com