The Windows Control Panel offers up a number of settings that you might not want some users messing around with. Here's how to hide specific Control Panel apps in Windows 7, 8, and 10.
Why bother doing this? You might share a computer and not want some users having access to some settings. Or you might have a computer in your business that is available to guests and customers that you want to lock down a bit. Of course, you could also go all in and disable the Control Panel and Settings interface completely. But if you don't want to go that far, hiding items from the Control Panel is an easy way to protect specific settings from being changed. If you have a Pro or Enterprise edition of Windows, you can use the Local Group Policy Editor to make the change. Users of any edition of Windows can also make a quick edit to the Registry.
Home Users: Hide Control Panel Items By Editing the Registry
If you have Windows 7, 8, or 10 Home, you will have to edit the Windows Registry to make these changes. You can also do it this way if you have Windows Pro or Enterprise, but just feel more comfortable working in the Registry. (If you have Pro or Enterprise, though, we recommend using the easier Local Group Policy Editor, as described in the next section.)
Standard warning: Registry Editor is a powerful tool and misusing it can render your system unstable or even inoperable. This is a pretty simple hack and as long as you stick to the instructions, you shouldn't have any problems. That said, if you've never worked with it before, consider reading about how to use the Registry Editor before you get started. And definitely back up the Registry (and your computer!) before making changes.
Before you get started editing the Registry, you'll need to log on as the user you want to make changes for, and then edit the Registry while logged in to their account. If you have multiple users for whom you want to changes for, you'll have to repeat the process for each user.
After logging on, open the Registry Editor by hitting Start and typing "regedit." Press Enter to open Registry Editor and give it permission to make changes to your PC.

In the Registry Editor, use the left sidebar to navigate to the following key:
HKEY_CURRENT_USER\SOFTWARE\Microsoft\Windows\CurrentVersion\Policies\

Next, you'll need to make sure that a subkey named Explorer exists inside the Policies key. If you already see the Explorer key, you're good to go on to the next step. If you don't see it, you'll need to create one by right-clicking the Policies key and choosing New > Key. Name the new key "Explorer."

From this point, you can go one of two ways. You can either hide specific items from the Control Panel by creating a disallow list, or hide all items except the ones you specify by creating a restricted list. Technically, you could create both a disallow and a restricted list, but that gets complicated fast. The disallow list would always take precedence and the two lists would always be competing. So, we recommend choosing just one. Which method you choose is up to you, and should really just be based on how many items you want to hide from the Control Panel.
Next, you're going to create a new value inside the Explorer key. Right-click the Explorer key and choose New > DWORD (32-bit) Value. If you're hiding specific items by creating a disallow list, name the new key DisallowCPL . If you're hiding all items except the ones you specific by creating a restrict list, name the new value RestrictCPL instead.

Double-click the new value you created to open its properties window. Change the value from 0 to 1 in the "Value data" box and then click "OK." This turns the setting on.

Now that you've created the setting and enabled it, your next step is to create a list of items. Right-click the Explorer key again and this time choose New > Key. If you're disallowing items, name the new key DisallowCPL and if you're restricting items, name the new key RestrictCPL instead.

Inside whichever key you created, you're going to build your list of items by creating a new string value for each one. In this example, we're going to disallow the Sync Center Control Panel app by adding a string value for it to our new DisallowCPL key. If you're restricting items, you'd add it to the RestrictCPL key you created instead. Right-click the DisallowCPL key and choose New > String Value. Name the new string value with the full name of the Control Panel item.

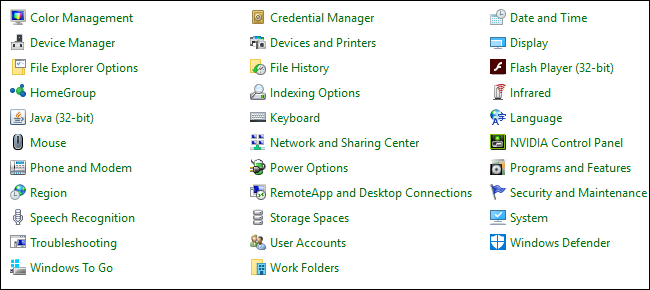
Double-click the new value to open its properties dialog and type the same full Control Panel item name in the "Value data" box that you used to name the value. (You'll need to switch your Control Panel over to one of the icon views instead of the default Category view in the upper right-hand corner of the Control Panel window so that you can see the full name of each item.)

That's all you have to do to disallow or restrict a Control Panel item. You can test your changes by opening up the Control Panel window--no need to restart Windows or anything. If you're creating a disallow list, you should see that the item for which you created the value is now gone from the Control Panel window. If you're creating a restrict list, the item for which you created the value will be the only thing you see in the Control Panel window until you add more items to the list. In our example below, the Sync Center item is now hidden.

If at any time you want to remove an item from the list, all you have to do is go back into Registry Editor and delete the value you created for that item. If you'd like to turn off the setting, just change the DisallowCPL or RestrictCPL value you created from 1 back to 0. This disables the feature, but leaves the list you created intact in case you want to turn the feature back on again.
Pro and Enterprise Users: Hide Control Panel Items with Local Group Policy Editor
If you're using Windows Pro or Enterprise, the easiest way to hide Control Panel items is by using the Local Group Policy Editor. It also gives you a bit more power over which users have this restriction. If you're restricting access to items for only some user accounts on a PC, you'll need to do a little extra setup by first creating a policy object for those users. You can read all about that in our guide to applying local Group Policy tweaks to specific users.
You should also be aware that group policy is a pretty powerful tool, so it's worth taking some time to learn what it can do. Also, if you're on a company network, do everyone a favor and check with your admin first. If your work computer is part of a domain, it's also likely that it's part of a domain group policy that will supersede the local group policy, anyway.
Start by finding the MSC file you created for controlling policies for those particular users. Double-click to open it and allow it to make changes to your PC. In this example, we're using one we created for applying policy to all non-administrative user accounts.
In the Group Policy window for those users, on the left-hand side, drill down to User Configuration > Administrative Templates > Control Panel. Again, you can approach this two ways from here. If you want to hide specific items from the Control Panel, look for the "Hide specified Control Panel items" setting and double-click it to open its properties dialog. If you want to hide all items except for the ones you specify, double-click the "Show only specified Control Panel items" setting instead. In our example, we're going to be hiding specific items, but the process is identical for both methods.
In the setting's properties window, click the "Enabled" option and then click the "Show" button.
In the "Show Contents" window, click each line in the list and type the name of the Control Panel item you want hide or allow, depending on which setting you're using. (You'll need to switch your Control Panel over to one of the icon views instead of the default Category view in the upper right-hand corner of the Control Panel window so that you can see the full name of each item.) When you're done building your list, click "OK."
You can now exit the Local Group Policy window. To test your changes, sign in as one of the affected user accounts and see what's available in the Control Panel window. If you want to disable your changes, just head back into the Local Group Policy editor by double-clicking your MSC file again. This time, change the "Hide specified Control Panel items" or "Show only specified Control Panel items" options to "Disabled" or "Not Configured." This will turn the setting off entirely. Just be aware that turning off the setting will also reset your list of apps, so if you want to turn it on again, you'll need to retype that list.