Quick Links
If you've ever wondered how to record your computer screen and then turn it into an animated GIF, then wonder no more. Here's everything you need to know about creating GIF screencasts on Windows and Mac.
GIFs go back about as long as the Internet has been popular. The format itself isn't necessarily the best for sharing moving images, with more efficient formats on the horizon like GIFV, but the renaissance of animated images has led to dozens of GIF sites and a whole crop of specialized apps that let you create and share all sorts of animated GIFs.
One of the more practical uses of animated GIFs is making screen recordings, which can then be inserted into instructional articles and so forth, to better illustrate a point or process. Truly, a [animated] picture is worth a thousand words.
How to Create a GIF of Your Screen on Windows
For Windows, you'll find a bevy of free screen-to-GIF programs out there. After testing quite a few, we think the easiest one to use is GIF Screen Recorder. GIF Screen Recorder lets you record all or part of your screen and then edit the output afterward, so you can make the perfect GIF.
GIF Screen Recorder will work on Windows XP through Windows 10, but requires .NET Framework 4.0, which GIF Screen Recorder will automatically install if it is missing.
Once you have GIF Screen Recorder installed, go ahead and start it up. The application is very simple to use. The red outline denotes the area you will be recording.

In the upper-left corner, there are controls, which let you Start/Restart, Pause, and Stop your recording. There's also a Help button, and a dropdown menu from which you can select one of over a dozen preset sizes, including full screen.
If none of the preset sizes work for you, you can grab the red borders and drag them to resize the area manually.

In the upper-right corner, you can change the color depth and framerate of your GIFs. Both these options will affect the appearance and file size of the finished product.
Lowering the color depth will make the GIF appear more washed out, and lowering the framerate will cause them to play less smoothly. However, lowering these settings can also save a lot in terms of file size, which is useful given how large GIFs can get. You might need to play around until you get just the right combination.

For this demonstration, we're going to do a simple recording of opening and closing the Start menu on Windows, so we'll resize the GIF Recorder window so it frames just the Start menu.
When you have your area framed just right, click GIF Recorder's Start button and record the action. When you're finished, click the Stop button. If you need to pause the recording click the Pause button, and if you think you messed up and want a do-over, click the Start button again (it doubles as the Restart button).

When you click the Stop button, you will be asked to save your new creation. Make sure you choose a destination that is easily accessible, give it a name, and then "Save" it.

At this point, you're essentially done. You could go ahead and share you new GIF if you want, but our GIF has some unnecessary frames at the beginning and end that we want to trim off to give us a tighter animation, so at the next dialog, we'll click "Open the gif animation in the gif editor".

The GIF Editor application will let you trim off excess frames be they at the beginning, middle or end. To do this, first find the frame where you want your GIF to begin. Here, we want our GIF to start when the mouse pointer is on the Start button. So we'll select the frame just before that, hold the "Shift" button, then select the very first frame in the sequence, so we select the frames from 0.0 seconds to 2.1 seconds.
Next, click the "Delete Image" button in the toolbar or use the "Delete" button on the keyboard.

Do the same for the end of your GIF, if necessary, and then click the "Show Animation" button in the toolbar to preview the result.

Make sure you're satisfied with your trim job, otherwise you will need to reopen the GIF and trim it again (there's no undo button).

If you're happy with the result, you can Save the edited GIF by overwriting the old one (left), or create a new one with the Save As button (right).

While you're at it, there are some other options available to you with the GIF editor. For one, you can add supplemental images to your animation.

Also, clicking the "Edit Image" button will open it in Microsoft Paint, where you can make adjustments like adding visual aids or text.

Finally, the Export button will give you various options, such as resizing it (if the file is just too large) and converting it to an AVI file.

Here is our finished product, a simple recording of opening and closing the Start menu.

Once you've got the process of recording your screen mastered, you can take some time to browse the GIF editor further.
GIF Screen Recorder will let you create a fairly nice finished product without much further adjustments, but you can also really dress things up nicely if you need something even more polished.
How to Create a GIF of Your Screen on macOS
To create GIFs on a Mac, we are going to use GIPHY Capture, which can be downloaded from the App Store.
GIPHY Capture lets you record, edit, and save your screen captures to animated GIFs, which you can then share as you wish.
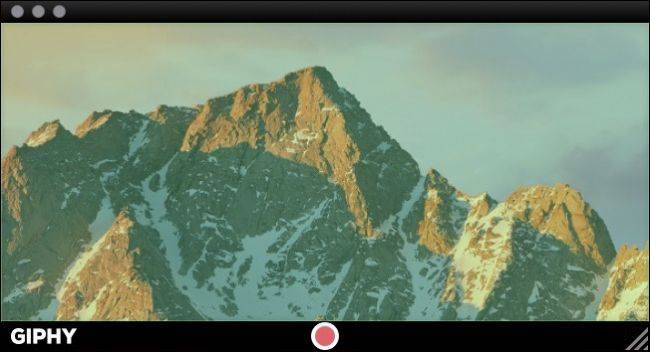
GIPHY Capture is extremely simple to use, consisting of really nothing more than a window with a red record button.

You can resize this window to nearly the full size of the screen, though you will need to move the recorder window off-screen a bit if you want to capture stuff like the Dock and menu bar as the following screenshot demonstrates (the record control is actually below the Dock).

In this demonstration, we want to record the mouse pointer as it moves across the Dock, but the record button is hidden.
To fix this problem, click the GIPHY Capture icon in the menu bar, and set a keyboard shortcut to record. In this case, we've selected Command+A. You can also check the box to capture the mouse pointer if desired.

Once your area is framed the way you want, you're ready to begin. Either click the record button if it is visible or use the keyboard shortcut. To stop recording, click the record button or use the keyboard shortcut again.
With your recording finished, click on the thumbnail at the bottom of the GIPHY Capture window. If the thumbnail or thumbnails aren't visible, click the button in the lower-right corner.

To get an idea of your GIF's duration and size, check out the details below the preview.
Clicking "Calculate size" will give you an idea of how big the file will be. At this point, if you're happy with the result, you can save it or even share it via email, Facebook, Twitter, and so on.

If you need to make adjustments to the GIF however, such as to its quality or duration, click "Edit GIF".
When you edit your GIF, you can trim it by grabbing the left handle and dragging it right, which will remove frames from the beginning, and conversely, drag the right handle to the left to remove frames from the end. Make sure to check the preview area as you're doing this so you get it just right.

Take time also to adjust the size and frame rate, if needed. You can change how your GIF loops as well as add a caption if desired. Again, click "Calculate size". As you can see, by reducing the frame rate and duration, we're able to bring our GIF's file size down below 3 MB.
Click "Done" on the edit screen when you're happy with the result, and then "Save" to save it to your Mac.

Here we see our new animated GIF of a simple swipe across our Dock using our mouse pointer.

That is all there is to it. Screen captures to animated GIFs on Windows and macOS in three easy steps: record, trim, and save.
It will take some practice at first until you become proficient with the process. Once you do however, you'll be creating GIFs of your computer tasks and easily sharing them with friends, family, and co-workers.
The time you save describing a process or task alone makes this a skill a worth mastering, so get to it and don't forget to have fun!