Quick Links
The Mac App Store is the default way to upgrade or install macOS, but it doesn't work for everyone. Maybe you've got multiple Macs and a limited amount of bandwidth, and don't want to download the entire operating system for every system. Or maybe you're looking to install the operating system from scratch.
Whatever your reason, installing macOS from a USB drive isn't hard. You just need a few things:
- An 8GB USB drive. This process will overwrite the entire drive, so back up anything stored on it. If your drive is larger than 8GB, and you'd like to use the rest of the drive for something else, you could use Disk Utility to partition the drive: just create an empty, 8GB partition for the installer.
- Access to at least one working Mac with access to the Mac App Store. This can be a friend's machine if necessary.
That's it! Once you have those things we can get started.
First, Download macOS From The Mac App Store
To begin, you need the installer for whatever version of macOS you want on a thumb drive. Head to the Mac App Store. If what you're looking for is the latest version of macOS, search for that operating system and click the "Download" or "Install" button.

The download will take a while, so make sure your Mac is plugged in and has a consistent connection to the Internet. The installer will load when the process is done; simply close the window, then head to your Applications folder to confirm the installer is there.

If you don't want the latest version of macOS, searching the App Store won't help you. Instead, you'll have to head to the "Purchases" tab in the installer and scroll down until you find the version of macOS you want on your thumb drive.

You will only find versions you've previously downloaded here. Click the "Download" button to the left of the release you want to install, and your Mac will download it. Again, the installer will launch when the download is complete; close the window when this happens. We're now ready to create our disk. There are two ways to do this: one with third party software, and another with the Terminal.
The Easy Way: With DiskMaker X
The simplest way to create a boot USB drive is to download DiskMaker X and use it to create your drive. Generally, the latest version supports only the latest version of macOS; if you want to install something older than macOS High Sierra, check the list of older versions and download one that's compatible with your chosen operating system.
Installing is simple: just mount the DMG, then drag the program to your Applications folder.

Start the program and it should find the installer you downloaded above. If you've put the installer somewhere besides the Applications folder, you can direct DiskMaker X to the file manually.

After that, you'll be asked which disk you'd like to use. Choose the drive or partition, knowing that it will be completely overwritten.

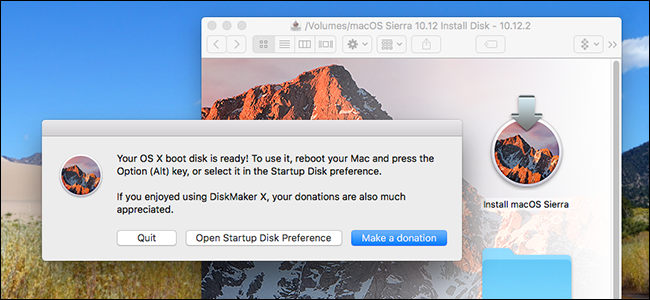
Once you authorize the action, DiskMakerX will mostly run in the background. When the process is done you'll hear a loud lion roar (seriously, it freaked me out), and you'll see the completed drive.

Diskmaker X also offers a variety of utilities, which can come in handy. The Terminal method, outlined below, does not include these.
The (Slightly) Harder Way: With the Terminal
If you'd rather not rely on a third-party tool to create your disk, Apple offers a built-in Terminal-driven method outlined here. To summarize: there is a script, called
createinstallmedia
, included in every macOS installer, and we're going to run it.
First, insert your thumb drive and give it a name---I'm using "Installer" for the purposes of this writeup, but make note of whatever name the drive has.
Next, let's find the installation script. Open the Terminal, which you can find in Applications > Utilities, and run the following command. Note that the exact command will vary depending on which version of macOS you're trying to install; this one is specific to Sierra.
sudo /Applications/Install\ macOS\ High\ Sierra.app/Contents/Resources/createinstallmedia --volume /Volumes/Installer --applicationpath /Applications/Install\ macOS\ High\ Sierra.app
In case you're curious, here's how this breaks down:
-
To run the command as root. This means the command must start with
sudo -
/Applications/Install\ macOS\ High\ Sierra.app/Contents/Resources/createinstallmedia -
To provide the application with a path to the volume that will be overwritten. In our case, this is
/Volumes/Installer -
To provide the application with a path to the installer package. For macOS Sierra, this is
/Applications/Install\ macOS\ High\ Sierra.app
You will be asked to confirm that you're ready for the disk to be deleted:

Yet "y", then Enter, and the process will begin. First the disk will be deleted, then the entire installer will be copied to your disk.

The process will take a while, but when it's done you'll have a bootable drive with the installer.

Notice that the Utilities folder, offered by DiskMaker X, is not here.
The command above is specifically for High Sierra (and a disk named "Installer.") Previous versions of macOS will have slightly different names. Here's the complete command for a few recent releases:
-
Sierra:
sudo /Applications/Install\ macOS\ Sierra.app/Contents/Resources/createinstallmedia --volume /Volumes/Installer --applicationpath /Applications/Install\ macOS\ Sierra.app -
El Capitan:
sudo /Applications/Install\ OS\ X\ El\ Capitan.app/Contents/Resources/createinstallmedia --volume /Volumes/Installer --applicationpath /Applications/Install\ OS\ X\ El\ Capitan.app -
Yosemite:
sudo /Applications/Install\ OS\ X\ Yosemite.app/Contents/Resources/createinstallmedia --volume /Volumes/Installer --applicationpath /Applications/Install\ OS\ X\ Yosemite.app -
Mavericks::
sudo /Applications/Install\ OS\ X\ Mavericks.app/Contents/Resources/createinstallmedia --volume /Volumes/Installer --applicationpath /Applications/Install\ OS\ X\ Mavericks.app
Hopefully you get the idea: you need to run the script from within the installer itself, point to your drive, then point to the installer.
How to Boot From Your Installation Drive
Now that you've created an external installer, you need to boot from it on your target Mac. Shut the Mac down, then plug in your installer disk. Turn the Mac on while holding the Option key. You'll be asked which drive to boot from:

Pick the drive you wrote the installer to. The installer for macOS will boot from it, at which point you can upgrade macOS, or install a fresh version.