When you double-click a ZIP file on your Mac, the files are automatically uncompressed and the ZIP itself is sent to the Trash. What if that's not what you want?
A hidden System Preferences pane lets you configure how archives work on your Mac. You can stop ZIP files from going to the Trash after you unarchive them, or you can have newly created archives spawn in a particular folder. Enabling this panel just takes a couple minutes.
Find and Install The Hidden Preferences Pane
Open the Finder, then click the icon for your computer in the "Devices" section of the sidebar. From your system drive, browse to System > Library > CoreServices > Applications, a folder that houses a few application your Mac uses regularly.

We're interested in the Archive Utility, which is the program that opens ZIP files by default on your Mac. Right-click this application, then click "Show Package Contents."

This allows us to browse the files that make up the application. Head to Contents > Resources and you'll find a file called "Archives.prefPane."

Double-click this file and System Preferences will launch, asking you if you'd like to install the pane. Click "Install."

You've now added the Archives pane to your System Preferences.
Change How Archives Work On Your Mac
You'll find the new Archives pane in the bottom section of the System Preferences.

Click it and you'll see a few options.

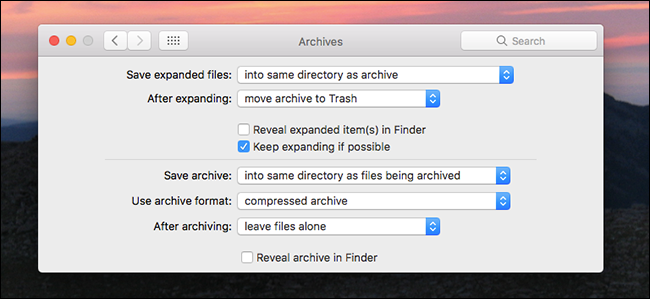
First, you can choose where unarchived files end up. The default is in the same archive as the archive itself, but you can choose a specific folder if you want. Next, you can choose what happens to archive files after you unarchive them. By default, such files are sent to the trash, but you can optionally leave the archive alone or even delete it outright.
The bottom half of this preference pane concerns archives created by this application. If you select a bunch of files in the Finder, right-click them, then click "Compress," you can create a ZIP file.

These settings configure how that works.
First, you can configure where the compressed file will end up. The default is the directory where the files live, but you can optionally choose a folder where all such archives end up. Next, you can choose the format for your archives.
Finally, you can decide what to do with the original files after archiving. The default is to leave the files alone, but you can optionally move them to the Trash or even delete them outright.
And that's it! I'm not sure why Apple buried these settings, and they're admittedly limited. If you want even more control over how archives work on your Mac, you could use The Unarchiver, a Mac-exclusive open source alternative archiver application. It can also open RAR and 7z files on the Mac, something Archive Utility can't do.